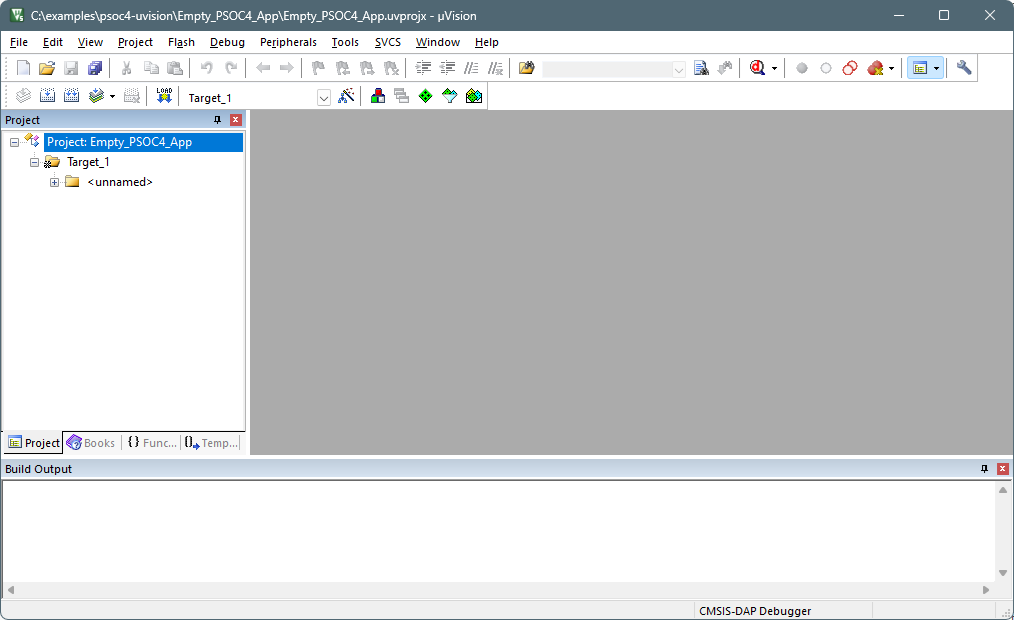
Follow instructions in Create/export application for Keil µVision. When
complete, your project should look similar to the following. Then, use the instructions
in this section to configure, build, and debug your application.
Configure and build the application
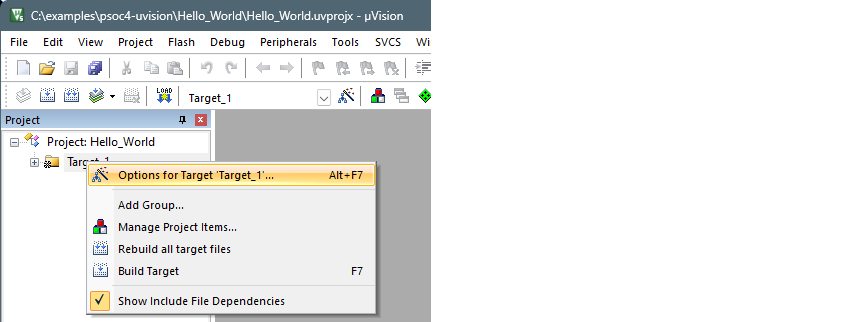
- Right-click on the Target_1 directory in the
µVision Project view and select Options for Target 'Target_1'
…
- Select the Debug tab and then
select the appropriate debugger probe. See Miscellaneous notes for
details to configure the probe.
- Click OK to close the Options
dialog. Note:For applications using the PSOC™ 64 secure single-core application or AIROC™ CYW20829 single-core application, skip the next step. Instead, perform the steps outlined in the applicable section.
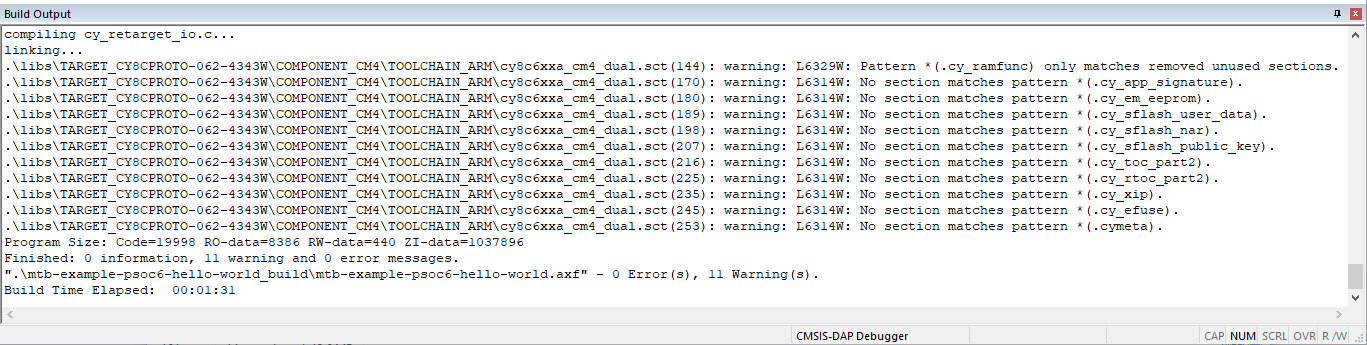
- Select Project > Build
target.
Programming/Debugging
Refer to sections for setting up the applicable debugger probe under Miscellaneous notes. Then:
- Connect the PSOC™ 6 kit to the host PC.
- As needed, run the fw-loader tool to make sure the board firmware is
upgraded to KitProg3. See KitProg3 User Guide for details.
The fw-loader tool is located in this directory by default:
[install-path]/ModusToolboxProgtools-[version]/fw-loader/bin/
- Select Debug > Start/Stop Debug
Session.
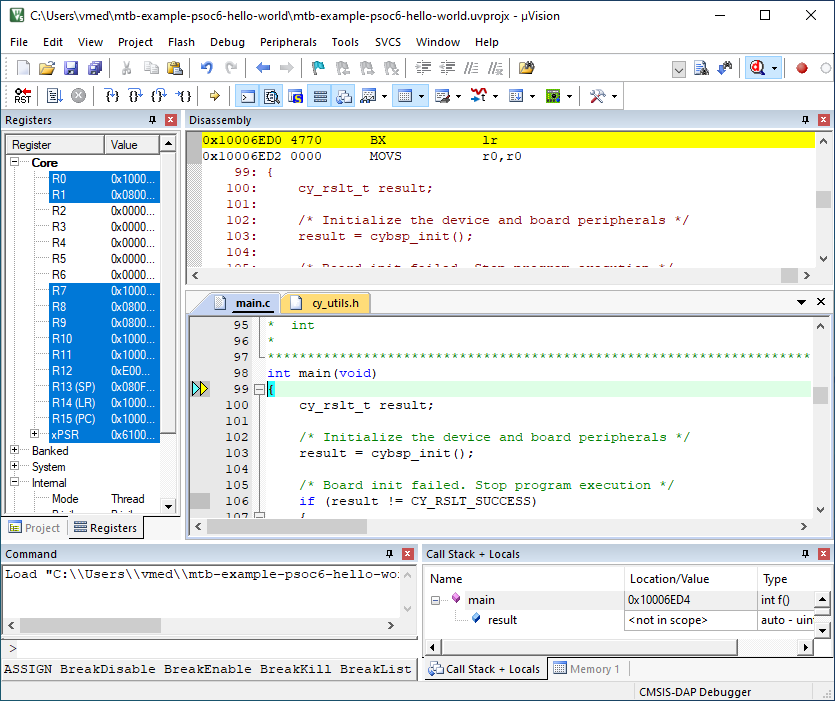
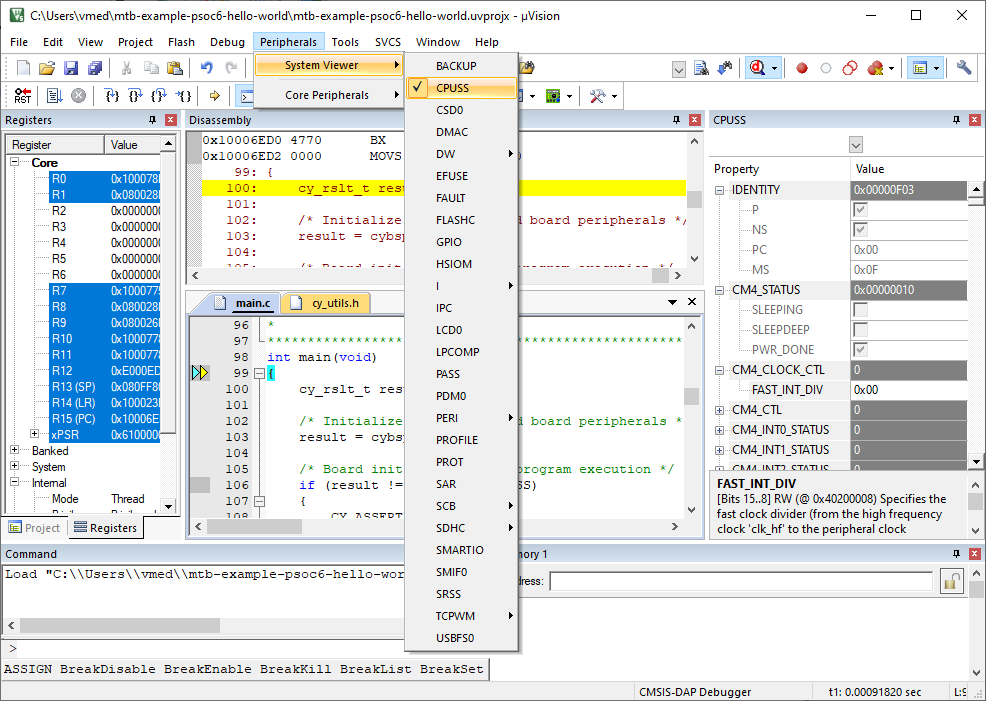
You can view the system and peripheral registers in the SVD view.
Program external memory
- Download internal flash as described above.
Notice "No Algorithm found for: 18000000H - 1800FFFFH" warning.
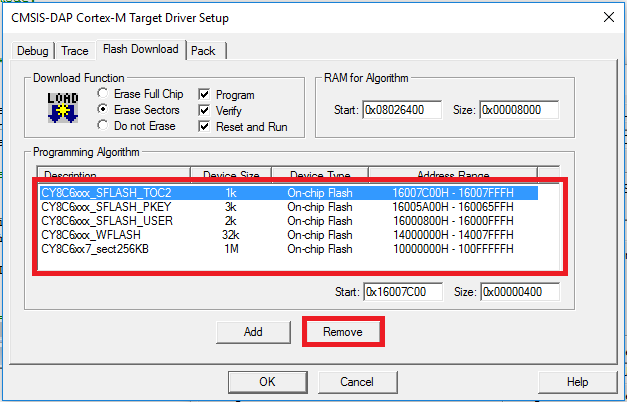
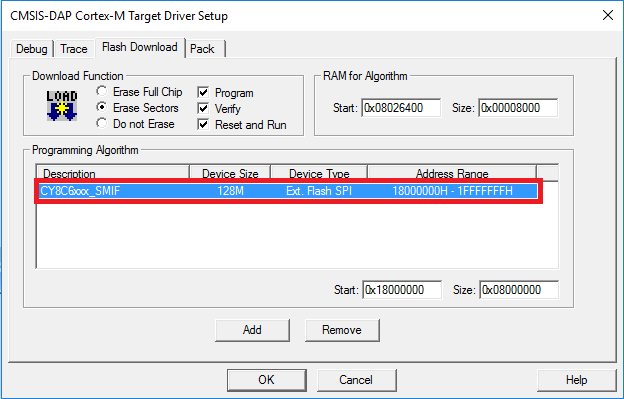
- Select the Flash Download tab in Target Driver Setup dialog and remove
all programming algorithms for On-chip Flash and add programming algorithm for External
Flash SPI:
- Download flash.
Notice warnings:
- No Algorithm found for: 10000000H - 1000182FH
- No Algorithm found for: 10002000H - 10007E5BH
- No Algorithm found for: 16007C00H - 16007DFFH
Erase external memory
- Select the Flash Download tab
in Target Driver Setup dialog and remove all programming algorithms for On-chip Flash
and add programming algorithm for External Flash SPI:
- Click Flash > Erase in menu bar.