Editing the BSP
After opening or creating a BSP, the GUI shows various settings. The following sections provide details about editing these settings.
Making changes
When you make a change within the BSP Assistant, such as device information, libraries, defines, etc., the
Save
button becomes active to submit the change. You must save these types of changes before making changes to configuration data, because configuration changes happen in separate tools.
When you make a change that involves configuration data (CAPSENSE™, QSPI, etc.), you save those changes in that particular tool. The BSP Assistant automatically incorporates those changes without needing to use
Save
.
You can use the
Undo <action>
menu to revert any change. If that change was saved (either manually or automatically), you must click
Save
to submit the undo. The same is true for
Redo <action>
.
BSP Sections
There are various BSP sections to edit and view different parts of the current BSP's information.
Devices
The Devices section includes various details about the BSP hardware. These settings vary for different types of devices and BSPs. It includes selections for the MCU/SOC/SIP and connectivity module or device on the board, as well as any other settings specific to the MCU/SOC/SIP.

Note:
If you are changing the device in a BSP for an existing application, newer devices may not be available. If not, you will need to close the BSP Assistant and update the device-db version in the Library Manager. You may also need to update the PDL version. Then, reopen the BSP Assistant to change the device.
MCU/SOC/SIP
The
MCU/SOC/SIP
pull-down menu contains all of the central devices that are compatible with the chip architecture of the current BSP. You can also search for such devices by typing into the field. If you change MCU/SOC/SIP significantly, a warning will indicate that you should run the Device Configurator and fix any errors displayed there. Refer to the
Device Configurator user guide
for more details about that tool.
The MCU/SOC/SIP can be changed to any device within the same chip architecture. If you want a device in a different chip architecture, you must create a new BSP.
Connectivity module
The values displayed in the
Connectivity module
field depend on the selected MCU/SOC/SIP.
If the MCU/SOC/SIP has built-in connectivity, this field will be greyed out. Information from the database specifying the built-in connectivity hardware will be displayed.
Otherwise, this pull-down menu will contain the value "None", a list of all connectivity modules compatible with the central device, and the value "Custom..."
The connectivity module can be set to "None," any module that is supported for the selected MCU/SOC/SIP, or "Custom." In the case of "Custom," you must then specify the exact connectivity device that you are using and you must manually supply the required Bluetooth® and/or Wi-Fi firmware files for your device and hardware in your BSP or application. If you choose a supported module, the appropriate files will be automatically provided.
Connectivity device
The
Connectivity device
pull-down menu will display as follows:
If the module is "None," then this menu will be empty and greyed out.
If the module is set to a specific module, then this menu will be greyed out but will have the name of the connectivity device in the module.
If the module is "Custom...," then this menu will contain a list of all connectivity devices compatible with the central device.
Other settings
The remaining rows in the Devices section are options that are specific to the MCU/SOC/SIP and connectivity selections that you have made. These are used to select the settings required to get the desired behavior of the devices.
Note:
For PSOC™ 6 only, there is a "CM0+ pre-build firmware image" setting used for single-core applications. If the current BSP is for a PSOC™ 6 multi-core application, the Makefile uses a
DISABLE_COMPONENTS
option to disable the default CM0+ image, and therefore overrides this setting.
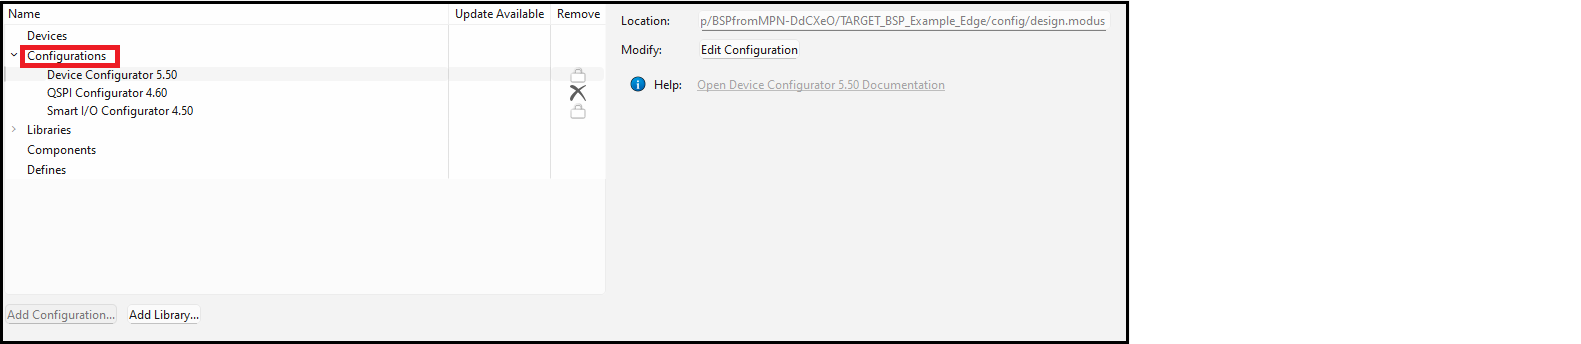
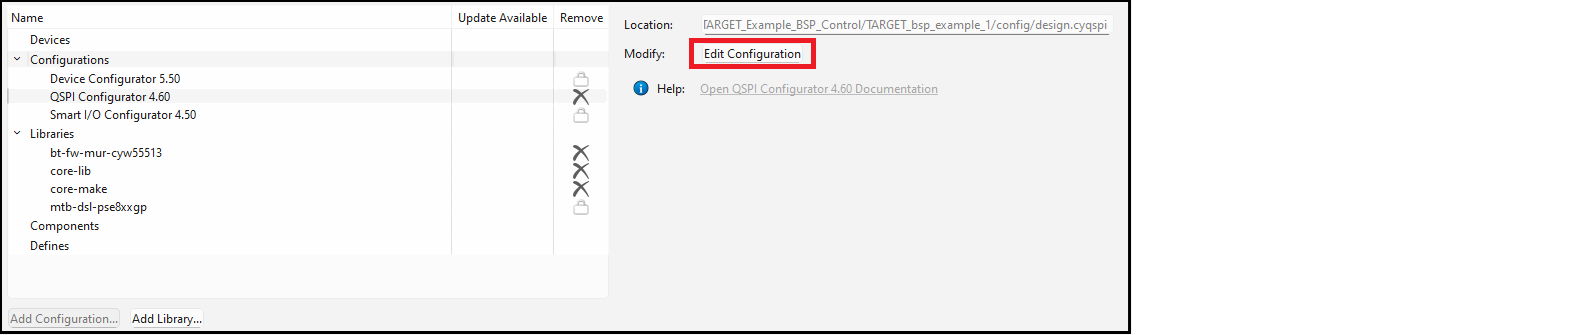
Configurations
The Configurations section allows you to edit, remove, or add BSP configuration settings for the selected MCU/SOC/SIP and connectivity device. The list on the left shows all configurators that currently have files in the BSP. The
Location
field on the right shows the path to the selected configuration file.
Note:
As mentioned in the
Making changes
section, the BSP Assistant automatically incorporates configuration changes from these separate tools without needing to use the
Save
button.
Note:
The BSP assistant only operates on BSP configurator files. Library configurators such as the Bluetooth® configurator store their files in the application rather than the BSP, so they are not relevant to the BSP Assistant. For descriptions of the various configurators, refer to the
ModusToolbox™ tools package user guide
.
Add configuration
To add a new configuration to the BSP, click the
Add Configuration…
button. This opens the Select configurator dialog.
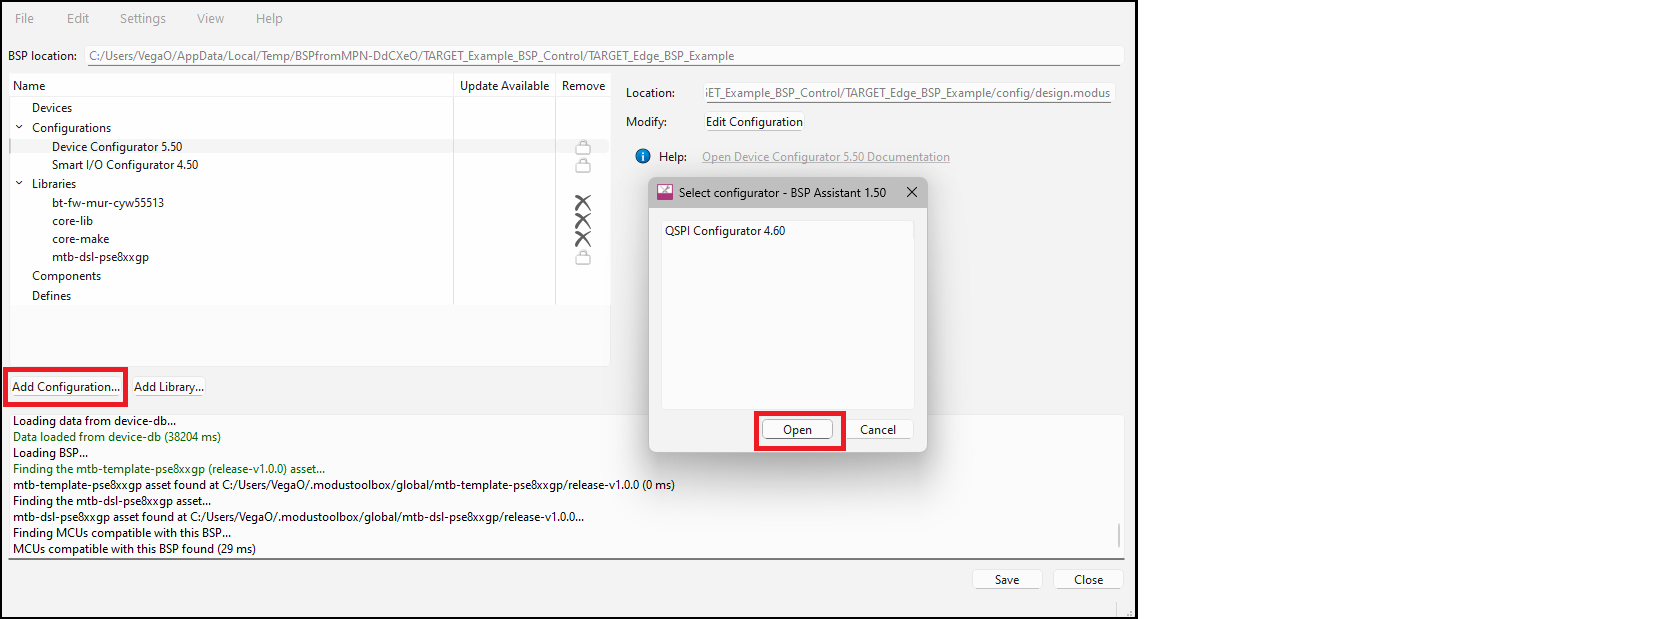
Select the desired configurator from the list and click
Open
. This will open the applicable configurator.
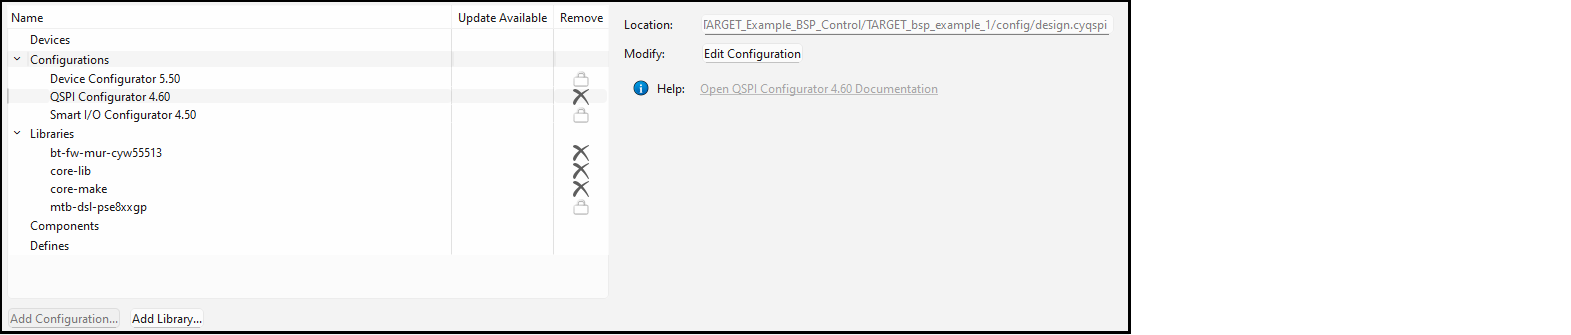
Once you save your settings from that configurator, it will appear in the list in the BSP assistant.
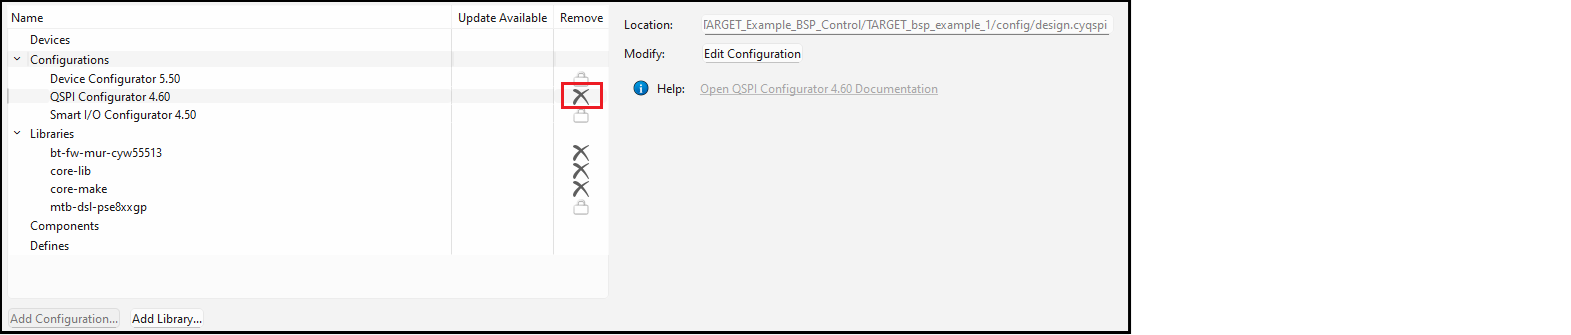
Remove configuration
To remove a selected configuration file from the BSP, click the
X
icon, if applicable. Some have a lock symbol and cannot be removed.
Edit configuration
Click the
Edit Configuration
button to open the applicable configurator. Refer to that configurator's documentation for details about using it.
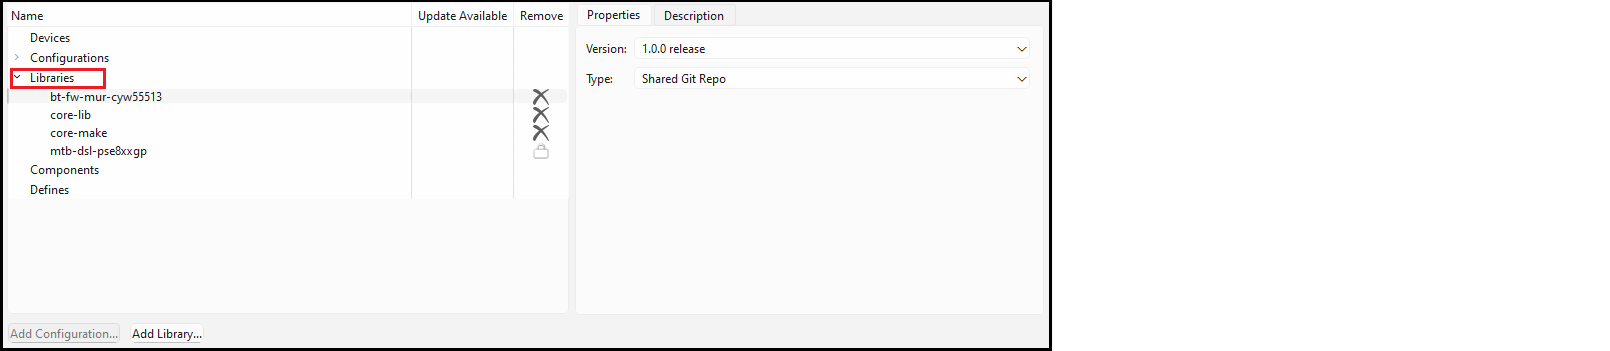
Libraries
The Libraries section shows all of the libraries that the BSP needs to operate along with any other libraries that have been added. When you first create a BSP, it will list all of the libraries that are required for your BSP, such as the core libraries, recipe libraries, PDL, and HAL. You can change the
Version
or
Type
of any library. The type is either shared (that is, in
mtb_shared
) or local (that is, in the application's
libs
directory). To change these values, use the pull-down menus on the right side of the dialog.
Note:
The default versions for the required libraries are the latest release versions at the time the BSP was created. If you want the libraries to be set to the latest versions when the BSP is used to create an application, you can change the versions to "Latest V.X release" where "V" is the major version number.
When you add additional Libraries, the default is "Latest V.X release" where "V" is the major version number. This means that those libraries will be set to the latest versions when the BSP is used to create an application. If you want fixed versions in the BSP, you can use the drop-down to select the release version that you require.
If you modify the libraries in a BSP, any application(s) that use the BSP must be updated to include those libraries. This can be done by running the Library Manager and clicking
Update
or by running
make getlibs
from the application's root directory on the command line.
You can remove a library, change a library from shared to local, and select a different version.
To remove a library, click the X icon, if applicable. Some have a lock symbol and cannot be removed.
To add libraries, click the Add Library… button to open the Add Libraries dialog.
This will open a dialog similar to the Add Library dialog from the Library Manager. Refer to the Library Manager user guide for more details about that tool. Use the plus and minus buttons to expand or collapse all categories.
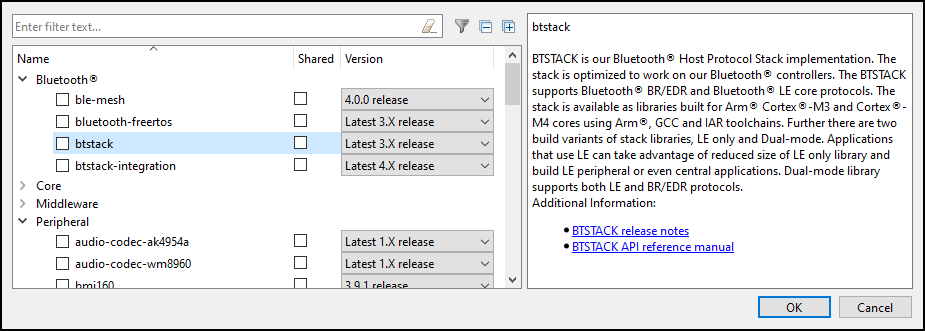
Enable the Filter
 button to show only the libraries that are already included in the BSP.
Use the plus and minus buttons to expand or collapse all categories.
Components
The Components section lists values that are included in the
COMPONENTS
variable in the
bsp.mk
file.
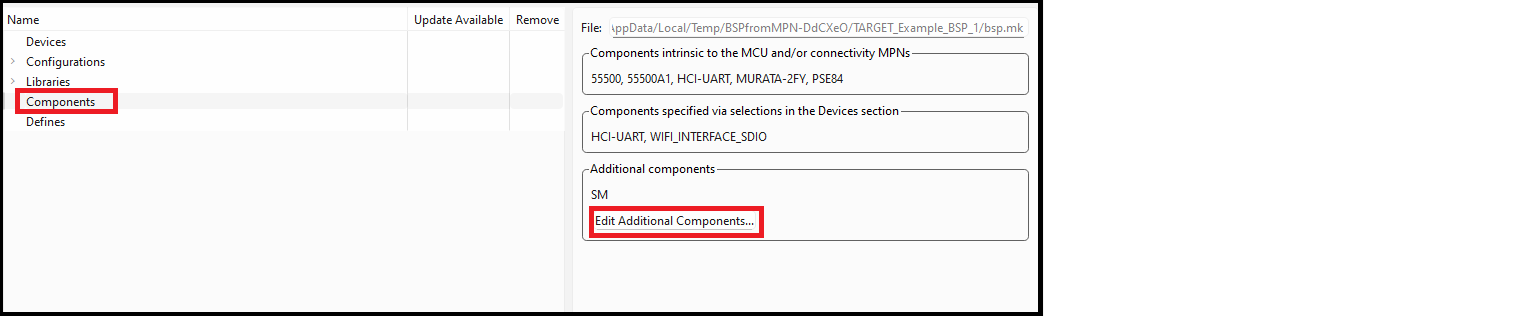
There are three sections: components that are required by the devices that your BSP contains, components that are required based on option selections from the Devices section, and any additional component values. The first two sets are set based on the devices section, so they cannot be modified in the Components section.
You can add or remove additional components by clicking the
Edit Additional Components
button.

Type the name of a component to add in the box and click
Add
to add it to the list. Deselect the box next to any existing components to remove them. Click
OK
when you are done making changes.
Defines
The Defines section is similar to the Components section, except that it lists values for the
DEFINES
variable in the
bsp.mk
file.

As with the Components section, there are three categories of defines. The first two are read-only values based on the selections in the Devices section. The third includes additional defines. Click
Edit Additional Defines
to add or remove additional define values.

Viewing changed files
To view a list of all the files that have been modified since you opened the tool for this session or created in the current BSP, select
View > List Changed Files…

Show Diff
To open a diff tool that displays the changes made to a specific file, double-click a file or select a file and click
Show Diff
.
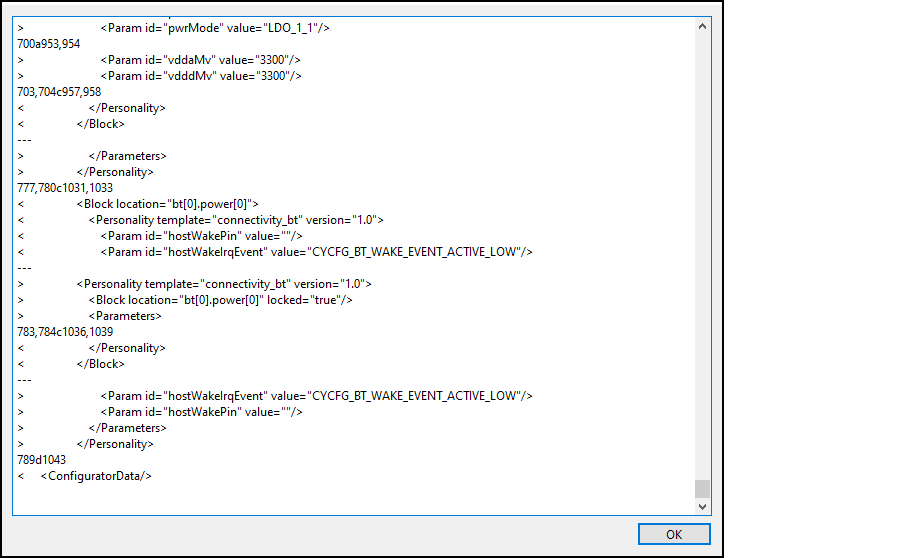
This dialog shows the output of the "diff" command, comparing the file as it existed when the BSP Assistant opened the BSP to the file as it exists now. Deleted lines include the "<" character while added lines include the ">" character.
Updating launch settings
If you are using an IDE, you may need to regenerate the launch settings to reflect the new BSP. Use the appropriate command(s) for the IDE(s) that are being used. For example:
make vscode
for VS Code or click the
Generate Launches…
link in the Quick Panel for Eclipse. This step must be done whenever the target device is changed since the launch settings may change from device to device.