Launch the BSP Assistant
There are numerous ways to launch the BSP Assistant, depending on how you choose to use the various tools in ModusToolbox™ software.
Stand-alone GUI
You can launch the BSP Assistant as a stand-alone GUI by running its executable as applicable for your operating system (for example, select it using the Windows
Start
menu or macOS Finder). By default, it is installed here:
<install_dir>/ModusToolbox/tools_<version>/bsp-assistant-<version>
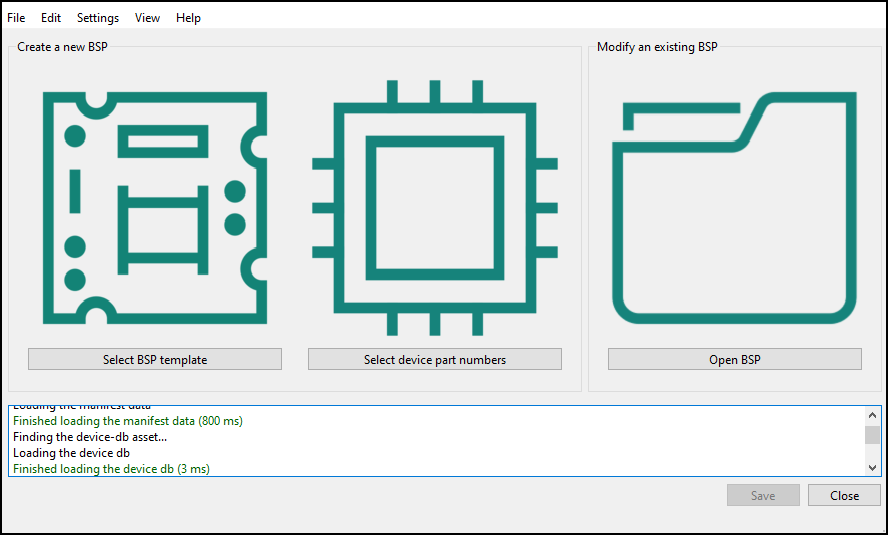
When you launch the GUI this way, it first loads the technology packs, tools information, and manifest data. Once that's done, the BSP Assistant opens without a BSP. You can then either open an existing BSP or create a new one.
From Dashboard
You can open the BSP Assistant GUI tool in stand-alone mode from the ModusToolbox™ Dashboard. Refer to the
Dashboard user guide
for more details.
GUI command-line options
You can open the BSP Assistant GUI tool in stand-alone mode from the command line using:
$ bsp-assistant
You also have the choice to add optional arguments, for example:
$ bsp-assistant --bsploc <bsp-location>
In this example, the BSP Assistant GUI tool opens with a specified BSP. The
--bsploc
option is used to specify a directory containing an existing BSP to load. For more information about the command-line options, run the executable using the
-h
option.
GUI from application
If you already have a ModusToolbox™ application, you can open its active BSP from a make command or from VS Code and Eclipse.
When you open a BSP from an application, the device-db is locked to the version that was available when the application was created. If you want newer devices not available in the device-db, you will need to update it using the Library Manager.
make command��
As described in the
ModusToolbox™ tools package user guide
, Build System chapter, you can run numerous make commands in the application directory, including launching the BSP Assistant. Navigate to the application directory (for example, Hello_World) and type the following command in the appropriate bash terminal window:
make bsp-assistant
When launched this way, the bsp-assistant opens with the active BSP for the application.
VS Code and Eclipse
VS Code and Eclipse have tools to launch the BSP Assistant from within an open application. Refer to the applicable user guide for more details:
CLI executable
Additionally, there is a "cli" version of the executable that does not open the GUI. Running the cli executable from the command line can be useful as part of batch files or shell scripts. The exit code for the executable is zero if the operation is successful, and non-zero if the operation encounters an error. See
CLI Description
for more details.