To launch a multi-core debug session, all projects within the workspace must be properly configured. In IAR there is a concept of 'master' and 'slave' projects. Configure the secure CM33 or non-secure CM33 project as the master project, and configure the CM55 as the slave project.
Secure CM33 project
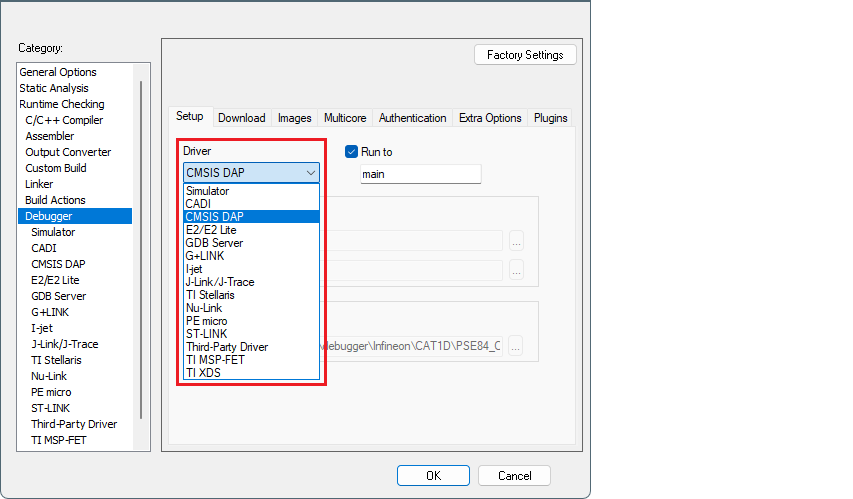
- Select the secure CM33 project, open the Options dialog, and go to the
Debugger category. Select the
Setup tab, and then select the applicable
Driver (I-jet, CMSIS-DAP, J-Link):
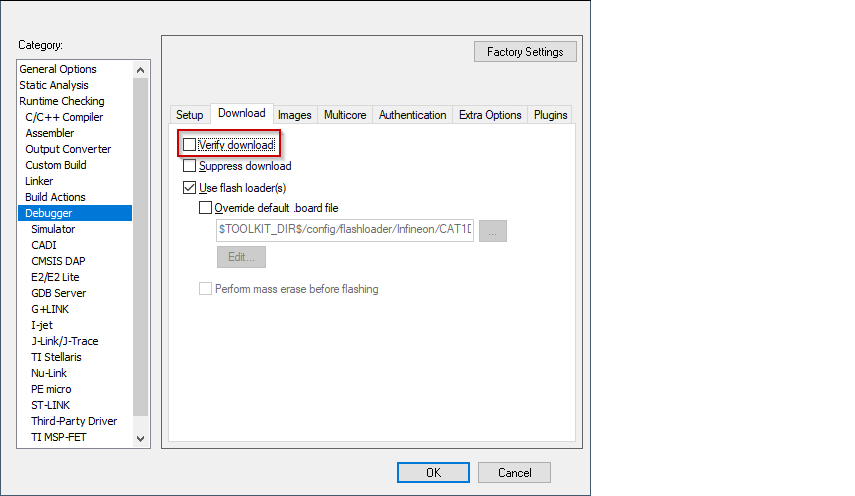
- If any application (secure CM33, non-secure CM33, or CM55) needs to be
programmed into external memory, switch to the Download tab
and ensure the Verify check box is not selected.
- If using CMSIS-DAP or I-jet, create a session configuration file. This is an
xml file containing a projects list that will be launched in a multi-core debug
session. The following shows an example for multi-core debug secure CM33 or
non-secure CM33 and CM55
applications.
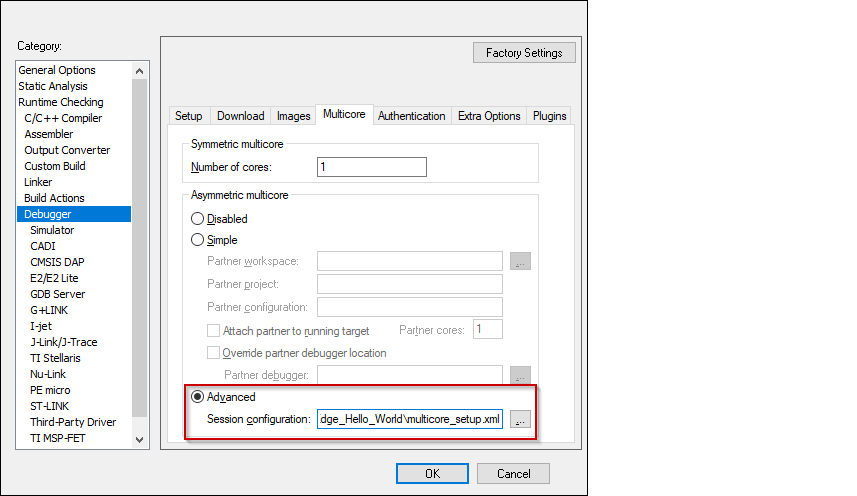
<?xml version="1.0" encoding="utf-8"?> <sessionSetup> <partner> <name>Partner0</name> <workspace>$WS_PATH$</workspace> <project>$PROJ_PATH$</project> <config>Debug</config> <numberOfCores>1</numberOfCores> </partner> <partner> <name>Partner1</name> <workspace>$WS_PATH$</workspace> <project>cm55</project> <config>Debug</config> <numberOfCores>1</numberOfCores> <attachToRunningTarget>true</attachToRunningTarget> </partner> </sessionSetup> - Switch to the Multicore tab, select the
Advanced radio button, and specify a path to the session
configuration file in the Session configuration field.
- Select the driver for the Debugger category that you selected. See Supported debugger probes.
- Click OK to close the Options dialog.
Non-secure CM33 project
- Select the non-secure CM33 project, open the Options dialog, and go to the
Debugger category. Select the Setup tab, and then select the applicable Driver (I-jet, CMSIS-DAP, J-Link):
- If using CMSIS-DAP or I-jet, switch to the Multicore tab and select the Advanced radio button. Then, specify the path to the session
configuration file (same file created for Secure CM33 project) in the Session configuration field.
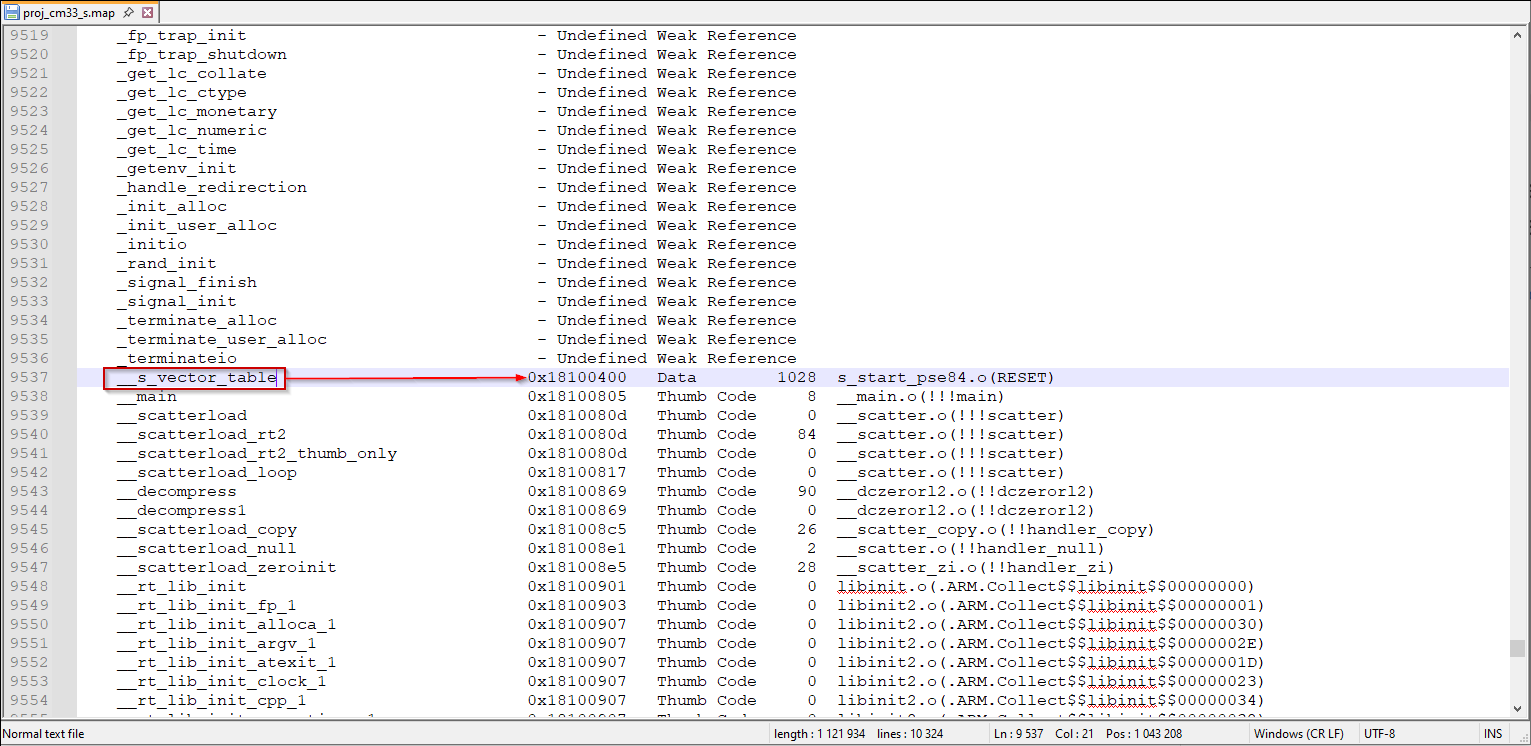
- Open the .map file of the secure CM33 application (usually located in the \proj_cm33_s\Debug\List folder) and find the address in it
that corresponds to the symbol `__vector_table`.
- Switch to the Extra Options tab, select
the Use command line options check box, and
paste the following command-line parameter, specifying the actual address found for
`__vector_table`. symbol in the .map
file.
--drv_vector_table_base=0x18100400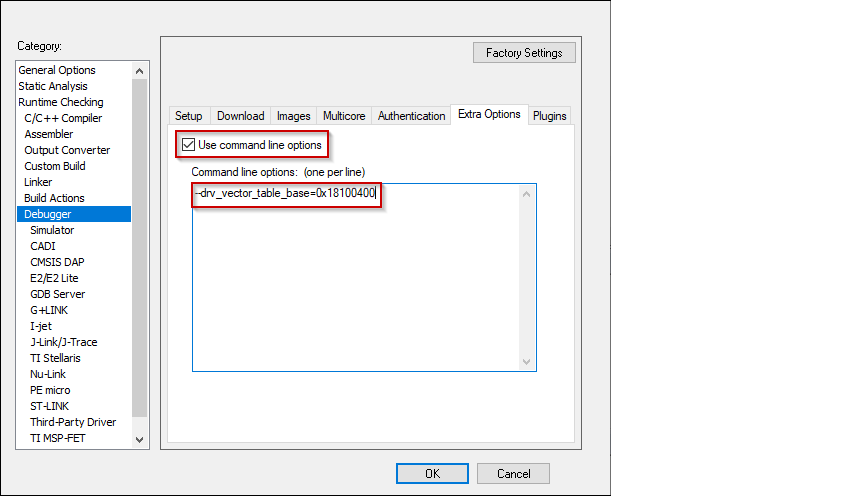
- Select the driver for the Debugger category that you selected. See Supported debugger probes.
- Click OK to close the Options dialog.
CM55 project
- Select the CM55 project, open the Options dialog, and got to the
Debugger category. Select the
Setup tab, and then select the applicable
Driver (I-jet, CMSIS-DAP, J-Link):
- Select the driver for the Debugger category that you selected. See Supported debugger probes.
- Click OK to close the Options dialog.
Secure debug configuration (optional)
The BootROM on the PSOC™ Edge can temporarily disable access to the core's AP. This
behavior is determined by the security policy during device provisioning. However,
access can be re-enabled using a debug certificate. If a debugger identifies that the AP
is disabled, it will upload and verify the certificate found in the
"packets/debug_token.bin" file within the current project folder. You can provide a
non-default path to the certificate in the debug macro by using the `--macro_param`
option.
- Select the secure CM33 project, open Options dialog, and go to the Debugger category.
- Select the Extra Options tab and the Use command line options check box.
- Paste the following command-line parameter, specifying the actual path to the certificate.
--macro_param debug_cert_file="c:/alt_path/alt_debug_token.bin"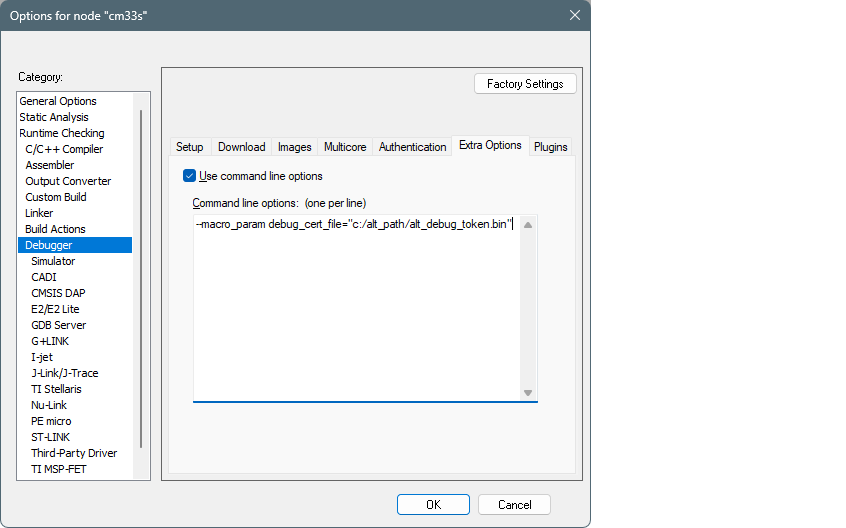
- Click OK to close the Options dialog.
- Perform the same modifications for non-secure CM33 and CM55 projects.