Follow instructions in Create/export application for Keil µVision.
- Single-project application – A stand-alone project targeting the secure software model. Follow the proj_cm33_s project configuration in this case.
- Dual-project application – A multi-core
application consisting of two inner projects:
- proj_cm33_s – TrustZone Secure project
- proj_cm33_ns – TrustZone Non-Secure project
In addition to the TrustZone technology from Arm, PSOC™ Control C3 devices have various security life cycle stages (LCS). For more details about security, refer to Application Note AN240106 - Getting started with PSOC™ Control C3 security.
The following sections provide details about working with a device with the default out of the box policy versus a device that has been provisioned.
Configure and build each project
- Open the Options dialog for the project, go to the User tab,
enable the Run #1 check box located under After
Build/Rebuild. Then, paste the following command as single
line.
ide_postbuild.bat \"#L\"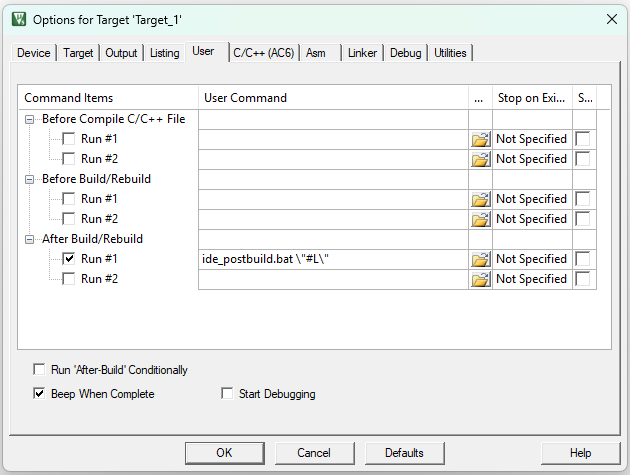
- Click OK to close the Options dialog.
- Select Project > Build Target to build the project.
- Repeat these steps for other projects in the application (if they exist).
Configure the debugging probe
J-Link Target Driver Setup
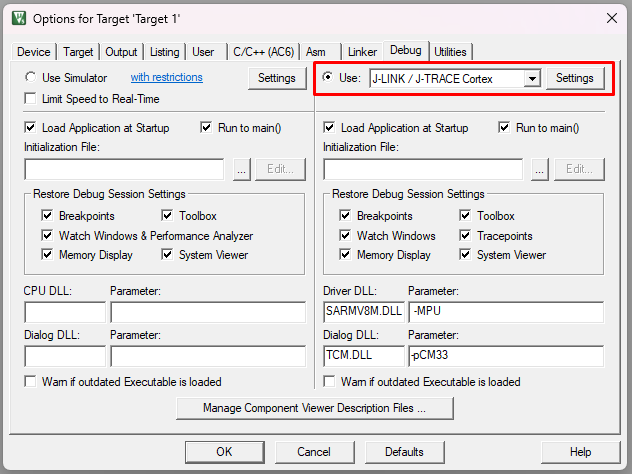
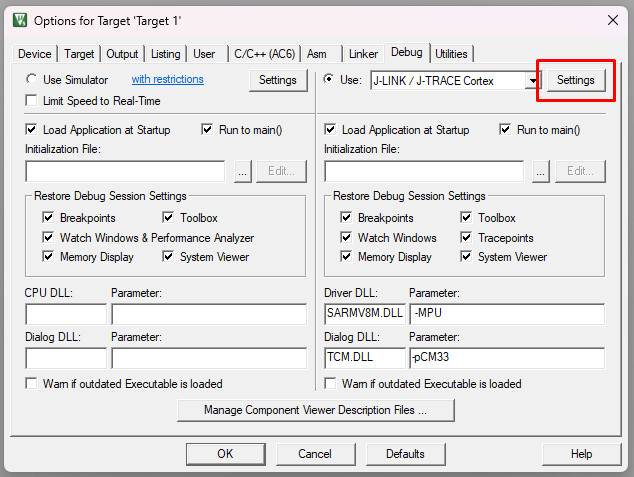
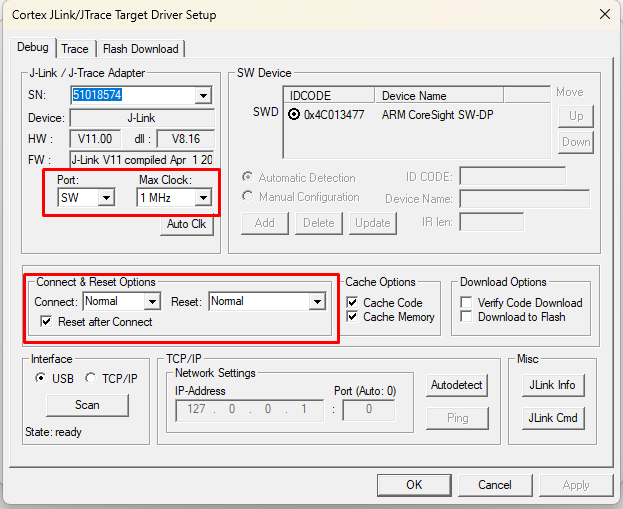
- Port: SW/JTAG
- Max Clock: 1 MHz (recommended)
- Connect: Normal
- Reset: Normal
- Reset after Connect: enabled
CMSIS Target Driver Setup (ULINK2, MP4)
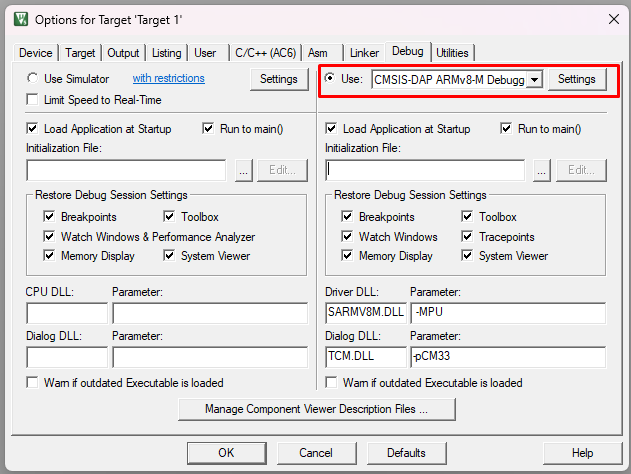
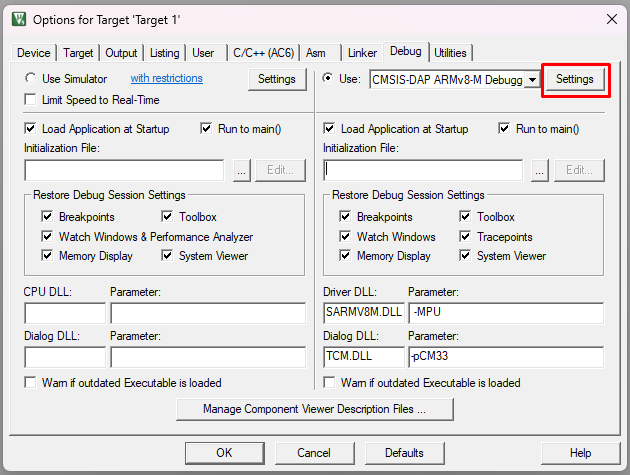
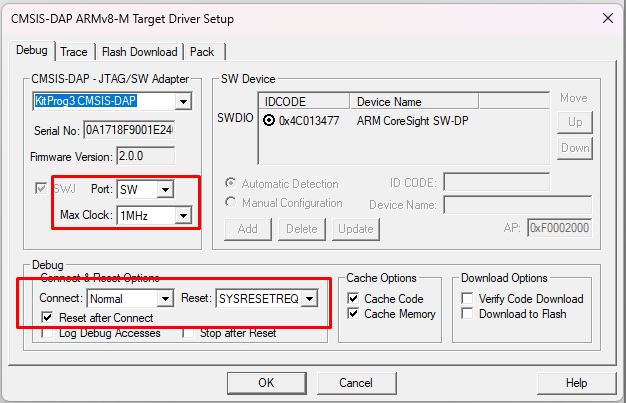
- Port: SW
- Max Clock: 1 MHz (recommended)
- Connect: Normal
- Reset: SYSRESETREQ
- Reset after Connect: enabled
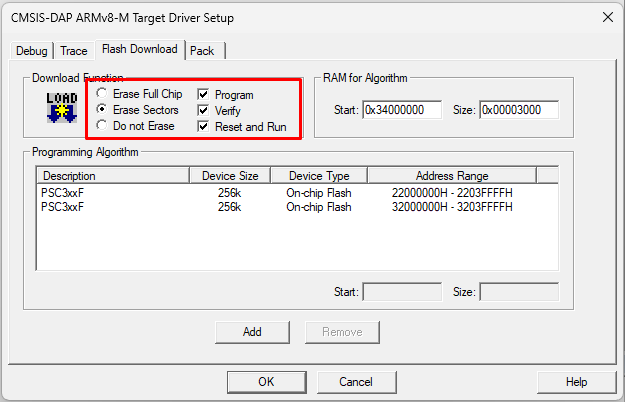
Program the application
Before programming, ensure that all projects within your application are successfully built. If your application consists of both proj_cm33_s and proj_cm33_ns inner projects, you may initiate device programming from either of them. However, before proceeding with programming, project must be properly configured to ensure the correct hex file is programmed onto the device
Configure projects
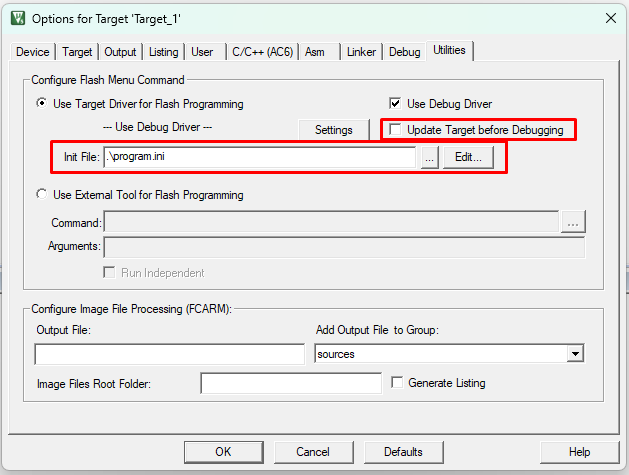
Click OK to close the Options dialog.
Target Programming
After configuring projects for programming and setting up the debugger connection, the next step is to program the target. To accomplish this, follow these steps:
- Select the µVision instance designated for the secure CM33 application.
- On the main menu, select Flash > Download.

Configure and run debug session
Configure the debugging probe as mentioned previously.
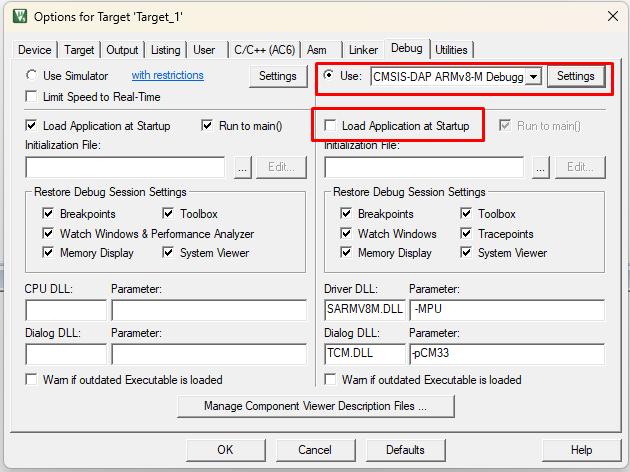
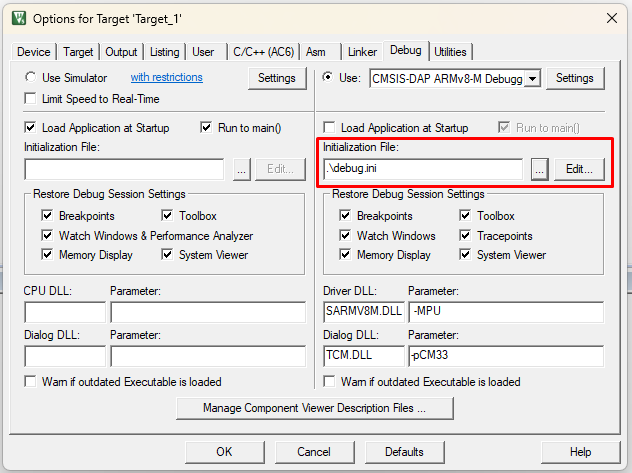
Click OK to close the Options dialog.
To start the debugger, select Debug > Start/Stop Debug Session.
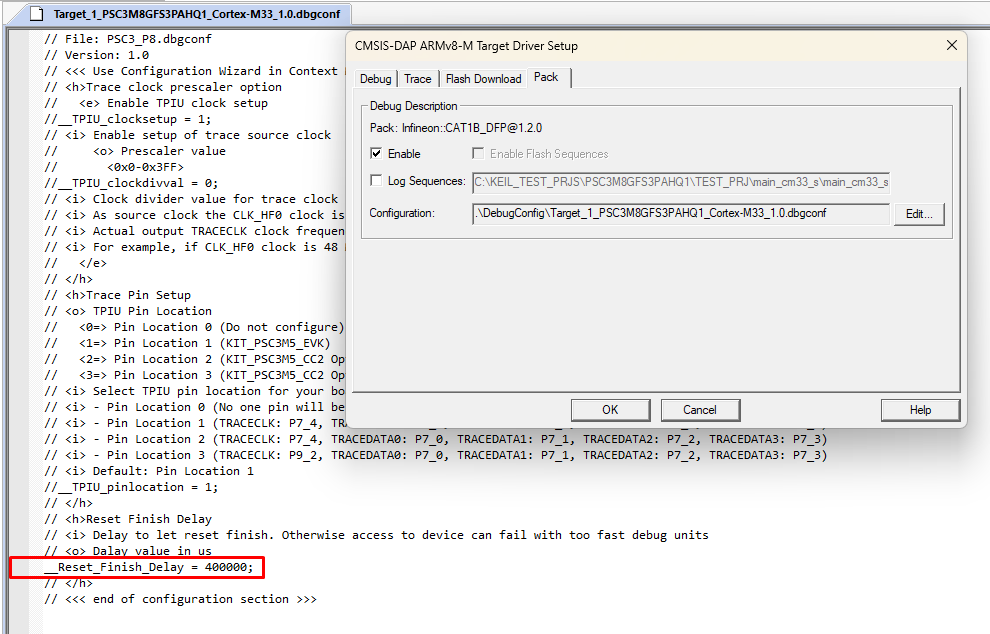
Recommended Values for __Reset_Finish_Delay
Proper device operation may require adjusting the __Reset_Finish_Delay parameter, depending on the device's configuration. The following shows the recommended values for this parameter when using KitProg3/MiniProg4 or ULINK2 debuggers/programmers.
- KitProg3/MiniProg4 – 200 000 - 400 000
- ULINK2 – 200 000 – 400 000
Configure debugger for device in DUAL FLASH Bank mode
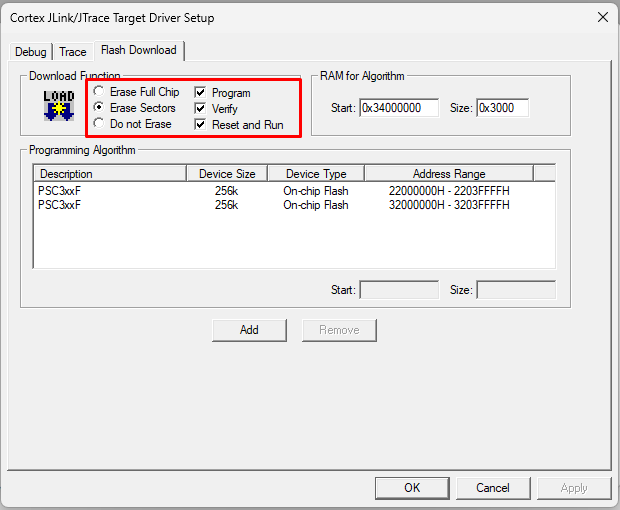
- Open the Flash Download tab of your selected probe driver
window.
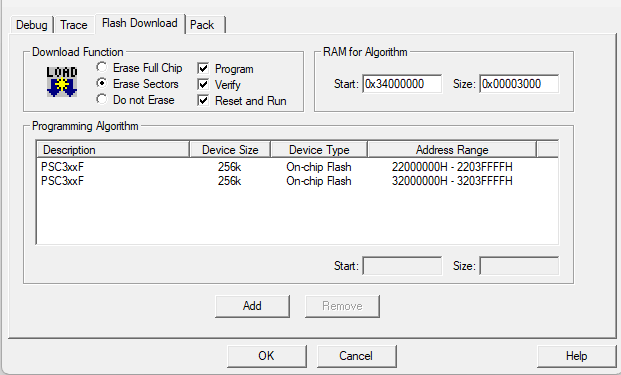
- Click on the first PSC3xxF (for some other PSOC™ Control C3 devices, it might have
another name) programming algorithm and reduce its size by half.
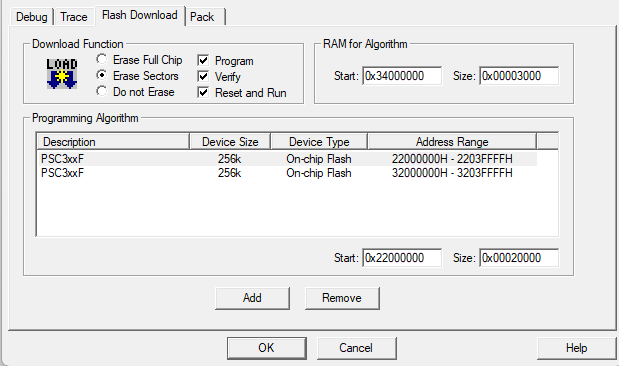
- Click on another algorithm and do the same thing.
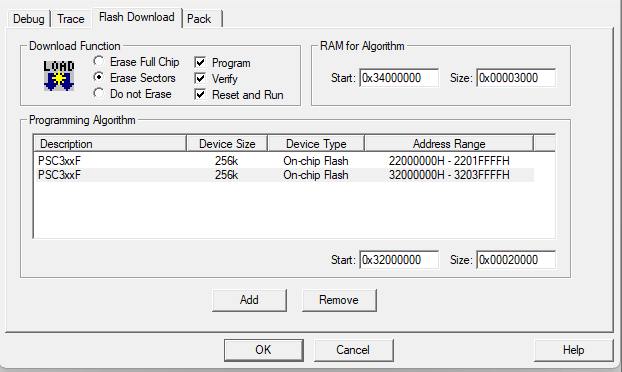
- Click on Add button and choose first algorithm with the same
name as the ones you already have.
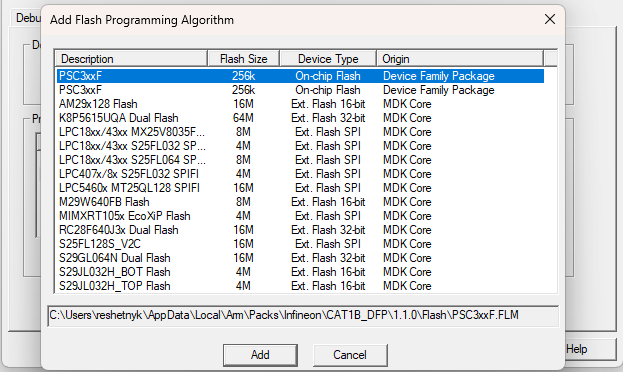
- Repeat step 4 one more time.
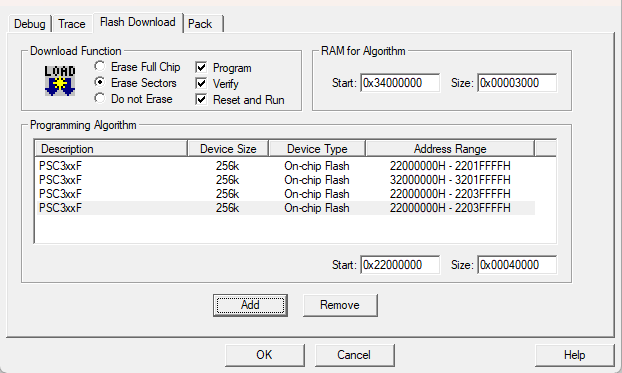
- Update the newly added programming algorithms so that they share the same size
as the existing ones, but use different start addresses. Specifically, change the
start addresses from 0x22000000/0x32000000 to 0x22800000/0x32800000.
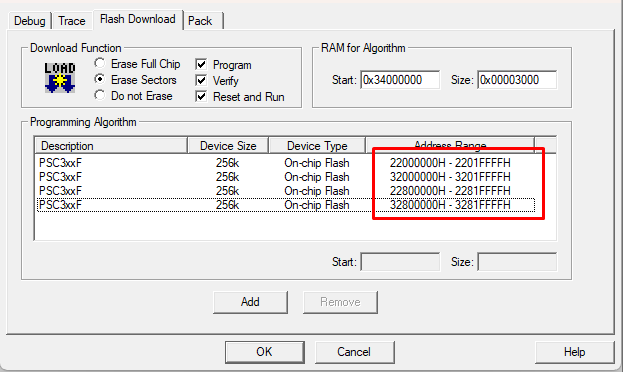
Now you can download and debug the dual bank application on PSOC™ Control C3 devices.