Device with default policy
Devices are shipped with a default policy, so you can develop and debug your application repeatedly without any knowledge about security or code signing. This is also referred to as Development LCS. In order to create a valid hex file for programming and debugging in this state, we must configure the application
Create a postbuild.bat file in the root directory of the project. The primary purpose of this is to shift the application image from the C-Bus region to the S-Bus region. This is done because the ARM compiler attempts to copy the Load Region to the Execution Region, which is read-only. The bat file contains three separate lines, for example:
C:\Keil_v5\ARM\ARMCLANG\bin\fromelf --output "Hello_World_Objects/tmp.hex" --i32combined "Hello_World_Objects/Hello_world.elf"

[path-to-gcc]\bin\arm-none-eabi-objcopy -O ihex "Hello_world_Objects/tmp.hex" "Hello_world_Objects/Hello_world.hex" --change-addresses 0x20000000

del "Hello_world_Objects\tmp.hex"
Update the paths and file names to match your configuration.
Note:
Copying text from a PDF file may insert additional spaces and/or line breaks.
Create project.ini and project2.ini files in the project root folder. These initialization files provide
LOAD
commands that are needed for the application.
Add the following text to the project.ini file and click
Save
.
LOAD $L@L.hexAdd the following text to the
project2.ini
file and click
Save
.
LOAD $L@L.elf NOCODE
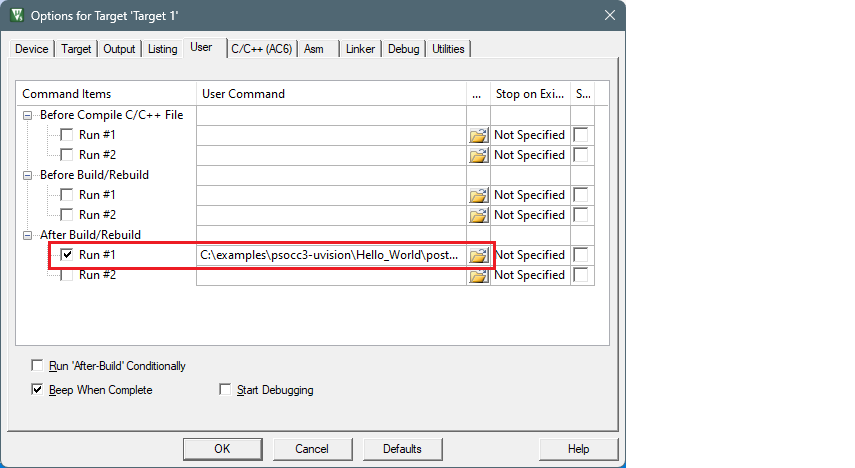
g, mainOpen the Options for Target dialog, select the
User
tab, select the
After Build/Rebuild Run #1
check box, and select the
postbuild.bat
file:
Switch to the
Output
tab and add a ".elf" extension to the file in the
Name of Executable
field, and select the
Create HEX File
check box:

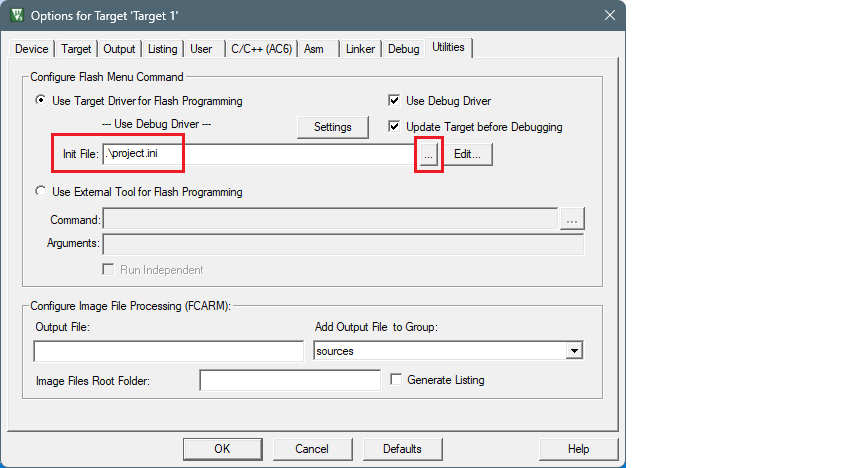
Switch to the
Utilities
tab, select the
project.ini
file in the
Init File
field:
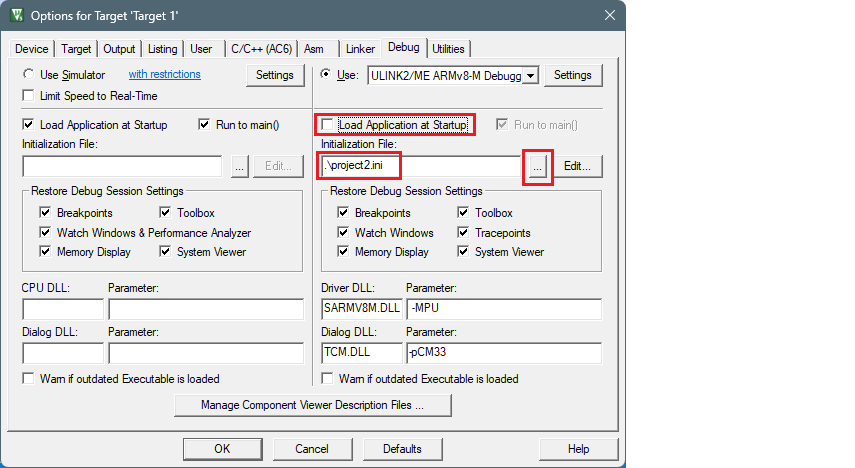
Switch to the
Debug
tab. Make sure that the
Load Application at Startup
check box is not checked.
Select the
project2.ini
file in the
Initialization File
field:
Click
OK
to close the Options dialog.
Select
Project > Build Target
to build the application and execute post-build commands.
Configure the applicable debugger settings. See
Miscellaneous notes
.
To program the device, select
Flash > Download
.
To start the debugger, select
Debug > Start/Stop Debug Session
.