Create/export application for Keil µVision
This section covers the ways to get started using Keil µVision with ModusToolbox™ software.
Create/export ModusToolbox™ application
Create new application
Use the Dashboard to open the Project Creator tool and create a ModusToolbox™ application for Keil µVision.
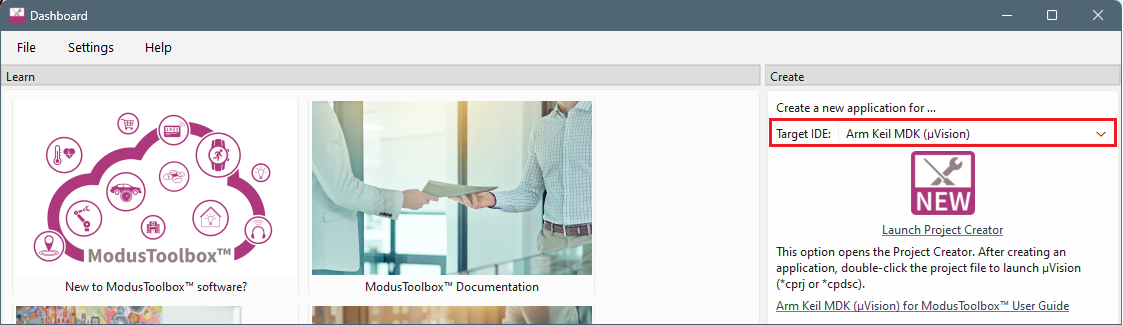
Refer to the
Project Creator user guide
for more details.
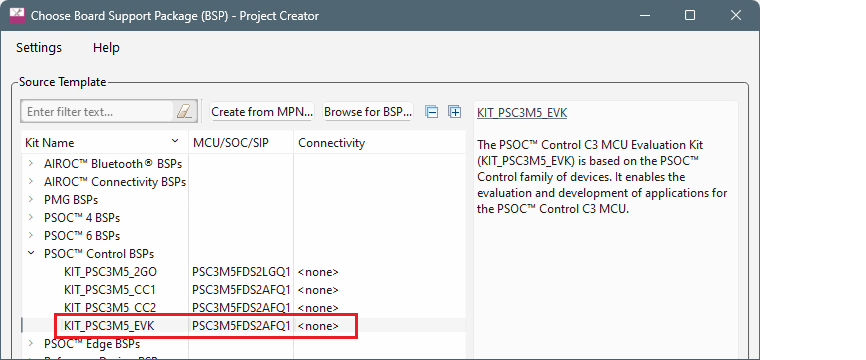
Select the BSP from the list or use a buttons to create one or select one on disk.
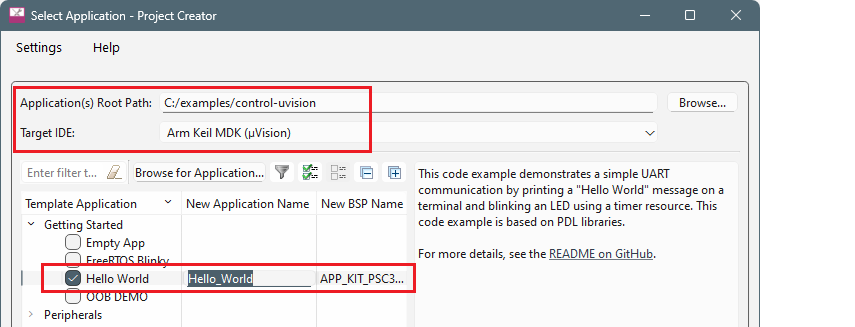
On the next page, select the location, target IDE, and the application to create.
Click
Create
. When the process completes see the messages in the console.

Click
Close
.
Export existing application
Instead of creating a new application, if you have a ModusToolbox™ application that was created for another IDE or for the command line, you can export that application to be used in Keil µVision. Open a terminal window (modus-shell in Windows) and type the following:
make uvision CY_IDE_PRJNAME=[project-name] TOOLCHAIN=ARM
Note:
For applications that were created using core-make-3.0 or older, you must use the
make uvision5
command instead.
This sets the
TOOLCHAIN
to ARM in the Keil µVision configuration files but
not
in the ModusToolbox™ application's Makefile. Therefore, builds inside Keil µVision will use the ARM toolchain, while builds in the ModusToolbox™ environment will continue to use the toolchain that was previously specified in the Makefile. You can edit the Makefile's
TOOLCHAIN
variable if you also want ModusToolbox™ builds to use the ARM toolchain.
Check the output log for instructions and information about various flags.
Postbuild script
The process to create or export an application for use in Keil µVision creates a script file named
ide_postbuild.bat
. This script updates the hex file as needed for security and multi-core support. It requires you to set the
CY_COMPILER_ARM_DIR
environment variable. For example:
CY_COMPILER_ARM_DIR=C:/Keil_v5/ARM/ARMCLANG
Use forward slashes (even on Windows) because of UNIX/Linux path rules.
Create Keil µVision project(s)
Creating or exporting the application generates the following file in the application/project directory:
*.cprj
The
cprj
file extension should have the association enabled to open it in Keil µVision.
Double-click the
*.cprj
file. This launches the Keil µVision IDE.
The first time you do this, a dialog similar to the following displays:

Click
Yes
to install the device pack. You only need to do this once per device type.
Follow the steps in the Pack Installer to properly install the device pack.
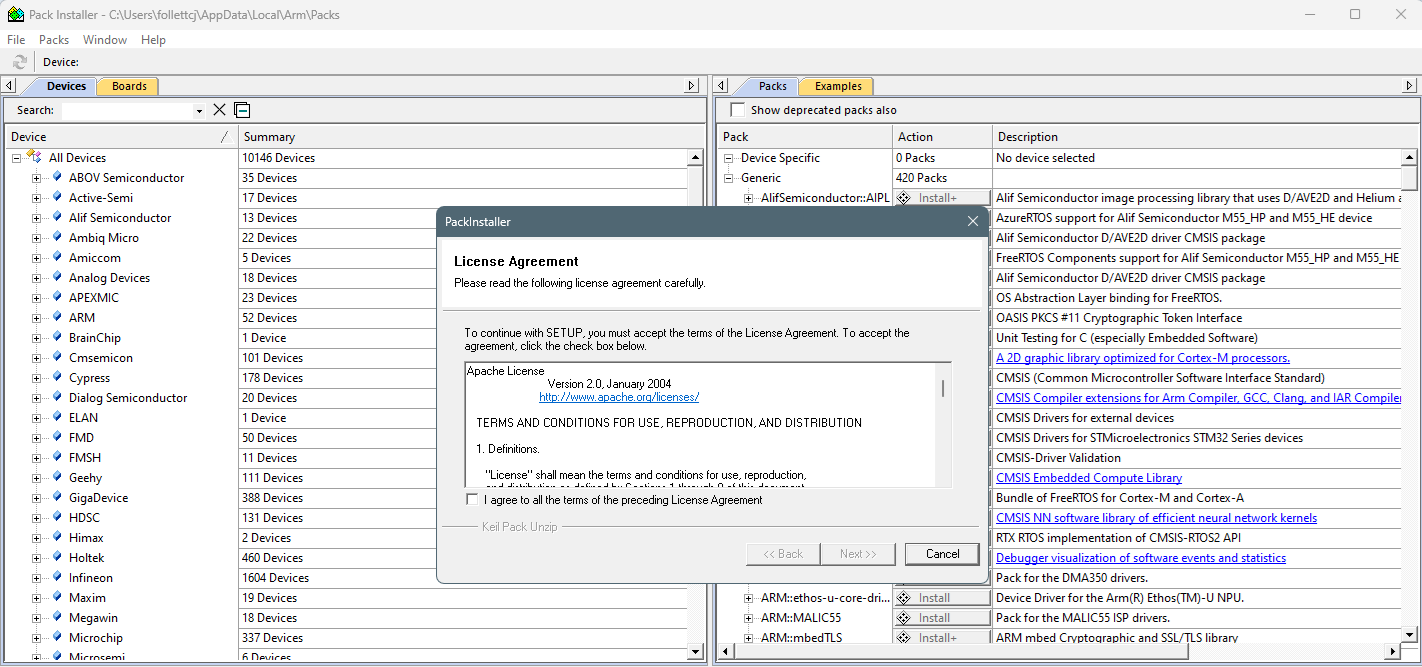
When complete, close the Pack Installer and the application will be created for you in the IDE.
If you're working with a multi-core or multi-project application, a cprj file is created in each sub-project directory. Double-click the *.cprj file in each folder (for example, PSOC™ Edge: cm33s, cm33ns, and cm55, XMC7xxx: cm0p, cm7_0, and cm7_1).