This section covers how to create or export a ModusToolbox™ application for use in the IAR Embedded Workbench IDE.
Create/export ModusToolbox™ application
Create new application
- Use the Dashboard to open the Project Creator tool and create a
ModusToolbox™ application for IAR Embedded Workbench.
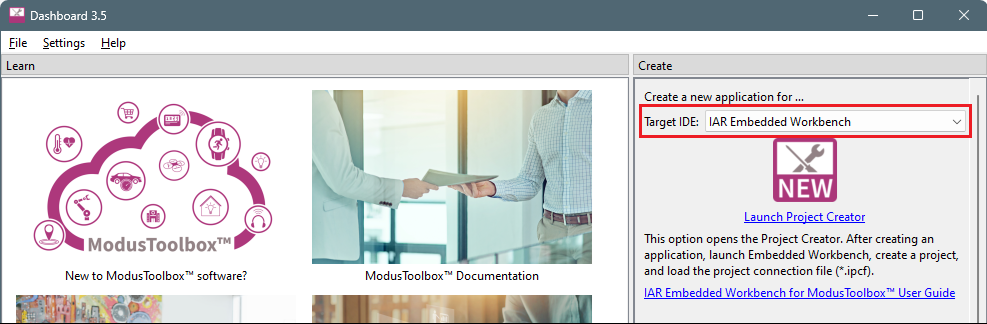
Refer to the Project Creator user guide for more details.
- Select the BSP from the list or use one of the buttons to create a
BSP from an MPN or select a BSP on disk.
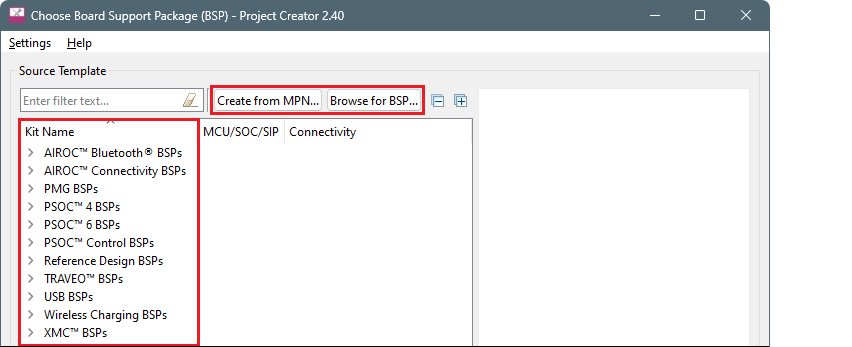
- On the next page, select the location and the application to create.
Notice Target IDE is already selected from the Dashboard.
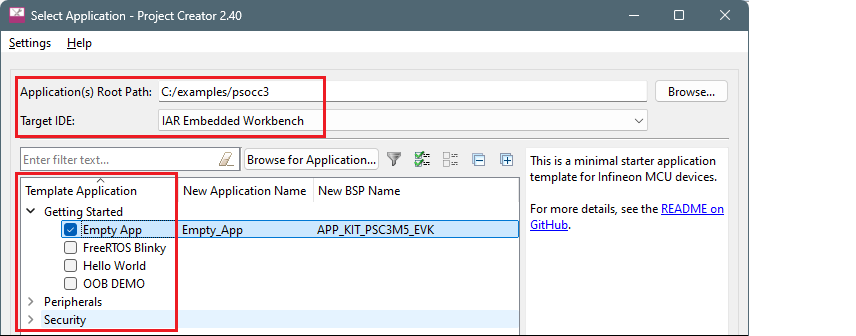
- Click Create. When the process completes see the messages in
the console.
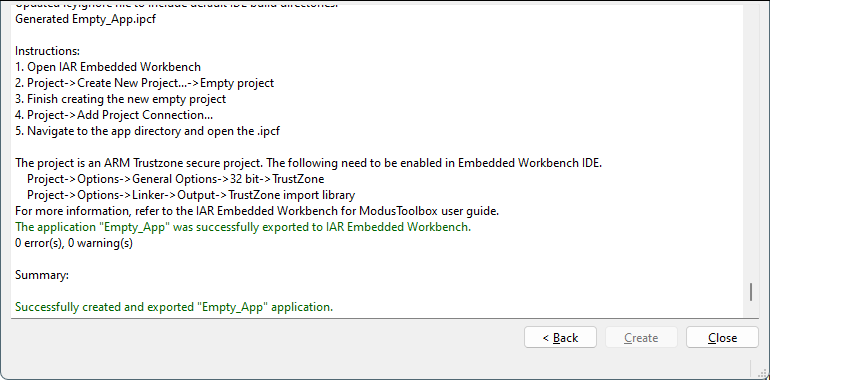
- Click Close.
Export existing application
make ewarm CY_IDE_PRJNAME=[project-name] TOOLCHAIN=IARWhere [project-name] is the name of the root application/project
folder.
make ewarm8 command instead.This sets the TOOLCHAIN to IAR in the
Embedded Workbench configuration files but not in the
ModusToolbox™ application's Makefile. Therefore, builds inside IAR Embedded
Workbench will use the IAR toolchain, while builds in the ModusToolbox™ environment will
continue to use the toolchain that was previously specified in the Makefile. You
can edit the TOOLCHAIN variable if you also want
ModusToolbox™ builds to use the IAR toolchain.
Create IAR workspace and project(s)
After creating or exporting an application, an IAR project connection file (.ipcf) appears in the ModusToolbox™ application/project directory. This an XML file that contains the hierarchy of all the files and directories from the original ModusToolbox™ application. For example: Hello_World.ipcf. To use the ModusToolbox™ application with IAR, do the following:
- Launch IAR Embedded Workbench.
- Select File > New Workspace,
select File > Save Workspace, and enter a
desired workspace name (*.eww) in the directory containing the ModusToolbox™
workspace.
- Select Project > Create New Project >
Empty project and click OK.
- Browse to the ModusToolbox™ project directory, enter a desired project
name (*.ewp), and click Save.
- Select Project > Add Project
Connection and on the dialog ensure that "IAR Project Connection File" is
selected; click OK.

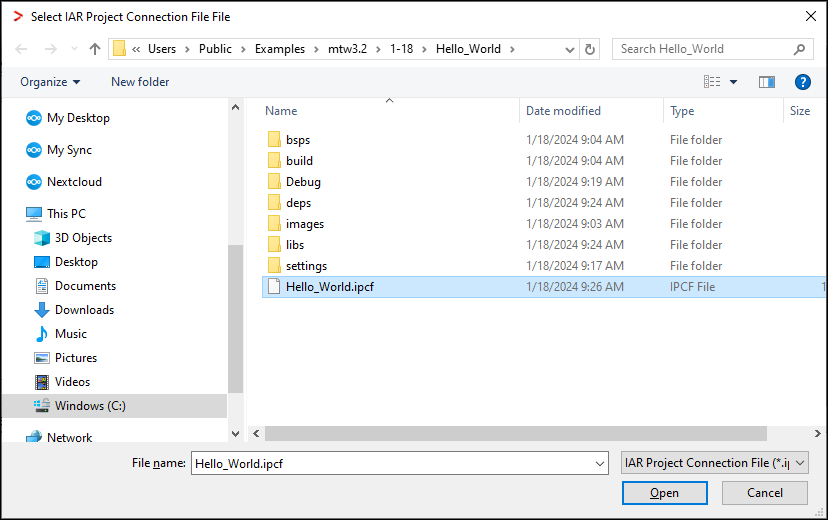
- On the Select IAR Project Connection File dialog, select the .ipcf file and click Open:
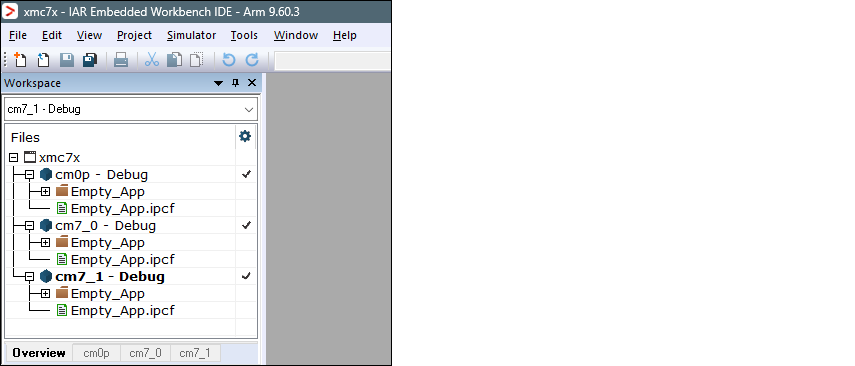
- If your application has multiple cores/projects, repeat the process to
create an IAR project for each core and add the .ipcf file for
each as well. For example:
- Once all projects have been created and connected, make sure to save the workspace and projects.
make ewarm TOOLCHAIN=IAR CY_IDE_PRJNAME=Hello_World- If you don't use the
CY_IDE_PRJNAMEoption, the generated ipcf file may revert to the original code example name, and it will not update your application. - If you don't care about staying connected to the ModusToolbox™ tools that generate the project files, you can delete the .ipcf file from the workspace and restart IAR Embedded Workbench.
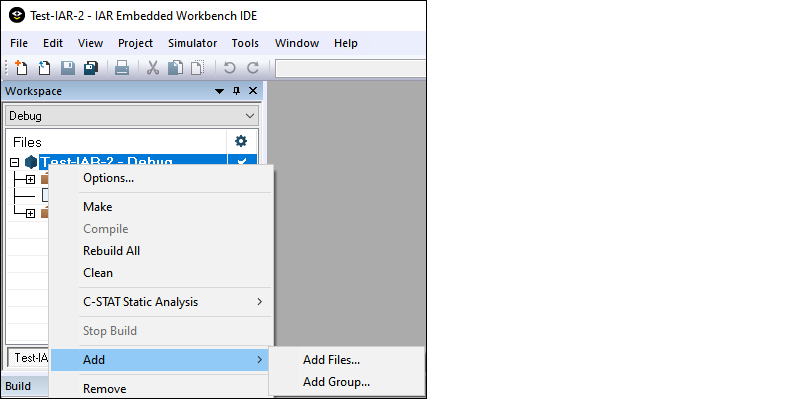
- If you want to make changes in IAR Embedded Workbench, you need to
do that at the workspace level using the Add
option. These additions will not be included in the .ipcf file.
Next steps
In the simplest cases, the .ipcf file contains all required build settings, so configuring the build settings is generally not required. However, there are several cases and different devices for which configuring build settings is required, such as using TrustZone mode, post-build image processing like combining several additional images, or signing images or remaps to another memory region. Refer to the applicable device section for steps to configure build settings, build the application, then program the device if it is attached, and debug the application.