This section provides a basic walk-through for how to create a couple applications using Eclipse, selecting a BSP. It also covers how to build and program them using Eclipse and basic launch configurations supplied for the applications.
Installing Eclipse
Beginning with the ModusToolbox™ tools package version 3.4.0, Eclipse for ModusToolbox™ is no longer included by default. Instead, it is a separate package that you can install via the ModusToolbox™ Setup program.
The Setup program is located on our website here: https://softwaretools.infineon.com/tools/com.ifx.tb.tool.modustoolboxsetup. It is used to install base packages and additional packages on Windows, Linux, and macOS. Refer to the ModusToolbox™ software installation guide for specific instructions.
Launch Eclipse
Eclipse is installed in the following directory, by default:
C:\Users\<UserName>\Infineon\Tools\ModusToolboxEclipse
To launch Eclipse:
- On Windows, select Eclipse for ModusToolbox™ <version> item from the Start menu.
- For other operating systems, run the "modustoolbox" executable file.
- You can also launch Eclipse from the dashboard for all operating systems. For more information refer to the dashboard user guide.
When launching Eclipse, it provides an option to select the workspace location on your machine. This location is used by Eclipse for creating and storing the files as part of application creation for a particular platform. The default workspace location is a folder called "mtw" in your home directory. You may add additional folders under the "mtw" folder or to choose any other location for each workspace.
For more details about Eclipse, refer to Eclipse documentation, as well as the Eclipse survival guide.
Configure tools & toolchains
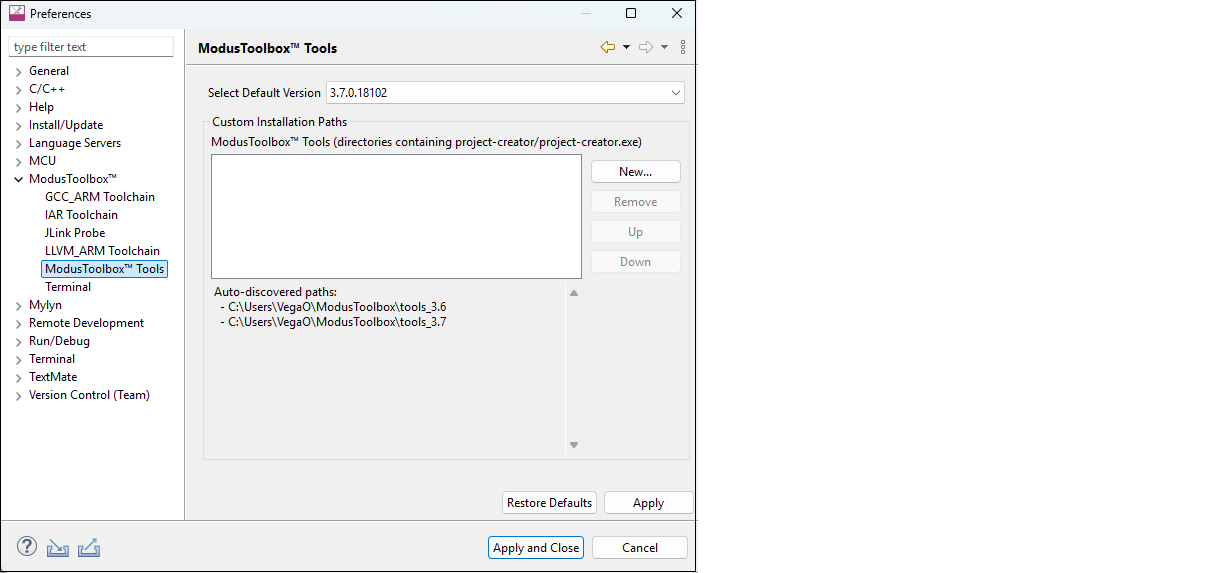
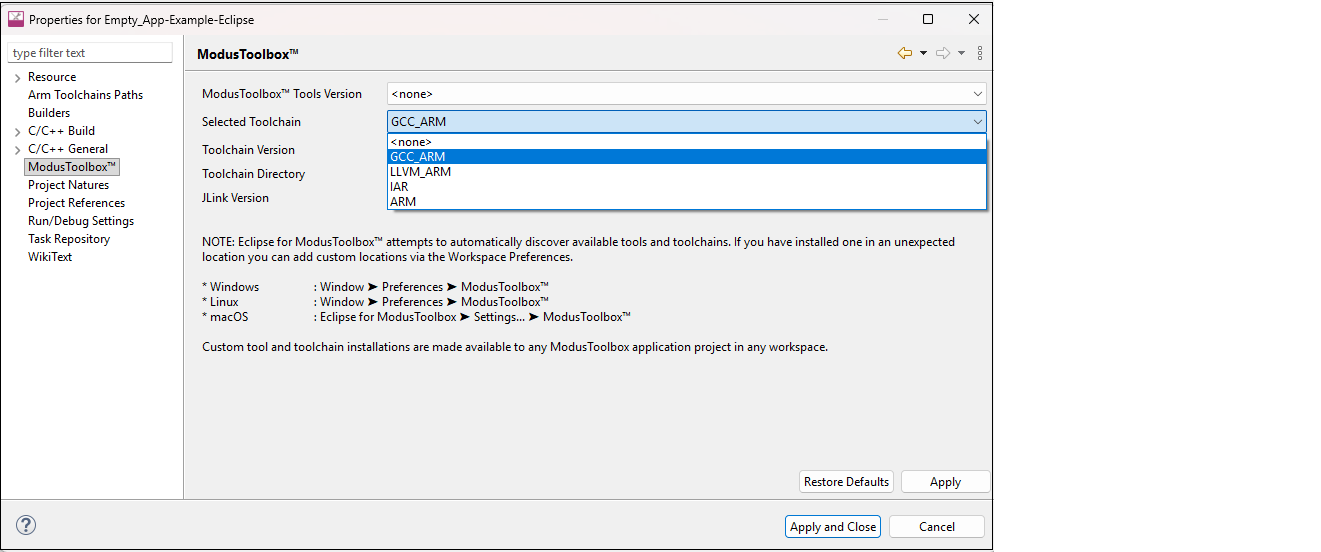
To select your preferred toolchain, open the Properties menu and choose between the different toolchain options.
See the table below for more specific information on available tools and toolchains.
| Sub-pane | Purpose |
|---|---|
|
GCC_ARM Toolchain |
View auto-discovered GCC_ARM toolchains and provide custom install paths when necessary. Auto-discovery will find installations installed by ModusToolbox™ Setup program. |
|
IAR Toolchain |
View auto-discovered IAR toolchains and provide custom install paths when necessary. Auto-discovery will look for IAR toolchain installations in the common search directories (defined below). |
|
JLink Probe |
View auto-discovered SEGGER J-Link installations provide custom install paths when necessary. Auto-discovery will look for SEGGER J-Link toolchain installations in the common search directories (defined below). Note:
J-Link installation directories must
include the version number
(e.g., C:\Program Files\SEGGER\JLink_V896 |
|
LLVM_ARM Toolchain |
View auto-discovered LLVM_ARM toolchains and provide custom install paths when necessary. Auto-discovery will look for LLVM_ARM toolchain installations in the common search directories (defined below). |
|
Terminal |
Integrated terminal used to enter various commands for the selected
project. Note: For more
information on this sub-pane, see Use integrated terminal |
Common auto-discovery search directories for each OS include:
Windows:
%ProgramFiles%(typicallyC:\Program Files)%ProgramFiles(x86)%(typicallyC:\Program Files (x86))%ProgramFiles(Arm)%(typicallyC:\Program Files (Arm))%USERPROFILE%(user's home directory)C:\root of drive C:
Linux:
/usr/local//opt/$HOME(user's home directory)
macOS:
/Applications//usr/local//opt/$HOME(user's home directory)
CY_COMPILER_ARM_DIR environment variable.Open Project Creator tool
Click the New Application link in the Eclipse Quick Panel.

These commands launch the Project Creator tool, which provides several applications for use with different development kits. The kits available may change over time.
For more details about using this tool, refer to the Project Creator user guide.
Build application
After loading an application, build it to generate the necessary files. Select a project. Then, in the Quick Panel, click the Build Application link.
Messages display in the Console, indicating whether the build was successful or not. For more details about building applications and the various Consoles available, see the Build applications chapter.
Program application
There are many more details about programming an application. This section only covers it briefly. For more detailed information, see the Program and debug chapter.
In the Project Explorer, select the desired project. Then, in the Quick Panel, click the <app-name> Program (KitProg3_MiniProg4) link for a PSOC™ MCU application, and <app-name> Program for an AIROC™ Bluetooth® application.
The Advanced KitProg3 Programming item in the Quick Panel is used to launch the ModusToolbox™ Programmer with the device and a HEX file already selected and configured for you. You must build your application before using this item. For more details on using the Programmer tool, see the ModusToolbox™ Programmer user guide.
Export/share application
There are several ways to share a ModusToolbox™ application. Refer to the ModusToolbox™ tools package user guide in the "Version Control and sharing applications" chapter for more general details.
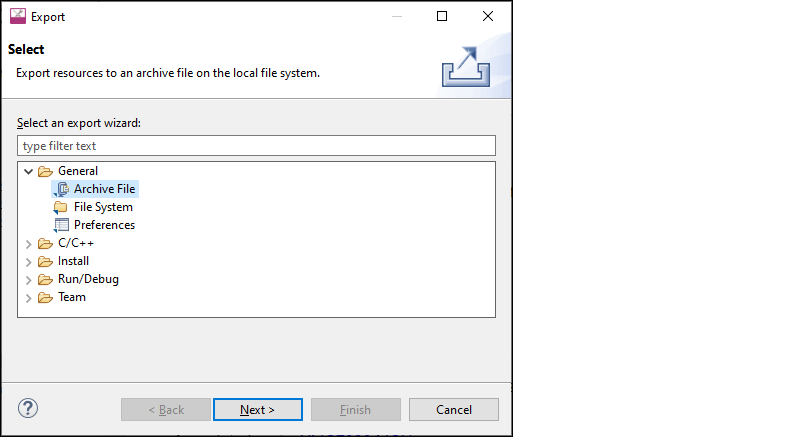
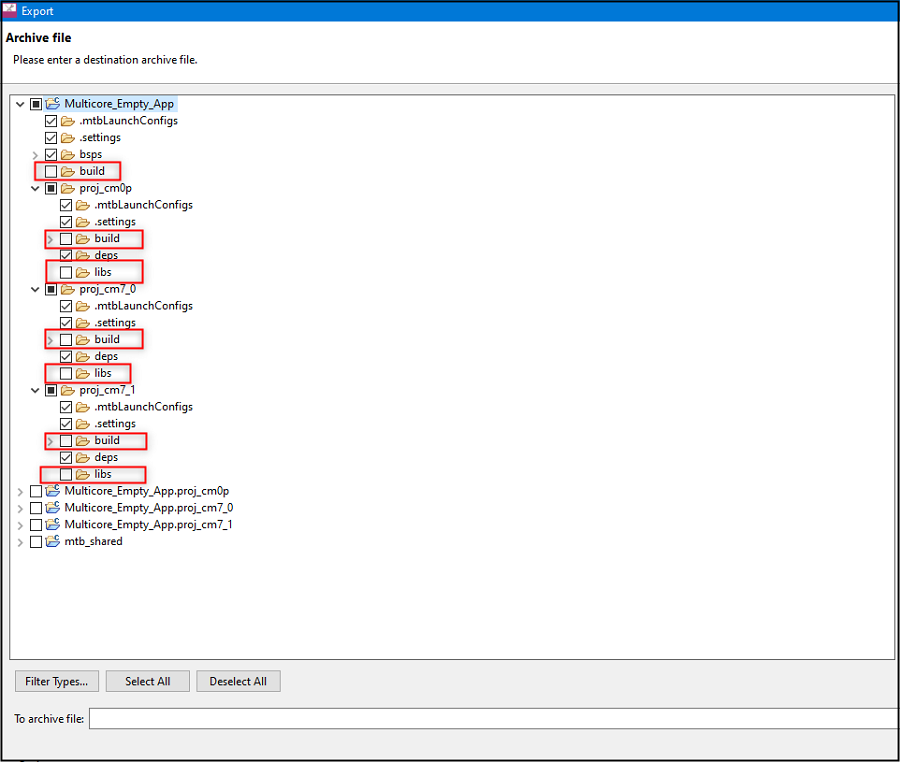
Keep in mind that a typical ModusToolbox™ application includes many libraries that are available on GitHub. These get regenerated during the make getlibs command. Therefore, you can substantially reduce the size of your exported application by excluding the libraries. Plus, the exported mtb_shared folder might retain hard-coded paths that would cause issues after importing the application.
For multi-core applications, Eclipse export function shows the core project folders along side the main application folder. These project folders are included in that main application folder, so you should exclude them from the export process as well.
Click Browse… to navigate to the location to save the archive and provide a file name.
Click Finish to generate the archive file.
Make sure build, libs, and mtb_shared are not selected to exclude them from the archive.
Import application
If you have a ModusToolbox™ application that you want to import into Eclipse, run the make getlibs command before importing it into Eclipse.
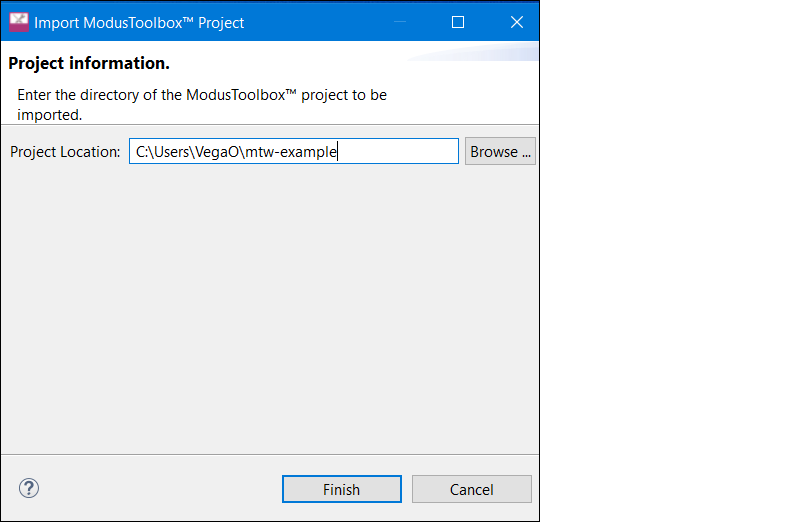
Click Finish to begin the import process. This will take a few moments, and then the application will display in Eclipse Project Explorer.
If the Console displays a message, such as "Error creating Eclipse configurations," open
the Library Manager and click Update. This runs the
make getlibs operation to generate the necessary files and libraries.
Search online for code examples
Infineon provides many code examples. These examples allow you to explore the capabilities provided by the SDK, create applications based on them, examine the source code demonstrated in them, and read their associated documentation. The Quick Panel provides a link to access online code examples. Click the Search Online for Code Examples link. This opens a web browser to the GitHub repository to select and download the appropriate examples.
Search online for libraries/BSPs
Infineon also provides all the libraries and BSPs online at GitHub. The Quick Panel provides a link to access these. Click the Search Online for Libraries and BSPs link. This opens a web browser to the GitHub repository that shows the ModusToolbox™ software page.
Access training material
Infineon also provides training material at GitHub. The Quick Panel provides a link to access these. Click the Training Material link. This opens a web browser to the GitHub repository that shows the ModusToolbox™ training page.