Secure CM33 project
Create a
debug_m33s.ini
file in the project folder, and add the following lines to it:
LOAD $L%L NOCODE
g, main
Open the Options dialog. Select the
Debug
tab and select the applicable debug probe (CMSIS-DAP or J-Link). Make sure that the
Load Application at Startup
check box is not selected.

Select the
debug_m33s.ini
file in the
Initialization File
field.
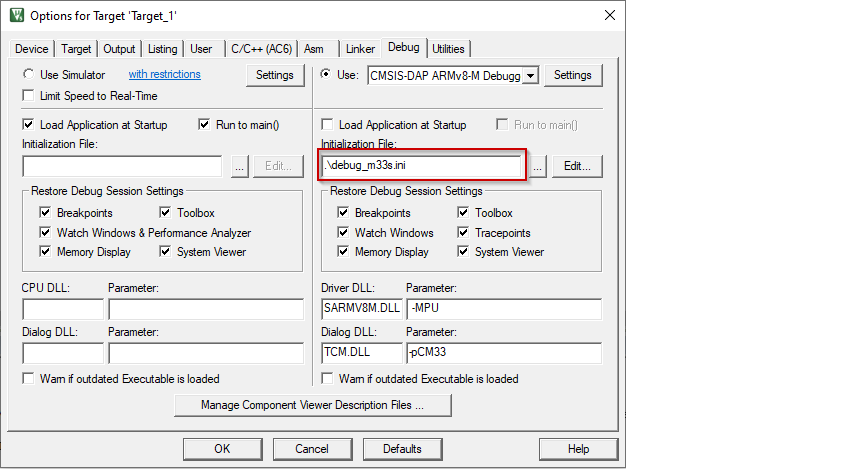
Click the
Settings
button to configure the target driver.

Select the
Debug
tab, and choose applicable connection options, the configuration settings are different for CMSIS-DAP and J-Link. Refer to the following sections for the applicable options:
CMSIS-DAP/ULINK2 Target Driver Setup
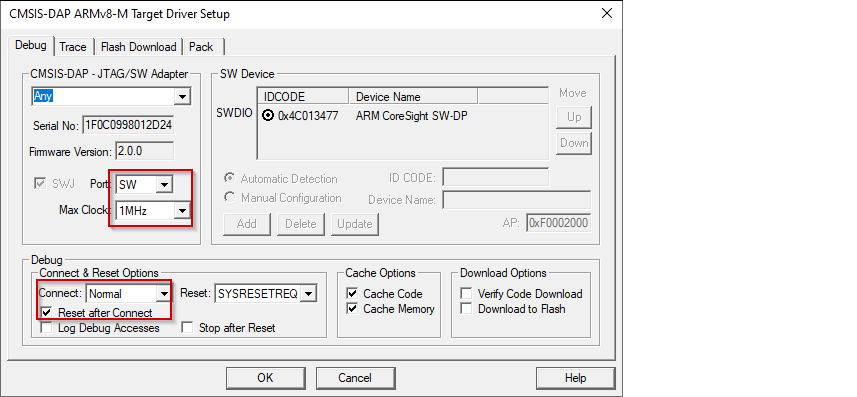
Use the following options:
Port
: SW
Max Clock
: 1 MHz
Connect
: Normal
Reset after Connect
: selected
Select desired
Reset
type. For PSOC™ Edge devices, there are two main reset types available: hardware reset using XRES and system reset by SYSRESETREQ.
For SYSRESETREQ the Vector Catch method is applied. The default reset type is SYSRESETREQ.
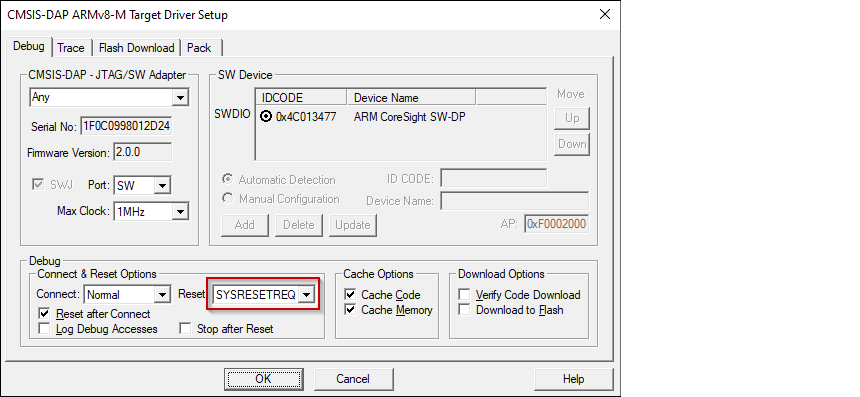
For XRES additional follow-up acquisition methods are available, including Test Mode acquisition, Vector Catch, and Break Point acquisition (an alternative acquire).
The method to use is determined by the
__Acquisition_Type
debug variable. The debug variables are accessible for editing at tab Pack clicking
Edit
button.
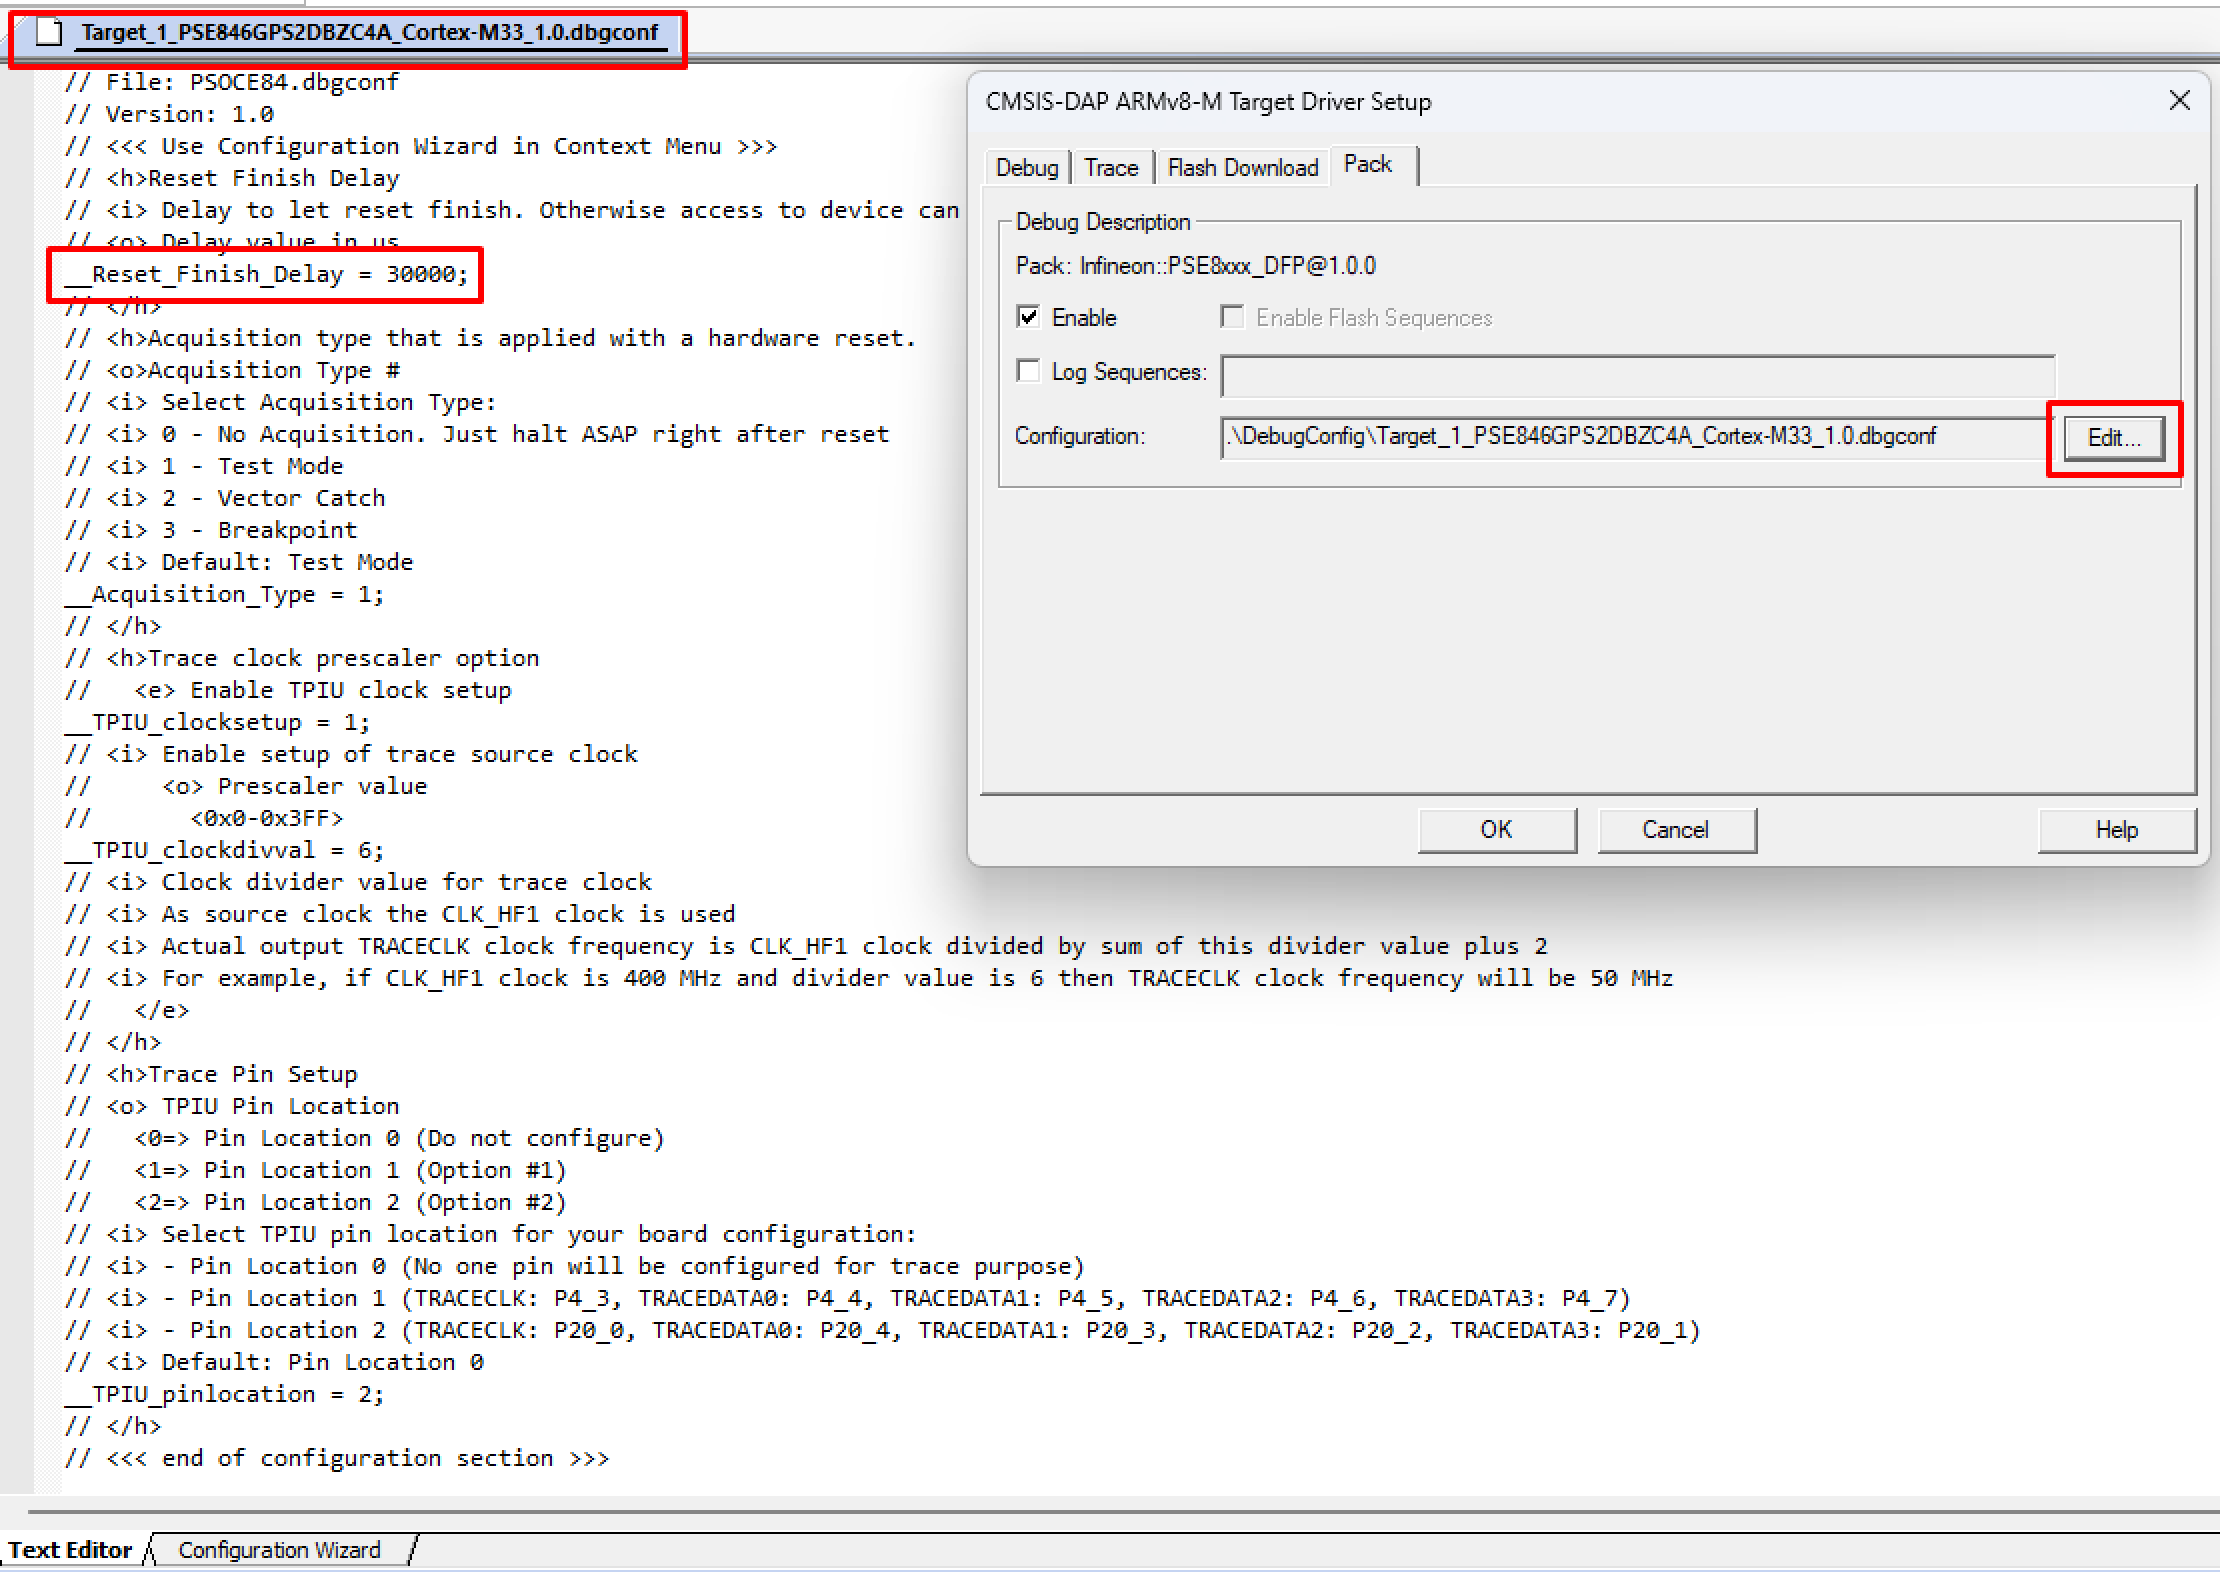
By default, the Test Mode acquisition is applied after XRES.
J-Link Target Driver Setup
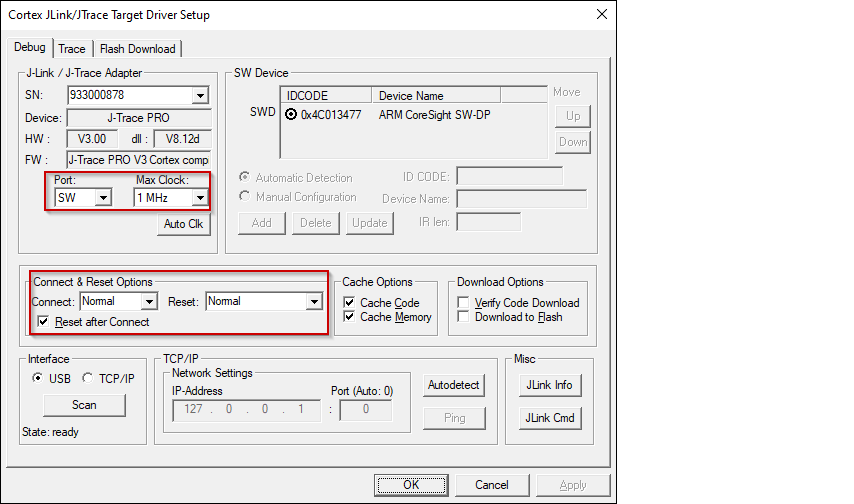
Use the following options:
Port
: SW
Max Clock
: 1 MHz
Connect
: Normal
Reset
: Normal
Reset after Connect
: selected
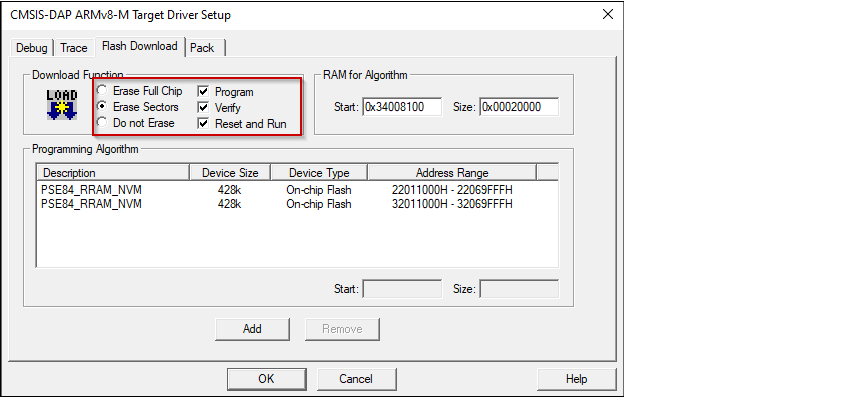
For either driver, switch to the
Flash Download
tab and select
Erase Sectors
radio button, as well as
Program
,
Verify
, and
Reset and Run
check boxes.
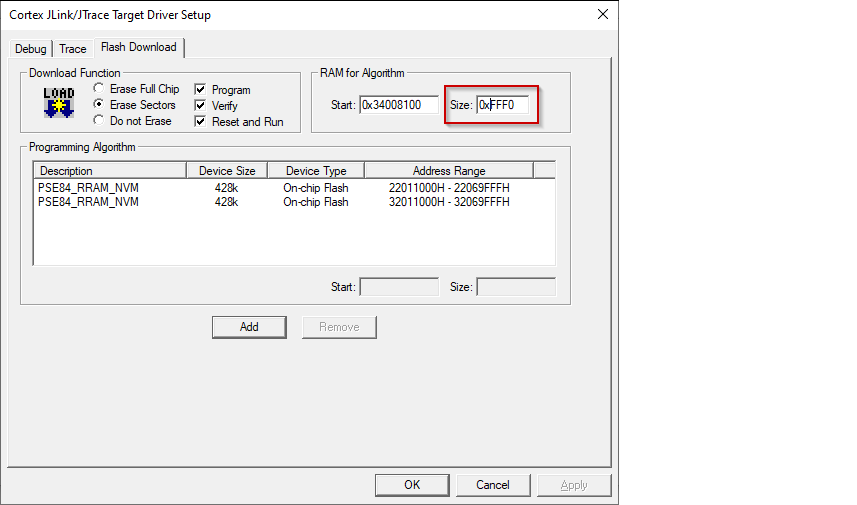
For J-Link, ensure the RAM size for the algorithm is set to 0xFFF0.
For either driver, if any application (secure CM33, non-secure CM33, or CM55) should be programmed to external memory, two additional instances of flashloaders with name PSE84_SMIF need to be added using the
Add
button.
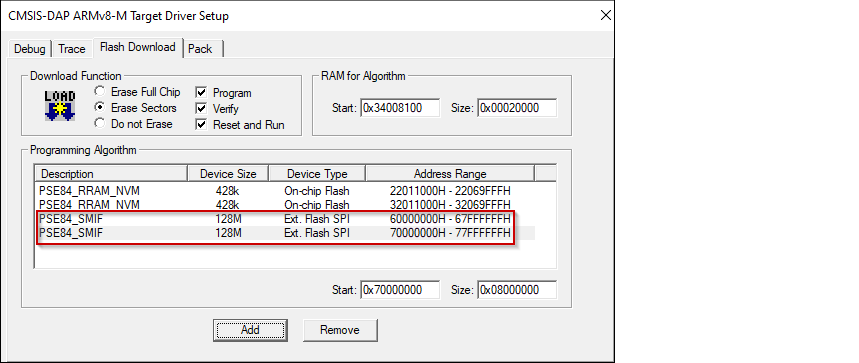
Make sure the second instance handle start address is 0x70000000.
Click
OK
to close the Target Driver Setup dialog.
Close the Options dialog.
Next, configure the project so that it also programs single combined image, which includes all three applications: secure CM33, non-secure CM33, and CM55. Do this using a *.ini file.
Create a new empty file named
program.ini
and save it inside the secure CM33 project directory.
Add a
LOAD
command with a path to the combined image:
LOAD ..\build\app_combined.hex
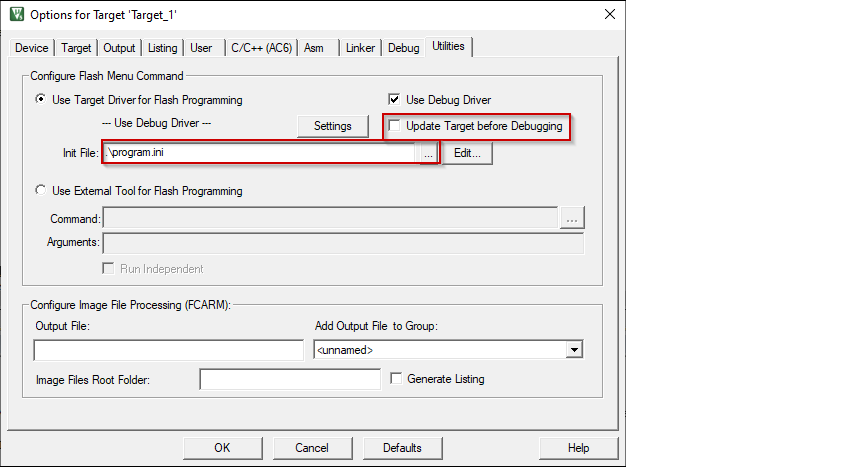
Open the Options dialog again and select the
Utilities
tab. Deselect the check box
Update Target before Debugging
and select the created
program.ini
file in the
Init File
field.
Close the Options dialog and save the project.