Managing project contents
Elements of a project – such as schematics, logs, or waveforms – can be deleted, renamed, copied, and managed in other ways.
Filtering workspace content
In large projects, it can be difficult to find the element you want to work with. This can be made easier by filtering the contents of the Workspace view.
To filter the content, click the Filter triangle below the workspace toolbar. This expands the filtering section of the
Workspace
view:

If you want to display only certain types of elements (such as schematics or symbols), check those element types. If you do not check any element types, all types of elements are displayed. (Note that project folders are always displayed, regardless of the checked options.)
If you want to display only elements with certain names, enter text into the text field below the checkboxes. Only elements are displayed whose names contain the entered text.
If you both check element types and enter text, only elements of the selected types with the specified text in their names are shown.
For example, these filter settings display only schematics whose names contains "v2":

Creating new elements
New elements are created via the buttons in the Workspace view toolbar. You can create schematics, libraries, symbols, and local components in this way.
Result folders of a project and the elements in them are created by running a simulation; they cannot be created manually. This applies to waveforms, netlists, and log files.
Deleting elements
Elements are deleted by right-clicking them and choosing
Remove
from the context menu.
It is not possible to delete individual elements of a result folder, but the result folder can be deleted as a whole.
Renaming elements
To rename an element, right-click it and choose
Rename
from the context menu. This opens the
New Name for Object
dialog:

Enter the desired name and click
OK
. Make sure not to change the filename extension when you rename an object.
You can rename schematics, libraries, symbols, and local components in this way. Result folders and their contents cannot be renamed.
Copying elements
To copy an element to another project, right-click the object and choose
Copy
from the context menu. This opens the
Copy File
dialog:
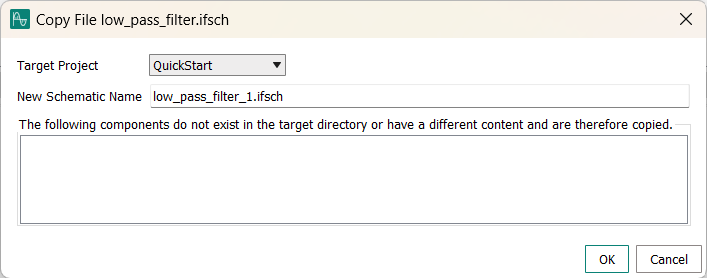
Choose the project to which you want to copy the element from the
Target Project
list and click
OK
. If you choose the same project from which you copying, the element is duplicated in its project.
Instead of right-clicking, you can also drag the element to the desired project. This opens the
Copy File
dialog with the target project already selected.
To copy multiple elements in one step, you can drag one project folder on top of another. This opens the
Copy Project
dialog:

Check the project elements that you want to copy to the target project, uncheck the elements that you do not want to copy, and click
OK
. All checked elements are copied.
Duplicating an element
A element can be duplicated by copying it to the project in which it is contained. See the description of copying element, above, for details.
Accessing the file of an element
If you want to access the file of an element, for example, for copying it to a different system or opening it with an external tool, you can do so by right-clicking it and choosing Show in File Explorer from the context menu. That opens the folder on disk that contains the file.