Debug configuration
To launch a multi-core debug session, all projects within the workspace must be properly configured. In IAR there is a concept of 'master' and 'slave' projects. Configure the secure CM33 or non-secure CM33 project as the master project, and configure the CM55 as the slave project.
Secure CM33 project
-
Select the secure CM33 project, open the Options dialog, and go to the Debugger category. Select the Setup tab, and then select the applicable Driver (I-jet, CMSIS-DAP, J-Link):

-
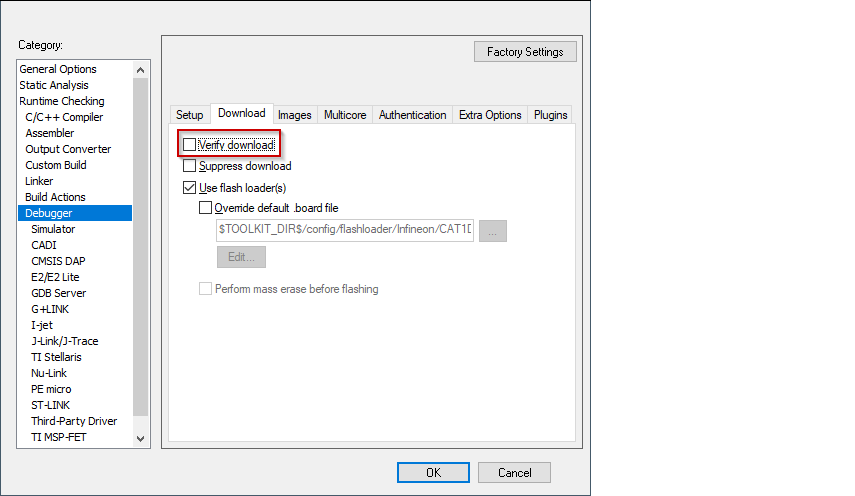
If any application (secure CM33, non-secure CM33, or CM55) needs to be programmed into external memory, switch to the Download tab and ensure the Verify check box is not selected.
-
If using CMSIS-DAP or I-jet, create a session configuration file. This is an xml file containing a projects list that will be launched in a multi-core debug session. The following shows an example for multi-core debug secure CM33 or non-secure CM33 and CM55 applications.
    <?xml version="1.0" encoding="utf-8"?>
    <sessionSetup>
        <partner>
            <name>Partner0</name>
            <workspace>$WS_PATH$</workspace>
            <project>$PROJ_PATH$</project>
            <config>Debug</config>
            <numberOfCores>1</numberOfCores>
        </partner>
        <partner>
            <name>Partner1</name>
            <workspace>$WS_PATH$</workspace>
            <project>cm55</project>
            <config>Debug</config>
            <numberOfCores>1</numberOfCores>
            <attachToRunningTarget>true</attachToRunningTarget>
        </partner>
    </sessionSetup>
-
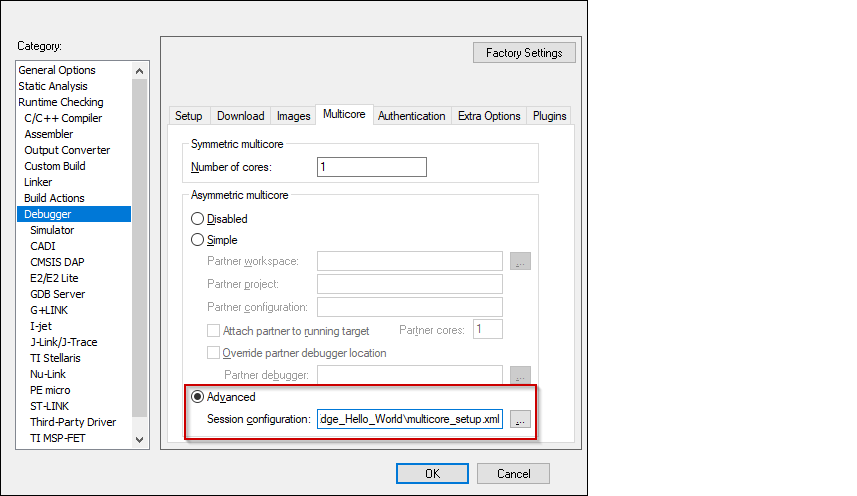
Switch to the Multicore tab, select the Advanced radio button, and specify a path to the session configuration file in the Session configuration field.
-
Select the driver for the Debugger category that you selected:
CMSIS-DAP
-
Switch to the Setup tab and select "Custom" from the Reset pull-down menu.

-
Switch to the Interface tab, and select Interface SWD, and set the Interface speed to 1MHZ.

I-jet
-
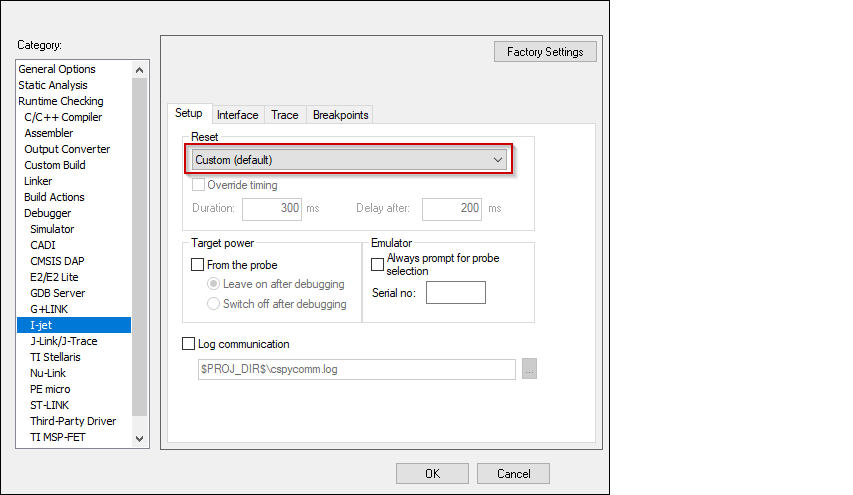
Switch to the Setup tab and select "Custom" from the Reset pull-down menu.
-
Switch to the Interface tab, and select Interface JTAG or SWD, and set the Interface speed to 1MHZ.

J-Link
-
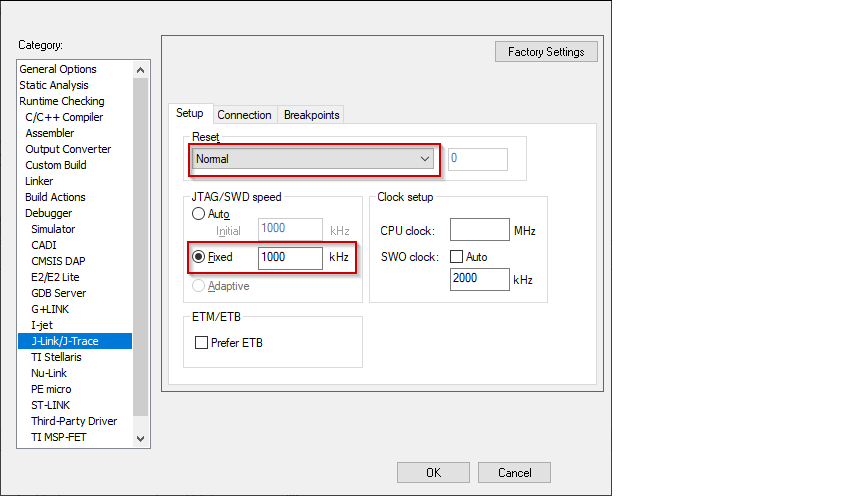
Switch to the Setup tab and select "Normal" from the Reset pull-down menu and set the JTAG/SWD speed to Fixed 1000 KHz.
-
Switch to the Connection tab, and select Interface JTAG or SWD.

-
-
Click OK to close the Options dialog.
Non-secure CM33 project
-
Select the non-secure CM33 project, open the Options dialog, and go to the Debugger category. Select the Setup tab, and then select the applicable Driver (I-jet, CMSIS-DAP, J-Link):
-
If using CMSIS-DAP or I-jet, switch to the Multicore tab and select the Advanced radio button. Then, specify the path to the session configuration file (same file created for Secure CM33 project ) in the Session configuration field.
-
Open the .map file of the secure CM33 application (usually located in the \proj_cm33_s\Debug\List folder) and find the address in it that corresponds to the symbol
__vector_table.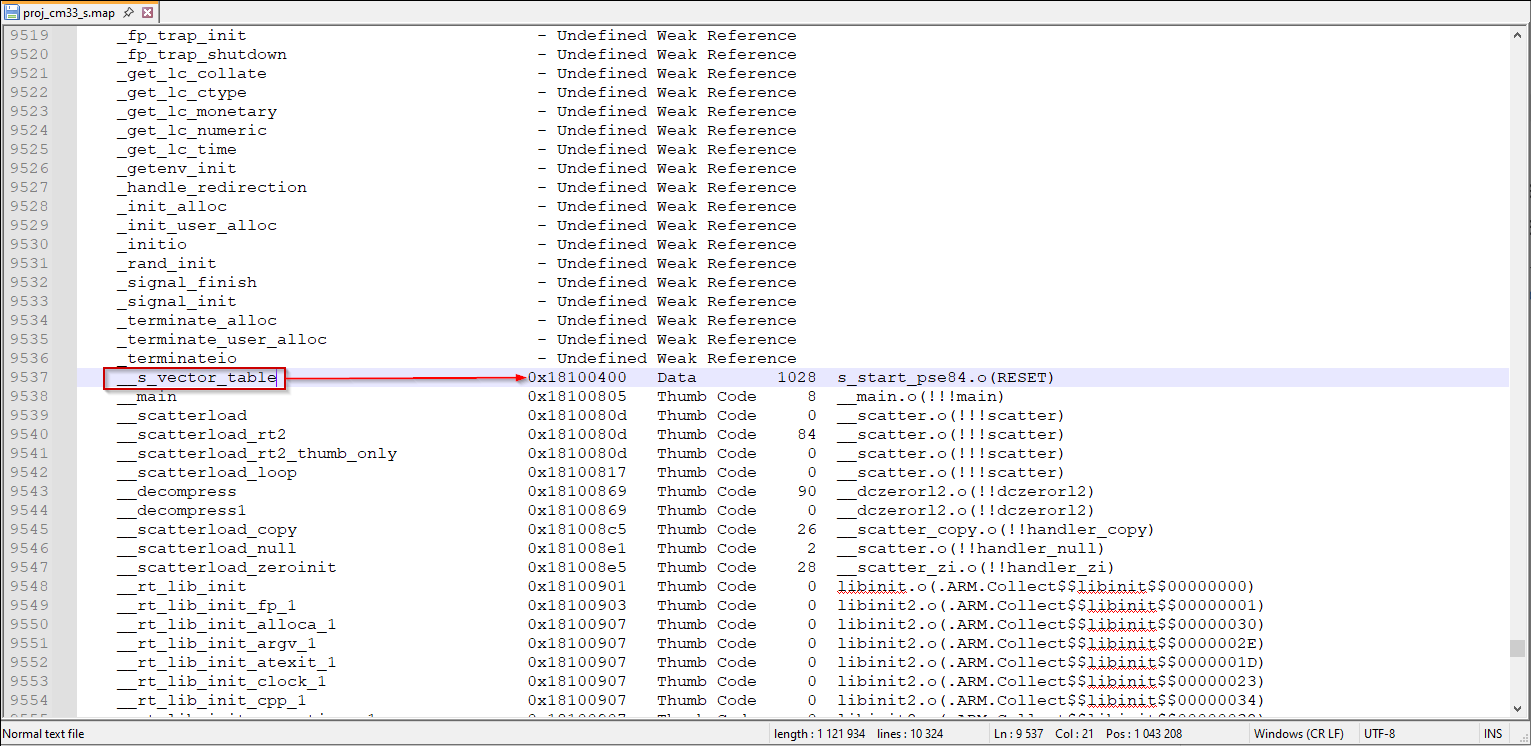
-
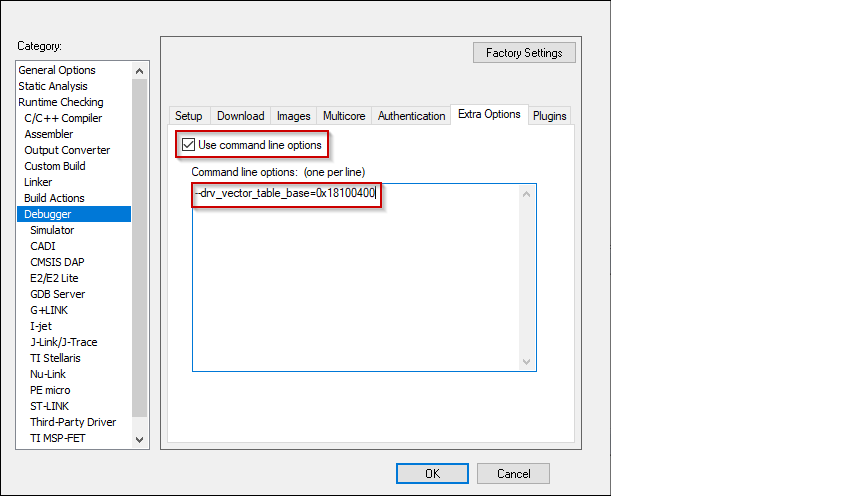
Switch to the Extra Options tab, select the Use command line options check box, and paste the following command-line parameter, specifying the actual address found for
__vector_table. symbol in the .map file.
--drv_vector_table_base=0x18100400
-
Select the driver for the Debugger category that you selected:
CMSIS-DAP 1. Switch to the Setup tab and select "Custom" from the Reset pull-down menu.
-
Switch to the Interface tab, and select Interface SWD, and set the Interface speed to 1MHZ.
I-jet 1. Switch to the Setup tab and select "Custom" from the Reset pull-down menu.
-
Switch to the Interface tab, and select Interface JTAG or SWD, and set the Interface speed to 1MHZ.
J-Link 1. Switch to the Setup tab and select "Normal" from the Reset pull-down menu and set the JTAG/SWD speed to Fixed 1000 KHz.
-
Switch to the Connection tab, and select Interface JTAG or SWD.
-
-
Click OK to close the Options dialog.
CM55 project
-
Select the CM55 project, open the Options dialog, and got to the Debugger category. Select the Setup tab, and then select the applicable Driver (I-jet, CMSIS-DAP, J-Link):
-
Select the driver for the Debugger category that you selected:
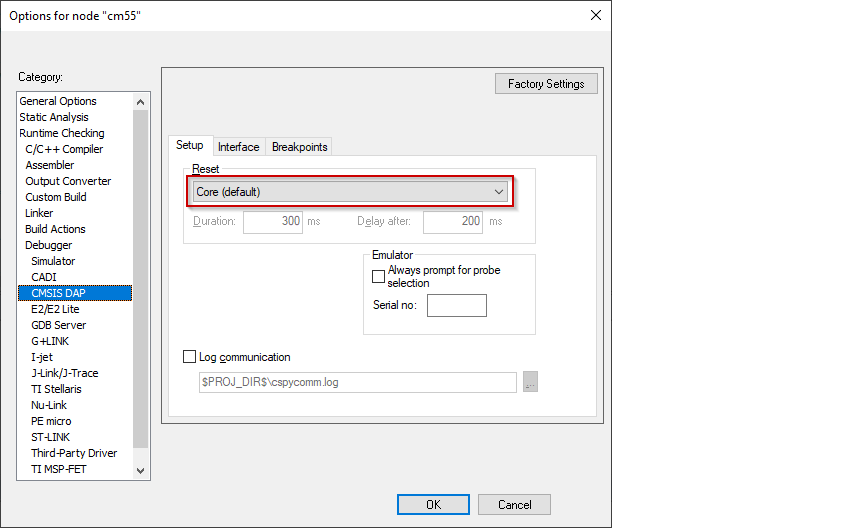
CMSIS-DAP 1. Switch to the Setup tab, and select "Core" from the Reset pull-down menu.
-
Switch to the Interface tab, and select Interface SWD, and set the Interface speed to 1MHZ.
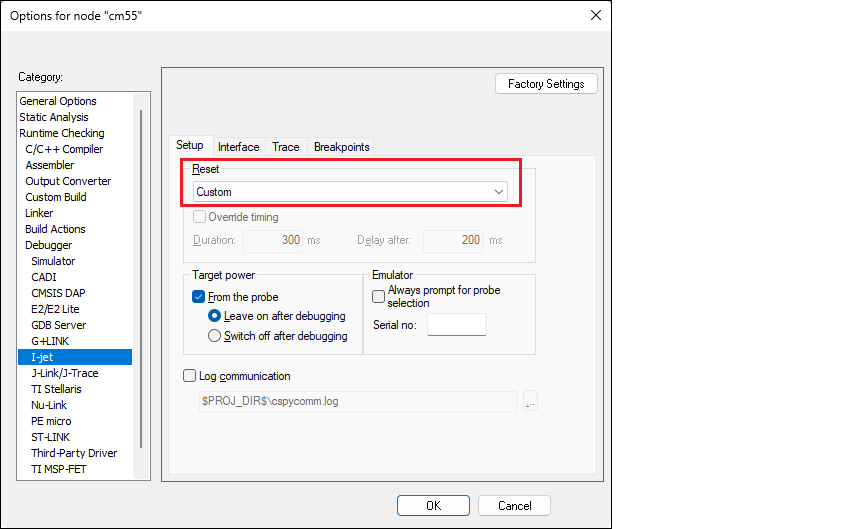
I-jet 1. Switch to the Setup tab, and select "Custom" from the Reset pull-down menu.
-
Switch to the Interface tab, and select Interface JTAG or SWD, and set the Interface speed to 1MHZ.
J-Link 1. Switch to the Setup tab and select "Normal" from the Reset pull-down menu and set the JTAG/SWD speed to Fixed 1000 KHz.
-
Switch to the Connection tab, and select Interface JTAG or SWD.
-
-
Click OK to close the Options dialog.
Secure debug configuration (optional)
The BootROM on the PSOC™ Edge can temporarily disable access to the core's AP. This behavior is determined by the security policy during device provisioning. However, access can be re-enabled using a debug certificate. If a debugger identifies that the AP is disabled, it will upload and verify the certificate found in the "packets/debug_token.bin" file within the current project folder. You can provide a non-default path to the certificate in the debug macro by using the --macro_param option.
-
Select the secure CM33 project, open Options dialog, and go to the Debugger category.
-
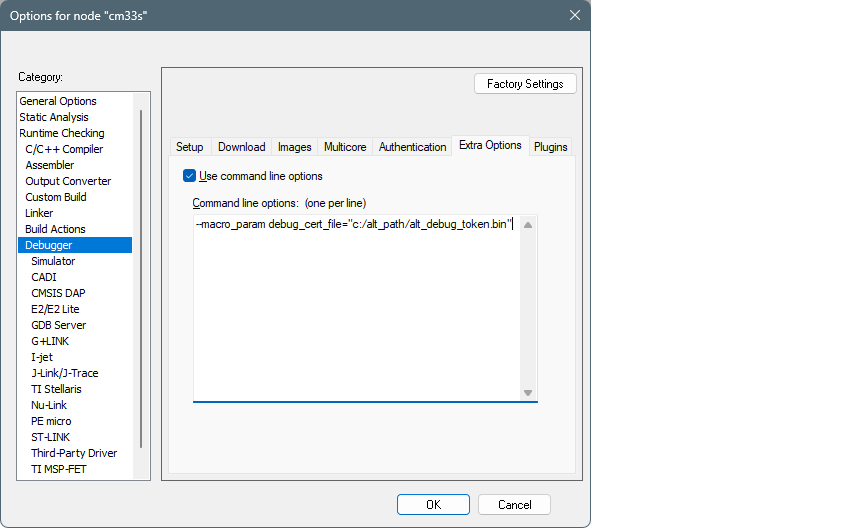
Select the Extra Options tab and the Use command line options check box.
-
Paste the following command-line parameter, specifying the actual path to the certificate.
--macro_param debug_cert_file="c:/alt_path/alt_debug_token.bin"
-
Click OK to close the Options dialog.
-
Perform the same modifications for non-secure CM33 and CM55 projects.