Workspace view
The Workspace view at the top left of the design environment contains all folders, projects, schematics, libraries, symbols and components, netlists and logs. This is the storage or directory from which to navigate.
Workspace icons ![]() create:
create:
 | New Project |
 | New Schematic File name suffix is .ifsch |
 | New Library File name suffix is .lib |
 | New Symbol |
 | New Local Component |
Workspace
The workspace contains for example
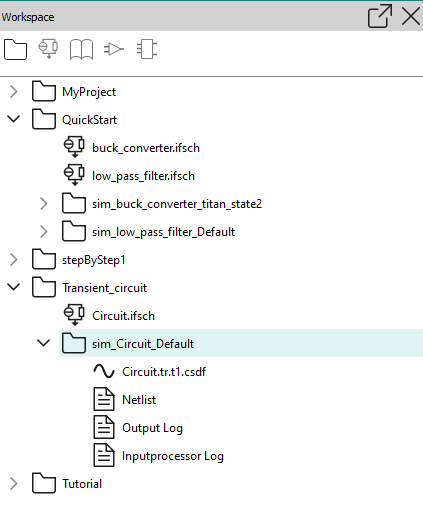
Project logs
Each project also contains a folder that includes the waveform, Netlist, Output Log and Input processor. The Netlists and waveform can also be found in the
Simulation Environment
. These are described in
Simulation Environment view
If you double-click a log file in the Workspace view, it opens in the Output view’s Log Summary tab. You can filter the tab’s content by message category.
The Output view’s Messages tab contains a list of status messages that were generated while executing the simulation. At the bottom of the window, the Output view provides feedback from the system.
The Output gives messages as well as Log Summary.
The messages are given in the form of text.
The Log Summary is given in the form of a table that includes Info,Warning,Error,Severe,Fatal.
Click on any one of the headings to select or deselect.
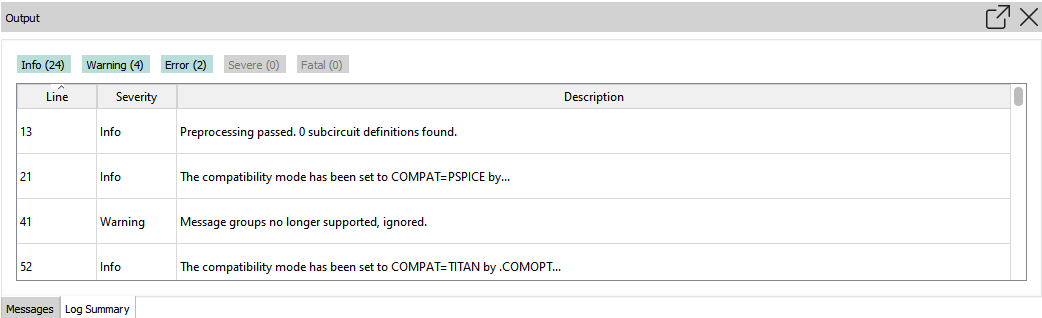
Line
: The number refers to the line in the
Inputprocessor Log
for the simulation.
Info
: message is treated as information.
Warning
: message is treated as a warning.
Error
: message is treated as an error, continue with next analysis.
Severe
: message is treated as a severe error, continue with next alteration (if there is one)
Fatal
: message is treated as a fatal error, abort simulation