PSOC™ Control C3 application
Follow instructions in Create/export application for Keil µVision. At the end of the process, you should see messages in the console. For a PSOC™ Control C3 device, one of the messages should read as follows:
The project is an ARM Trustzone secure project. Check the uVision IDE Project->Options->Target->Software Model to ensure "Secure" is enabled.
or
The project is an ARM Trustzone non-secure project. Check the uVision IDE Project->Options->Target->Software Model to ensure "Non-Secure" is enabled.
In most cases, PSOC™ Control C3 applications are set to Trust Zone Secure by default. For more details about TrustZone technology, refer to the Arm® website: https://www.arm.com/technologies/trustzone-for-cortex-m.
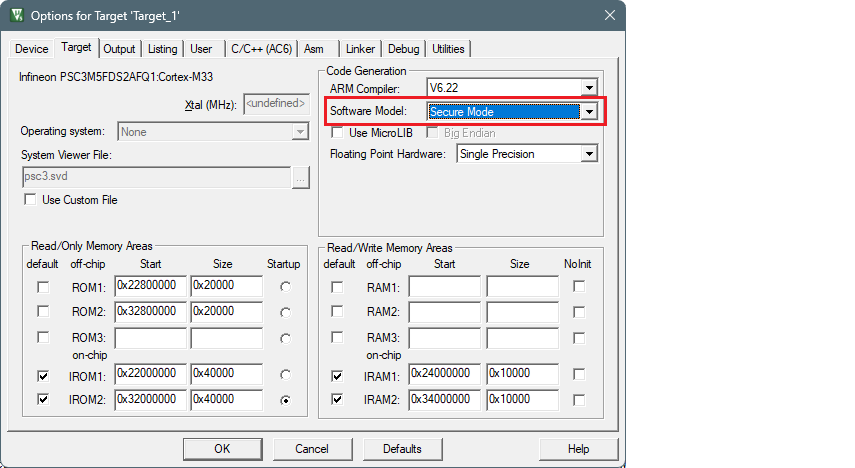
When you open the application in Keil µVision, you need to check the TrustZone setting. Open the Options for Target dialog, select the Target tab, and ensure the Software Model option is set to "Secure Mode".
Save the application and select Project > Build Target to build it. The Output should display the progress, ending with text similar to this:
linking...
bsps/TARGET_APP_KIT_PSC3M5_EVK/TOOLCHAIN_ARM/linker_s_flash.sct(107): warning: L6329W: Pattern *(.cy_sharedmem) only matches removed unused sections.
bsps/TARGET_APP_KIT_PSC3M5_EVK/TOOLCHAIN_ARM/linker_s_flash.sct(113): warning: L6314W: No section matches pattern *(Veneer$$CMSE).
Program Size: Code=16902 RO-data=1438 RW-data=312 ZI-data=64844
Finished: 0 information, 2 warning and 0 error messages.
".\Hello_World_Objects\Hello_World.axf" - 0 Error(s), 2 Warning(s).
Build Time Elapsed:  00:00:22
In addition to the TrustZone technology from Arm, PSOC™ Control C3 devices have various security life cycle stages (LCS). For more details about security, refer to Application Note AN240106 - Getting started with PSOC™ Control C3 security.
The following sections provide details about working with a device with the default out of the box policy versus a device that has been provisioned.
Device with default policy
Devices are shipped with a default policy, so you can develop and debug your application repeatedly without any knowledge about security or code signing. This is also referred to as Development LCS. In order to create a valid hex file for programming and debugging in this state, we must configure the application
- Create a program.ini file in the root directory of the project with the following content:
LOAD $L%L 0x20000000
The primary purpose of this is to provide a LOAD command needed for programming. The 0x20000000 part shifts the application image from the C-Bus region to the S-Bus region. This is done because the ARM compiler attempts to copy the Load Region to the Execution Region, which is read-only.
- Create a debug.ini file in the root directory of the project with the following content:
    LOAD $L%L NOCODE CLEAR INCREMENTAL
    g, main
This provides a LOAD command needed for debugging.
-
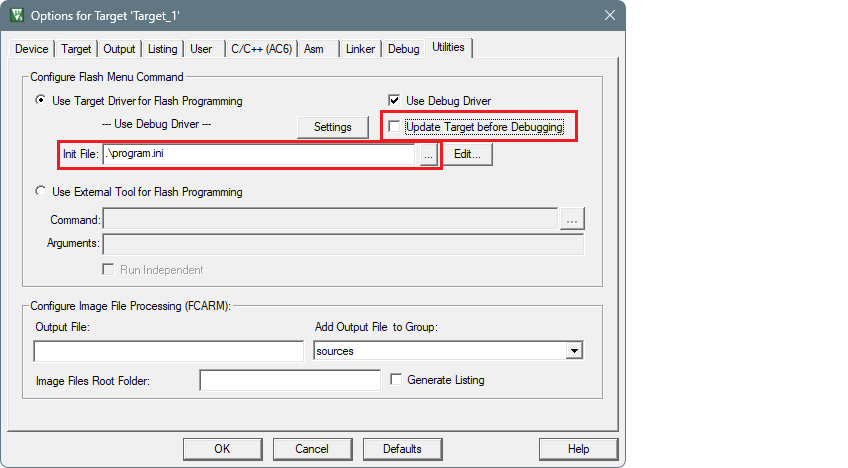
Open the Options dialog to the Utilities tab, deselect the Update Target before Debugging check box, and select the program.ini file in the Init File field:
-
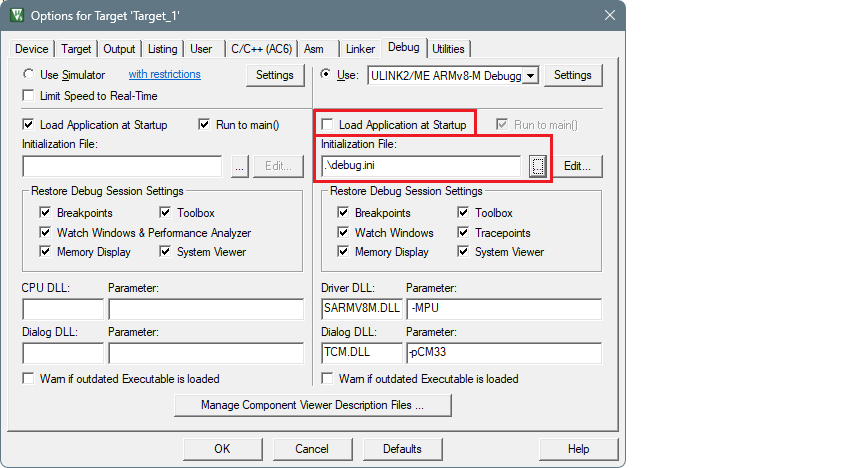
Switch to the Debug tab. Make sure that the Load Application at Startup check box is not checked.
-
Select the debug.ini file in the Initialization File field:
-
Click OK to close the Options dialog.
-
Select Project > Build Target to build the application and execute post-build commands.
-
Configure the applicable debugger settings. See Miscellaneous notes .
-
To program the device, select Flash > Download .
-
To start the debugger, select Debug > Start/Stop Debug Session .
Provisioned device
If you plan to work with a provisioned device, use the Basic Secure App. This example automates the signing steps through the ide_postbuild.bat script, which is generated automatically when you export the project (see Create/export ModusToolbox™ application).
Change the program.ini file or create a new one with the following content:
LOAD $L\..\build\APP_KIT_PSC3M5_EVK\Debug\mtb-example-ce240783-secureboot.hex
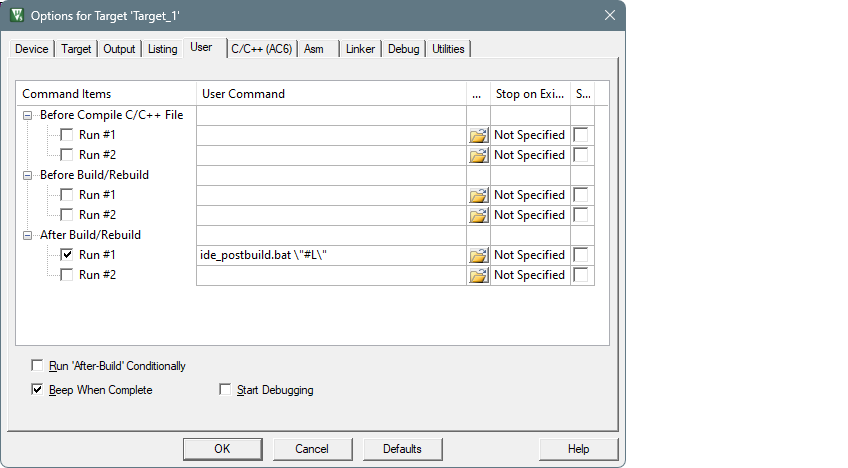
Open the Options dialog to the User tab and enable the Run #1 check box under After Build/Rebuild. Then, enter ide_postbuild.bat \"#L\".
All other configuration steps are the same as those in Device with default policy.
Build the application. The post-build script will handle the signing process for you. After a successful build, you can program the device and start a debugging session.
For more details on device provisioning and hex file signing, refer Application Note AN240106 - Getting started with PSOC™ Control C3 security.