Miscellaneous notes
This chapter contains miscellaneous notes that may be applicable to any device:
- Supported debugger probes
- To use KitProg3/MiniProg4, CMSIS-DAP, and ULINK2 debuggers
- To use J-Link debugger
- Suppress linker build warnings
- Empty defines
- Patched flashloaders
- Perform ETM/ITM trace
Supported debugger probes
- KitProg3 on-board programmer
- MiniProg4
- ULINK2 in CMSIS-DAP mode
- J-Link
To use KitProg3/MiniProg4, CMSIS-DAP, and ULINK2 debuggers
-
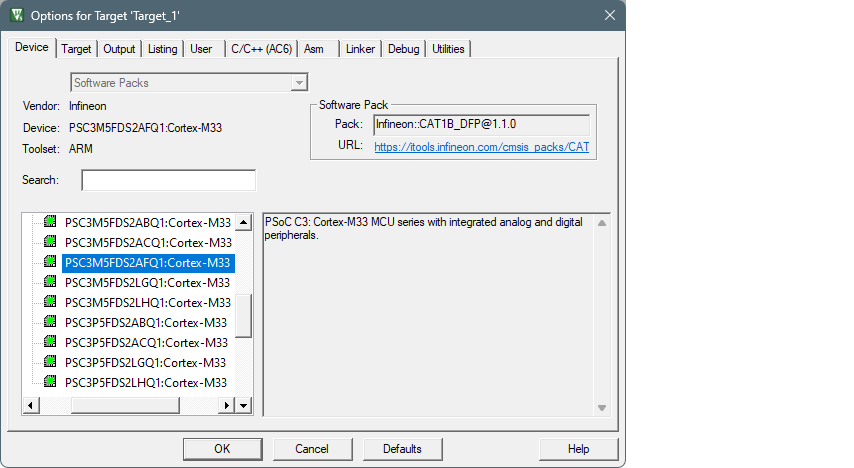
Select the Device tab in the Options for Target dialog and check correct core is selected:
-
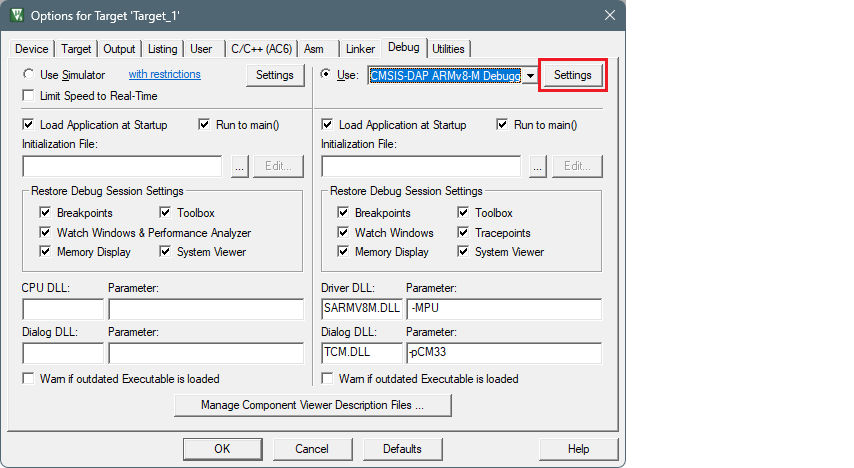
Select the Debug tab.
Note: To use the ULINK2 probe for multi-core debugging, select the CMSIS-DAP Debugger instead of ULink for each core of the project (CM4 and CM0P).
-
Click the Settings button.
-
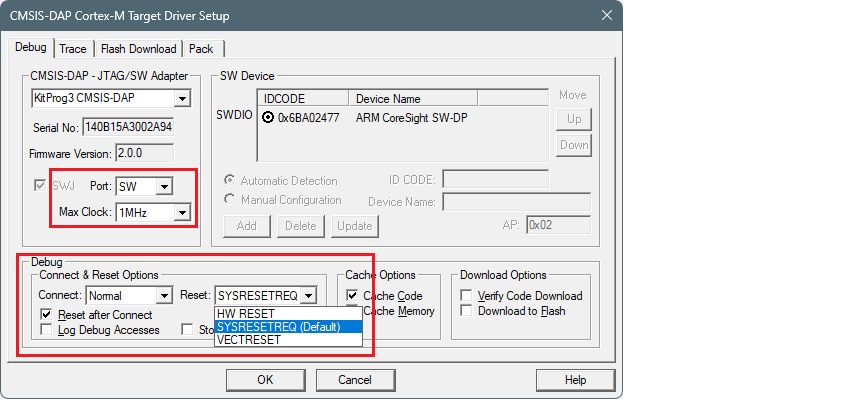
On the Target Driver Setup dialog on the Debug tab, select the following:
-
set Port to "SW"
-
set Max Clock to "1 MHz"
-
set Connect to "Normal"
-
set Reset :
- For PSOC™ 6, to "VECTRESET"
- For PSOC™ 4, PMG1, and AIROC™ CYW208xx, to "SYSRESETREQ"
- For other devices, leave as is.
-
enable Reset after Connect option
-
-
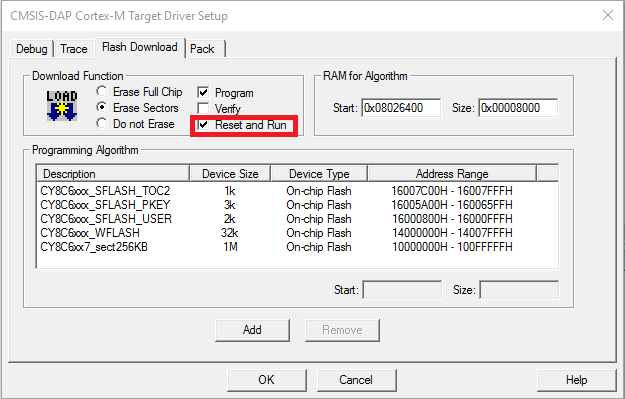
Select the Flash Download tab and select "Reset and Run" option after download, if needed:
-
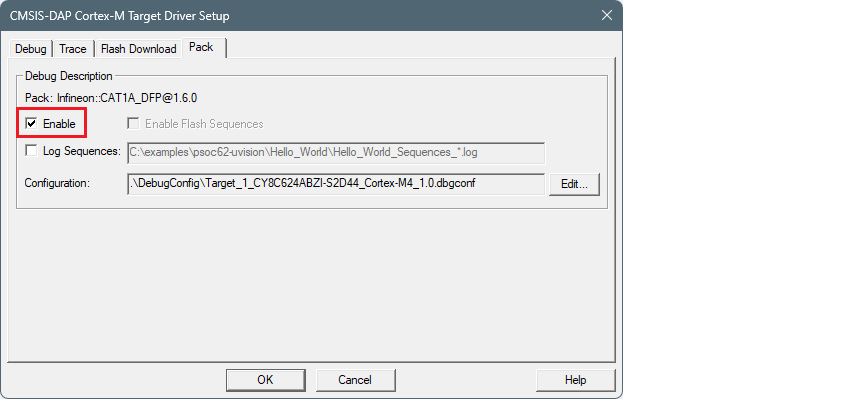
Select the Pack tab and check if the appropriate "DFP" is enabled:
To use J-Link debugger
-
Make sure you have J-Link software version 8.12 or newer.
-
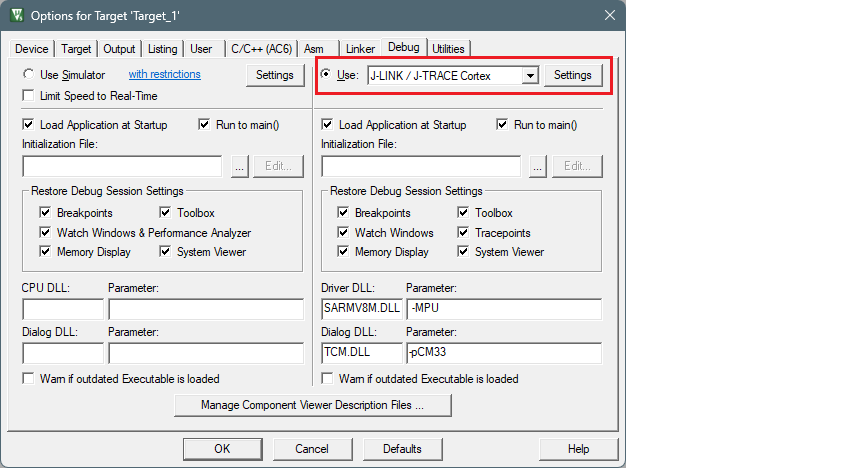
Select the Debug tab in the Options for Target dialog, select J-LINK / J-TRACE Cortex as debug adapter, and click Settings :
-
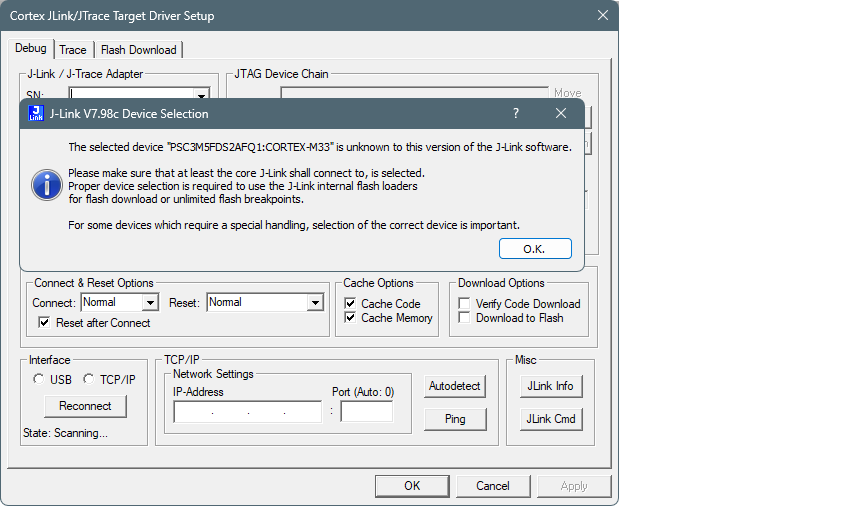
If you see the following message, click OK in the Device selection message box:
-
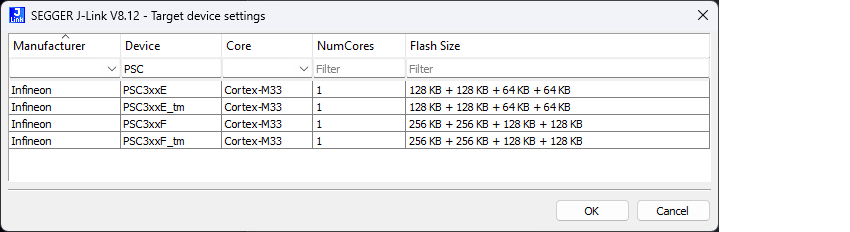
Select the appropriate device in the Target device settings and click OK .
-
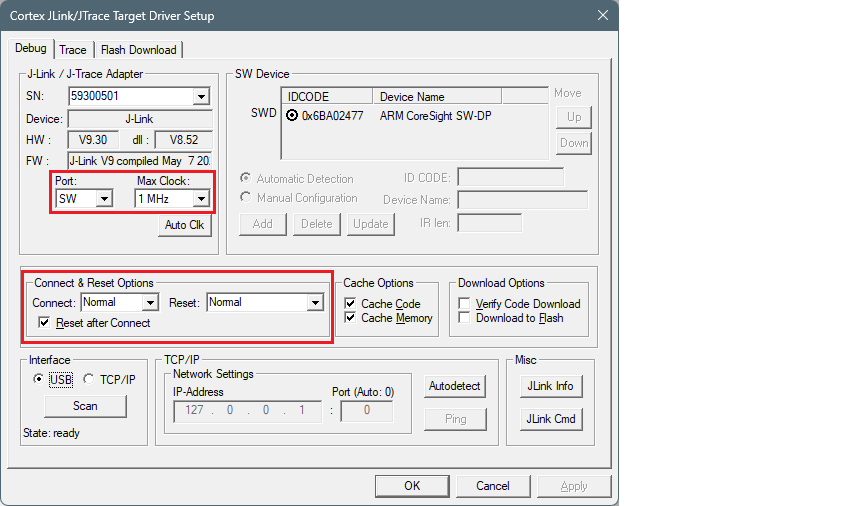
Go to the Debug tab in Target Driver Setup dialog and select:
- set Port to "SW"
- set Max Clock to "1 MHz"
- set Connect to "Normal"
- set Reset to "Normal"
- enable Reset after Connect option
-
Select the Flash Download tab in Target Driver Setup dialog and select Reset and Run option after download if needed:

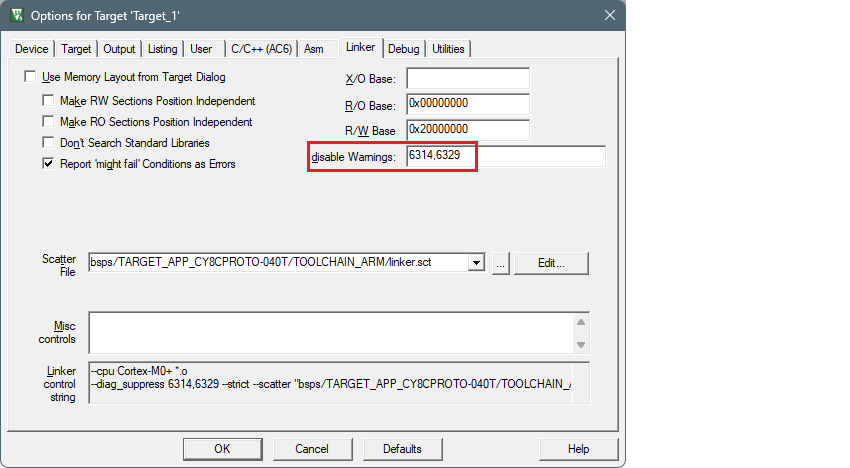
Suppress linker build warnings
Often when building an application in uVision, you will see various warnings about unused sections defined in the linker scripts, such as:
warning: L6314W: No section matches pattern EXCLUDE(*cy_smif.*).
To suppress these warnings, add "6314,6329" to the disable Warnings setting in the Options Linker tab.
Empty defines
There is a known issue in Keil µVision with empty defines. When you try to build an application, you may see an error similar to this:
error: You now need to define either
FIXED_POINT or FLOATING_POINT
To fix this, make sure empty defines are quoted. For example:
DEFINES+=FLOATING_POINT EXPORT=" " USE_CMSIS_DSP \
Patched flashloaders
Step 1: Identify the CMSIS Pack and FLM file
-
Determine the name and version of the CMSIS Pack containing the FLM file you want to overwrite (for example, AIROC_DFP.1.2.0 ).
-
Identify the name of the patched flashloader (the FLM file) you want to overwrite (for example, CYW208xx_SMIF.FLM ). This file is located in the [app-dir]\bsps[Kit-Name]\config\GeneratedSource directory.
Step 2: Locate the destination FLM file
-
Open File Explorer and navigate to the directory: %LocalAppData%\Arm\Packs[Pack_Name][Version]\Flash
-
Replace [Pack_Name] with the name of the CMSIS Pack (for example, Infineon\AIROC_DFP ) and [Version] with the version number of the CMSIS Pack (for example, 1.2.0 ).
-
In this directory, find the file named [FLM_File_Name].FLM (for example, CYW208xx_SMIF.FLM ).
Step 3: Overwrite the FLM file
-
Ensure that Keil µVision and any other applications using the FLM file are closed.
-
Replace the destination [FLM_File_Name].FLM file with the patched one you want to use.
-
Make sure to keep the same file name and extension (.FLM) to avoid any issues.
When using J-Link with µVision, the flashloaders will be taken from the CMSIS DFP. So, there is no need to replace flash loaders in SEGGER J-Link software.
Perform ETM/ITM trace
For PSOC™ Control and PSOC™ Edge devices, refer to application note AN242338 - Performing ETM and ITM trace on PSOC™ Control С3 and PSOC™ Edge E8 MCUs.
For PSOC™ 6 devices, refer to application note AN235279 - Performing ETM and ITM trace on PSOC™ 6 MCU.