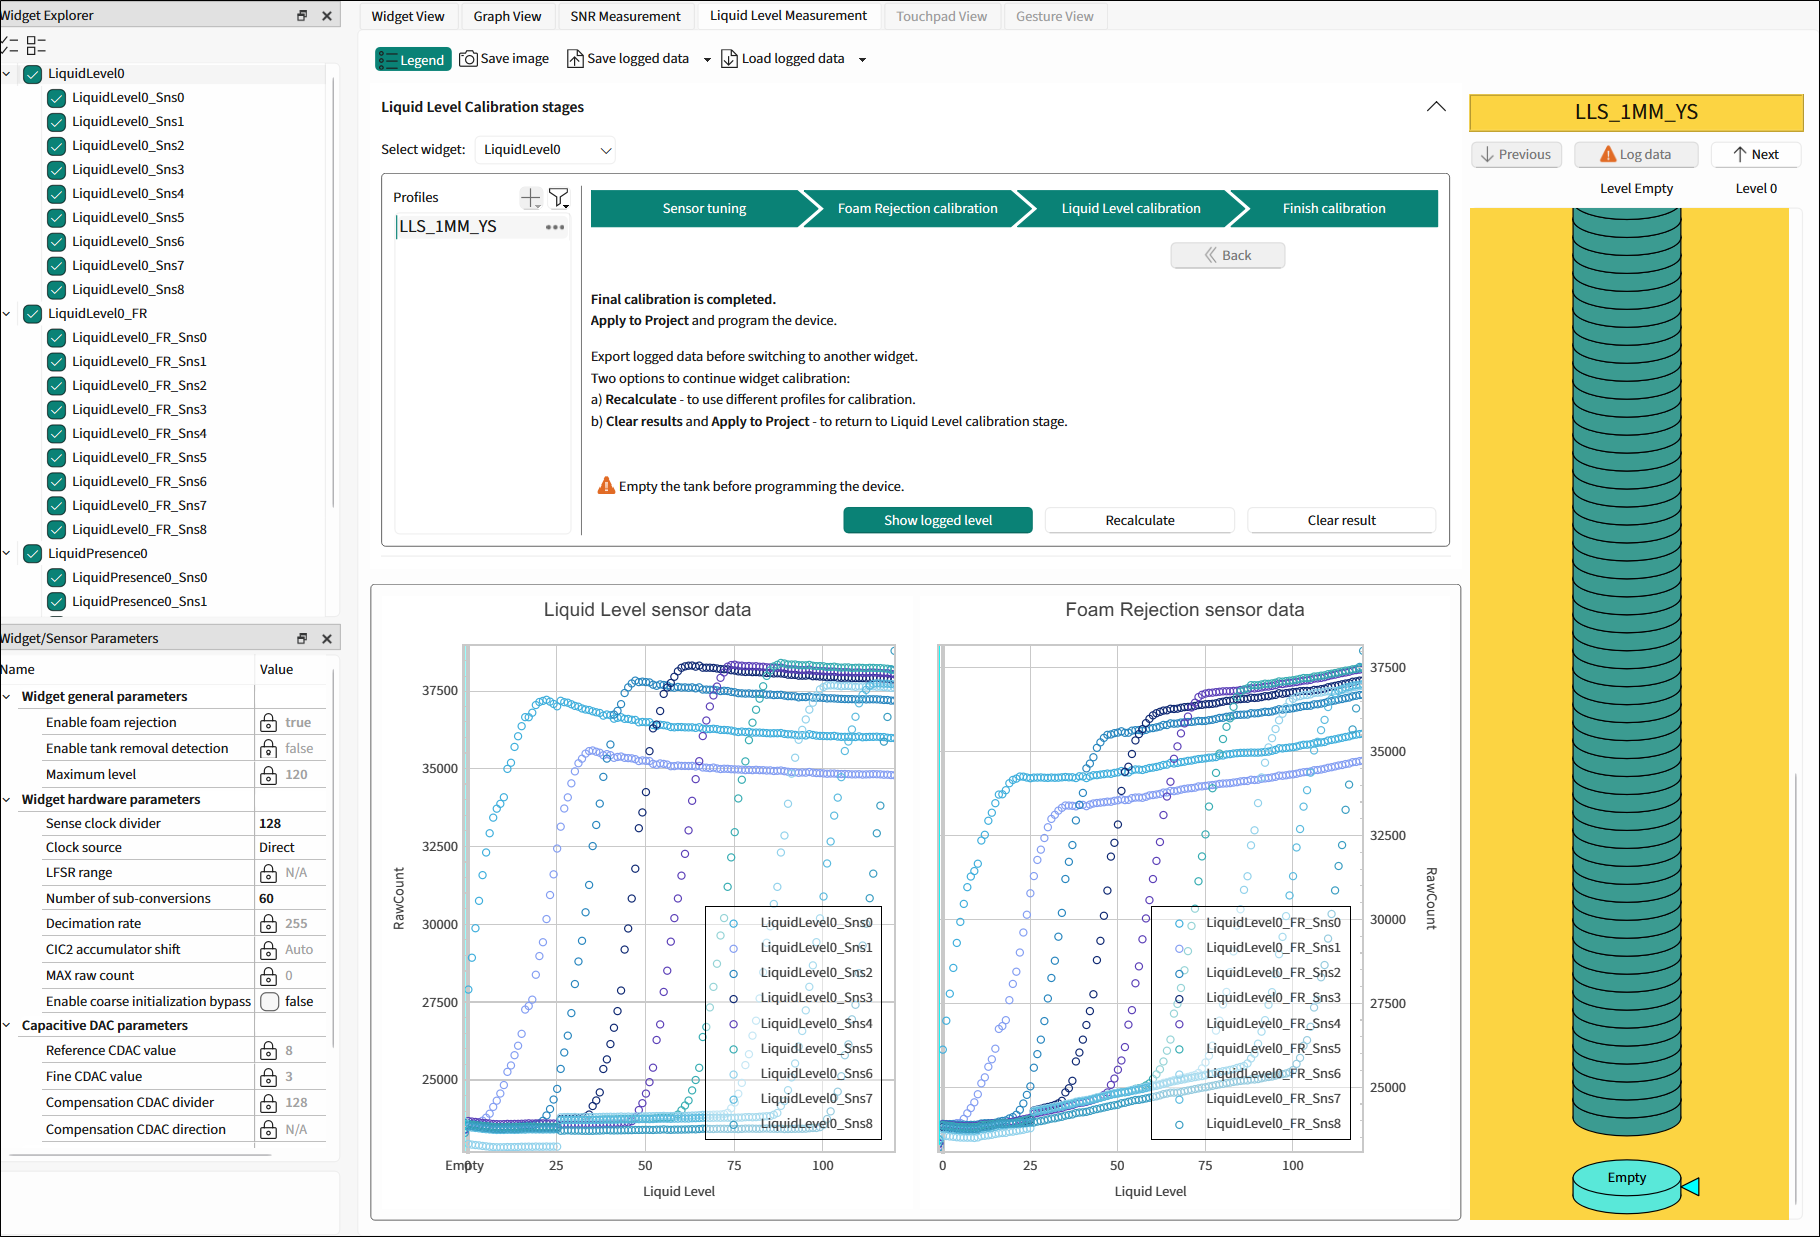
Liquid Level Measurement tab
The Liquid Level Measurement tab allows measuring high-resolution liquid levels based on the captured data. The tab provides the user interface to input the minimum step resolution and the total depth of the tank to measure. The Tuner calculates these parameters. Start with selecting a Liquid Level widget on Widget Explorer pane.
For a detailed description of the liquid level measurement and calibration process, refer to AN239805.
The toolbar is described in Tabs toolbars.
The tab contains the following panes: Liquid Level Calibration, Graph chart (LL), and Illustration of Liquid Level calibration.
The Liquid Level Measurement tab allows you to:
-
measure the liquid level for different profiles for
-
Liquid Level widget
-
Liquid Level with foam rejection – check Enable foam rejection in the CAPSENSE™ Configurator (Widget details tab→Widget general parameters)
The procedure is described in the Liquid Level Calibration and Calibration stages.
-
-
detect the presence or absence of liquid with the Liquid Presence widget
-
detect whether the tank has been removed – check Enable tank removal detection in the CAPSENSE™ Configurator (Widget details tab→Widget general parameters).
Note: The tank removal detection option enabled for the Liquid Level widget will also apply to the Liquid Level with foam rejection.
Any changes in the configuration require re-programming the device before calibration.
Liquid Level Calibration
The Liquid Level Calibration pane contains the Profiles tree and the stages to perform the Liquid Level calibration: **Sensor tuning, ****Foam Rejection calibration, ****Liquid Level calibration **, and Final calibration. See Calibration stages for detailed instructions.
**Select widget: **Select a widget from the list of available widgets.
Profiles
On the Profiles pane, you can add a new profile with the same or a new unit using the icons
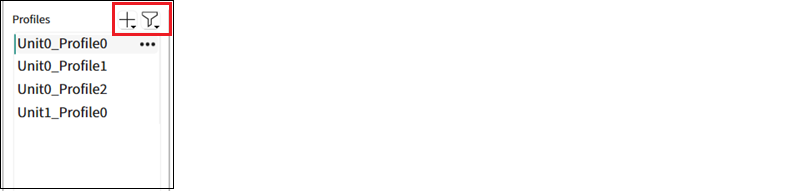
and sort the profiles by clicking "...".Use the Back and Forward buttons to switch between the stages.
Calibration stages
Stage 1: Sensor tuning
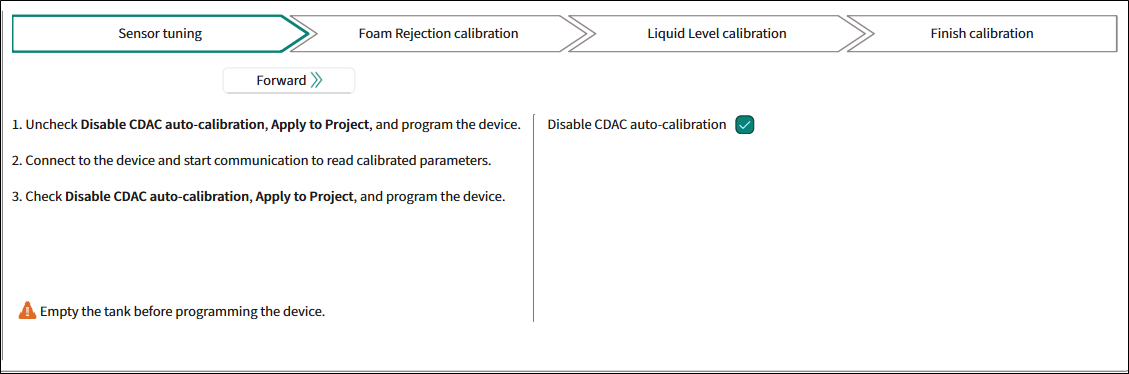
Instructions:
-
Uncheck Disable CDAC auto-calibration , Apply to Project , and program the device.
-
Connect to the device and start communication to read calibrated parameters.
-
Check Disable CDAC auto-calibration, Apply to Project , and program the device.
The parameter: Disable CDAC auto-calibration
Warning: "Empty the tank before programming the device."
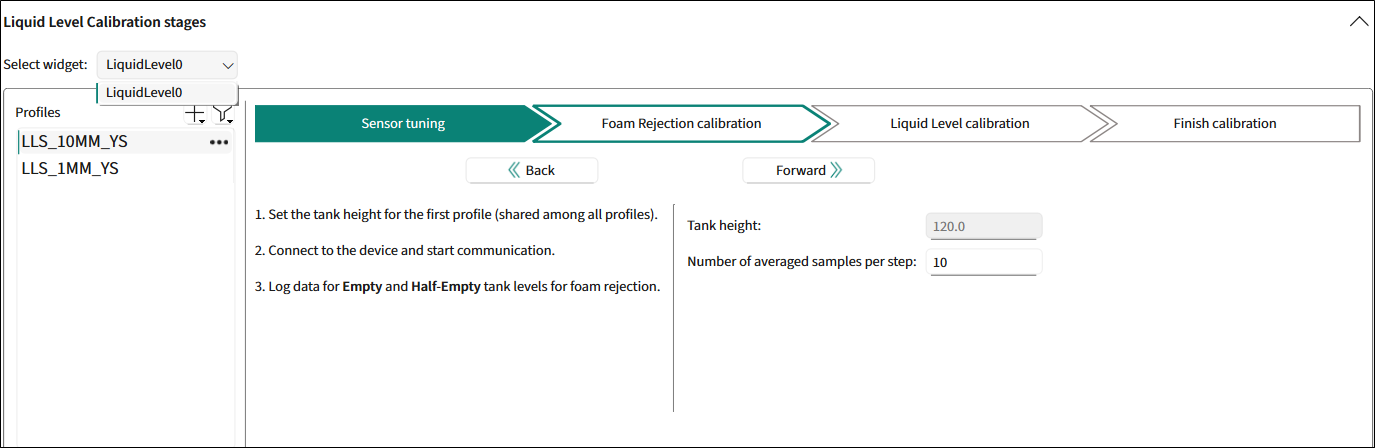
Stage 2: Foam Rejection calibration
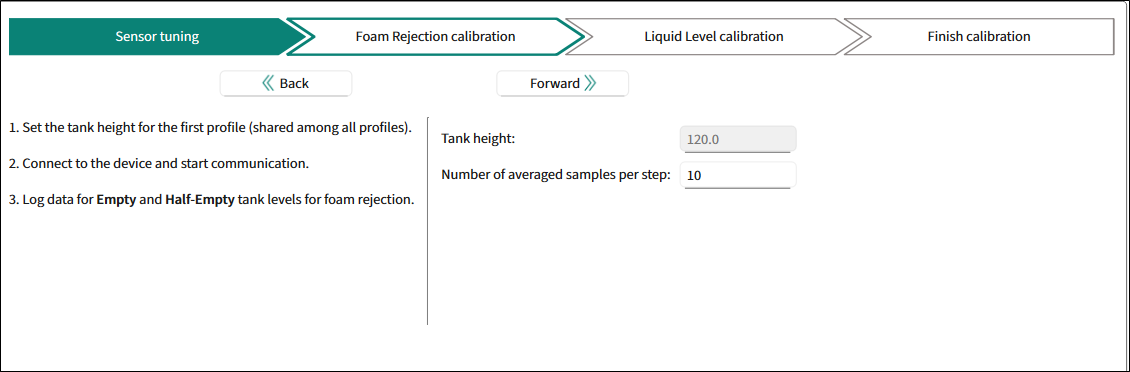
Instructions:
- Set the tank height for the first profile (shared among all profiles).
- Connect to the device and start communication.
- Log data for each liquid level starting with Empty and Half-Empty tank levels for foam rejection.
The parameters:
-
Tank height - The height of the tank. Range: 30-1000.
-
Number of average samples per step - The number of samples per measurement level. Range: 1-1000.
Stage 3: Liquid Level calibration
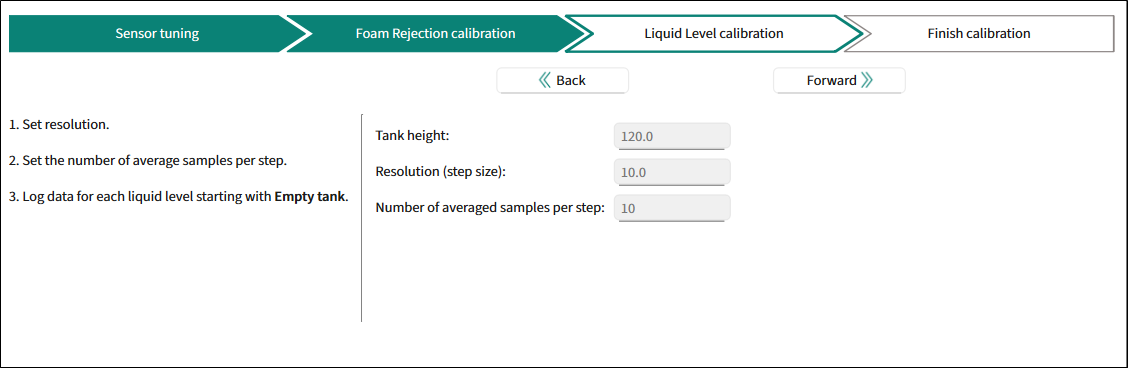
Instructions:
- Set the resolution.
- Set the number of average samples per step.
- Log data from each level starting with Empty tank.
The parameters:
-
Tank height - The height of the tank. Range: 30-1000.
-
Resolution (step size) - The resolution of measurement. Range: 0.1-1000.
-
Number of average samples per step - The number of samples per measurement level. Range: 1-1000.
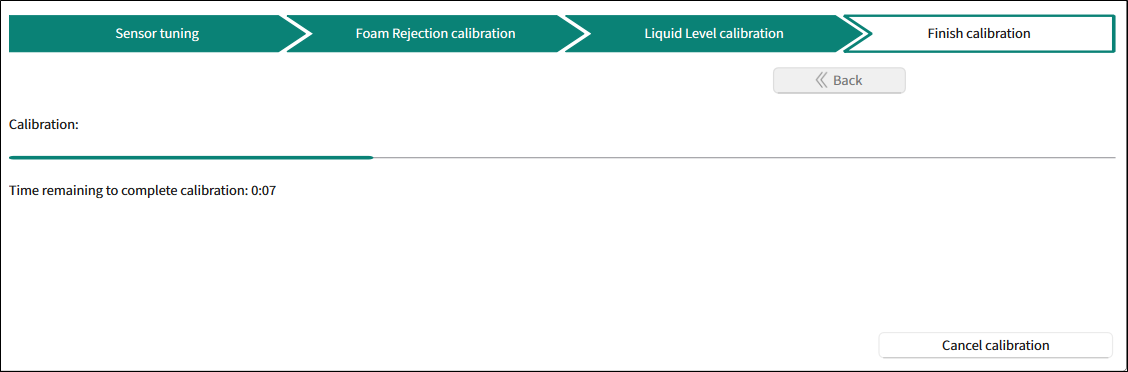
Stage 4: Finish calibration
The active profile is ready for the final widget calibration.
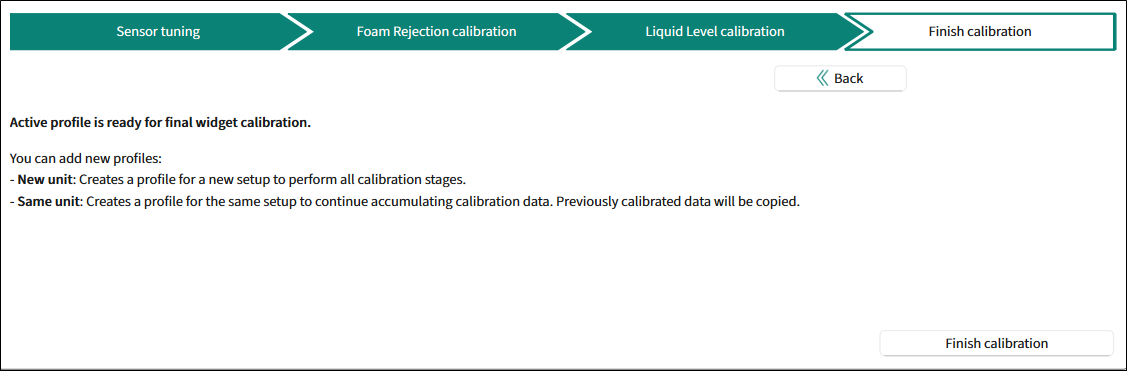
Instructions:
-
You can add new profiles:
-
New unit: Creates a profile for a new setup to perform all calibration stages.
-
Same unit: Created a profile for the same setup to continue accumulating calibration data. Previously calibrated data will be copied.
The procedure is described in the Liquid Level Calibration and Calibration stages.
-
Click the **Final calibration ** button. The dialog "Calibration options" displays.
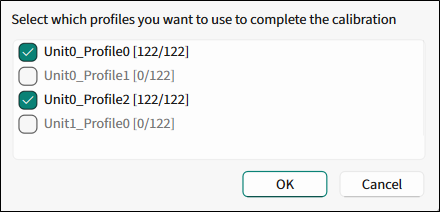
Note: A profile is considered valid if data is logged for: - Empty and one level
-
No tank if the tank removal detection is enabled
-
Select profiles.
The Tuner starts the Calibration process.
Stage 5: Final calibration completed
The Final calibration stage is completed.
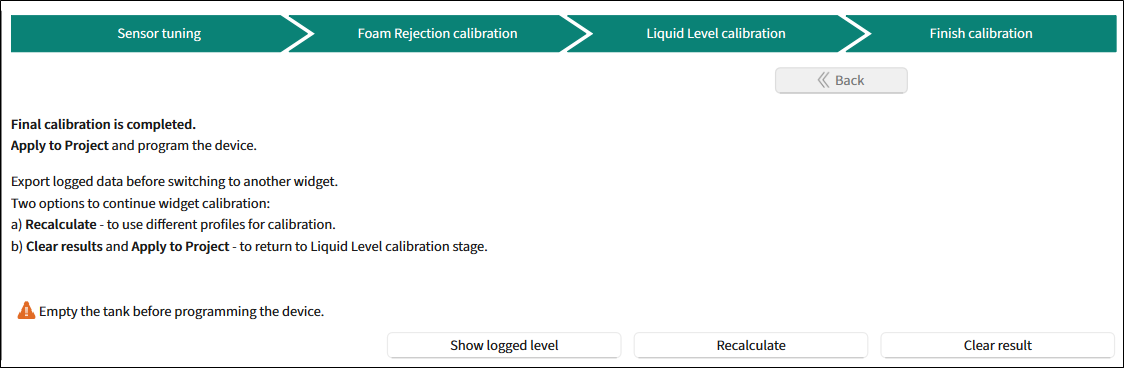
Instructions:
-
Apply to Project and program the device.
-
Export logged data before switching to another widget.
-
The options to continue the widget calibration:
- Recalculate - to use different profiles for calibration.
- Clear results and ** Apply to Project** - to return to the Liquid Level calibration stage.
Warning: "Empty the tank before programming the device."
- Show logged level , Recalculate , Clear results - use these buttons for relevant actions.
Illustration of Liquid Level calibration
This pane is the graphical illustration of the calibration process. The current level (tank) is indicated by the triangle.
The images reflect the tank filling at different stages: Empty, Half-Empty. If the tank has been removed, No Tank image displays.
| Foam Rejection calibration | Liquid Level calibration | No tank detected |
|---|---|---|
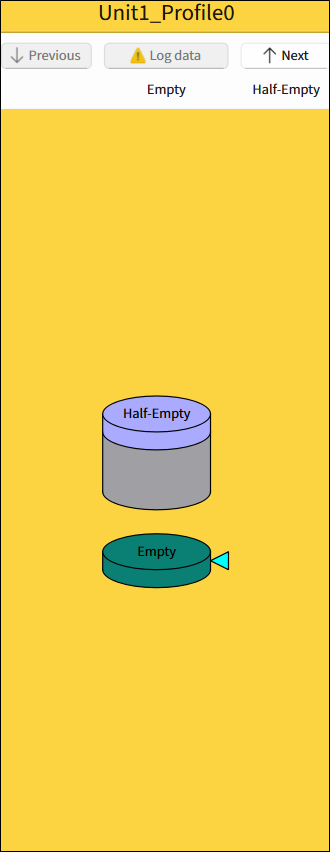 |  | 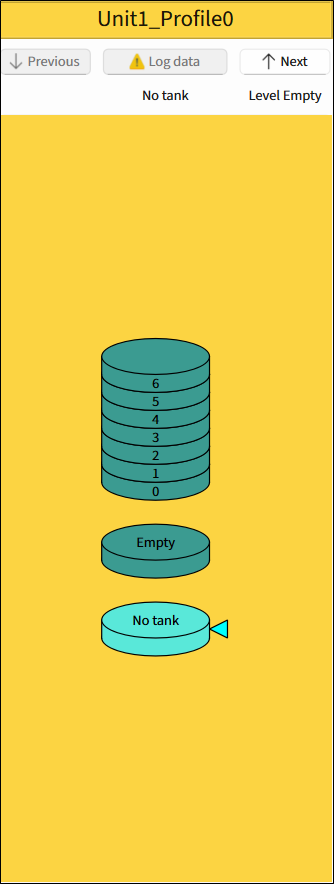 |
The pane contains buttons to execute the calibration process and a visual element.
-
Previous - Allows switching to the previous level but does not log data automatically. Disabled when there is no previous level.
-
Log data - Reads data from the device to the current level. After data is successfully read, the level automatically moves to the next one. The number of the level under the Log data button corresponds to the liquid level of the tank.
-
Next - Allows switching to the next level.
Use the context menu to:
- set different colors for logged/not logged levels and background
- enable gradient
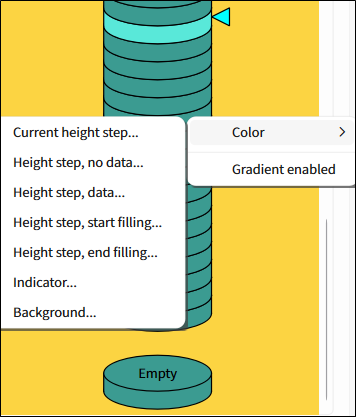
To see the height and data values of a level, hover over it.
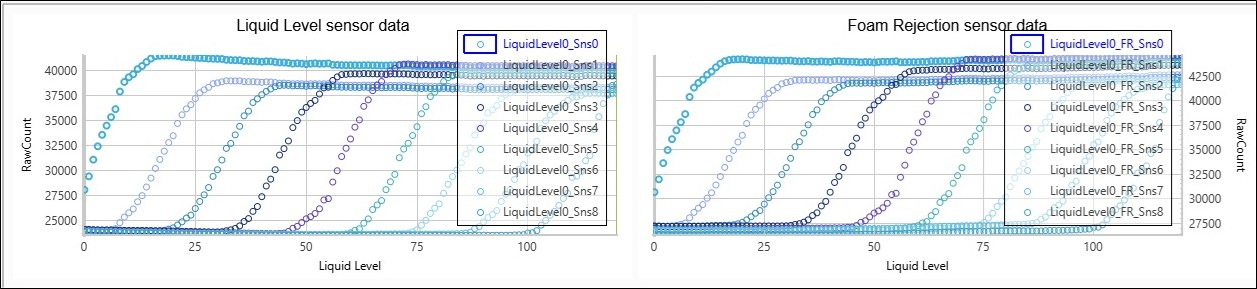
Graph chart (LL)
The Graph chart is empty until you start logging data and then the Liquid Level sensor data and Foam Rejection sensor data charts get populated with Liquid Level and RawCount parameters data.
Save/Load logged data
Allows saving and loading the gathered raw counts during the measuring process to/from the design.lls.csv file residing along to the configuration file.
-
Export to another file... - This option allows you to save gathered raw counts into a non-default user specified file
-
Import from another file... - This option allows you to load raw counts data from a non-default user specified file.