Updating the example application
After completing the process to create and build an example application and program a board, you may wish to update the application in various ways to explore its capabilities. This chapter covers some of the basic tasks, including:
- Update libraries
- Create/edit BSPs
- Configure settings for devices, peripherals, and libraries
- Write application code
- Debug the application
Update libraries
Use the Library Manager tool to add or remove BSPs and libraries for your application, as well as change versions for libraries. You can also change the active BSP for your application.
Open the Library Manager GUI tool from the application directory using the make library-manager command. The Library Manager opens for the selected application and its available BSPs and libraries.
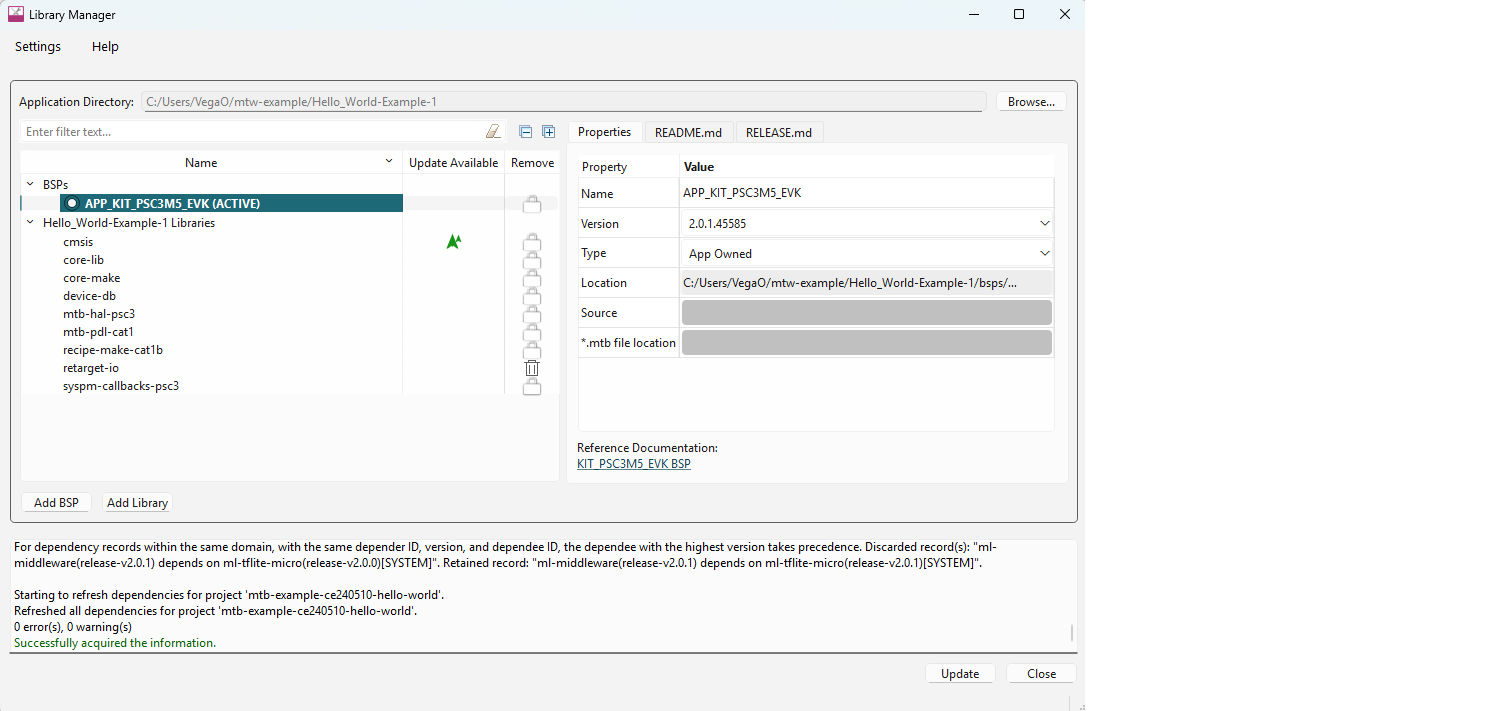
There are several ways to open the Library Manager; refer to the Library Manager user guide for more details.
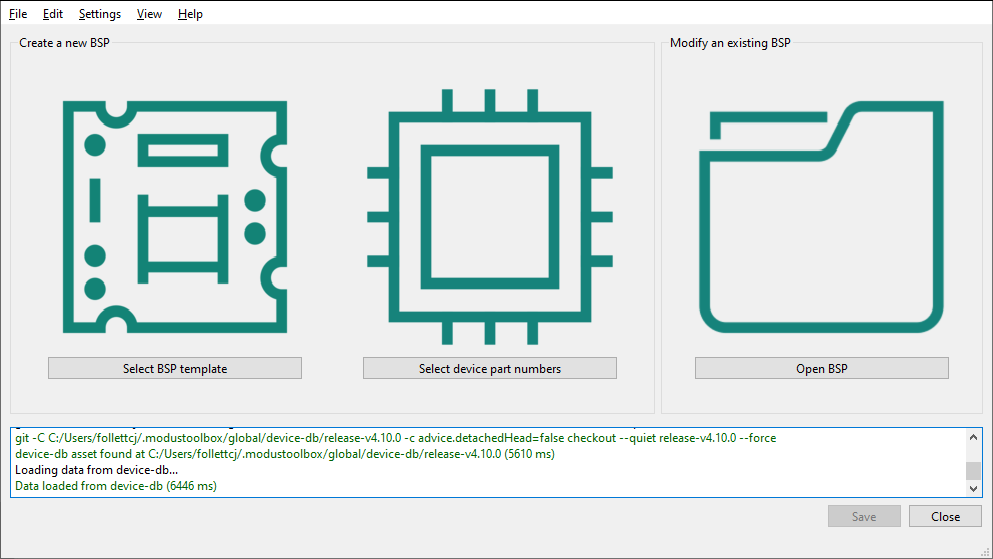
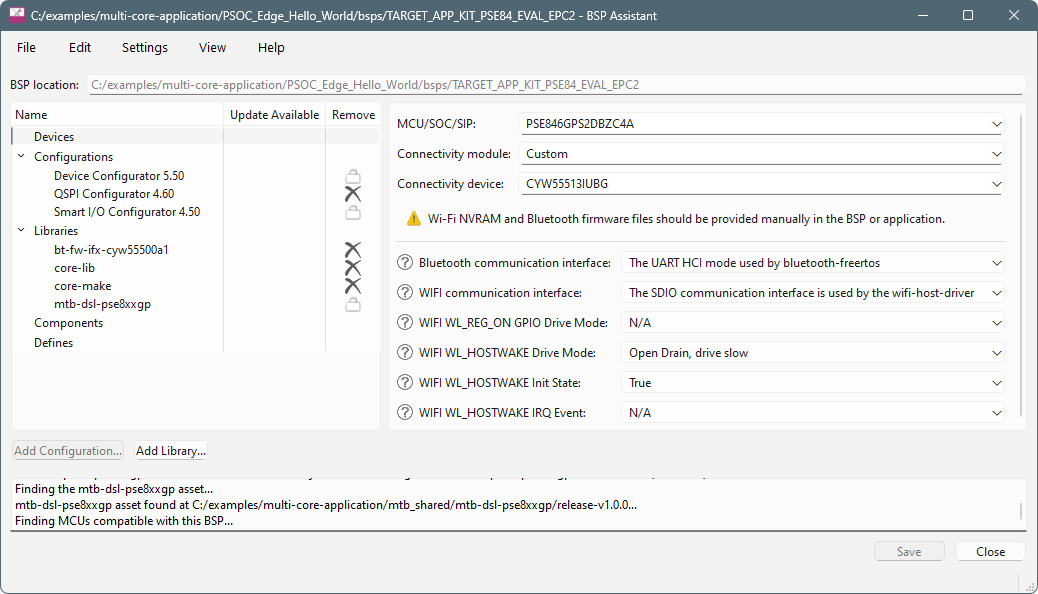
Create/edit BSPs
Use the BSP Assistant to change devices or add and remove configurations for the BSP in your application. The tool offers GUI and CLI versions. For more details, refer to the BSP Assistant user guide.
You can open the BSP Assistant GUI tool from Dashboard tool, or as applicable for your operating system. When opened this way, the BSP Assistant provides options to open an existing BSP, or create a new one.
If you have an existing application, open the tool from the application directory using the make bsp-assistant command. This opens the BSP Assistant for the selected BSP.
Configure settings for devices, peripherals, and libraries
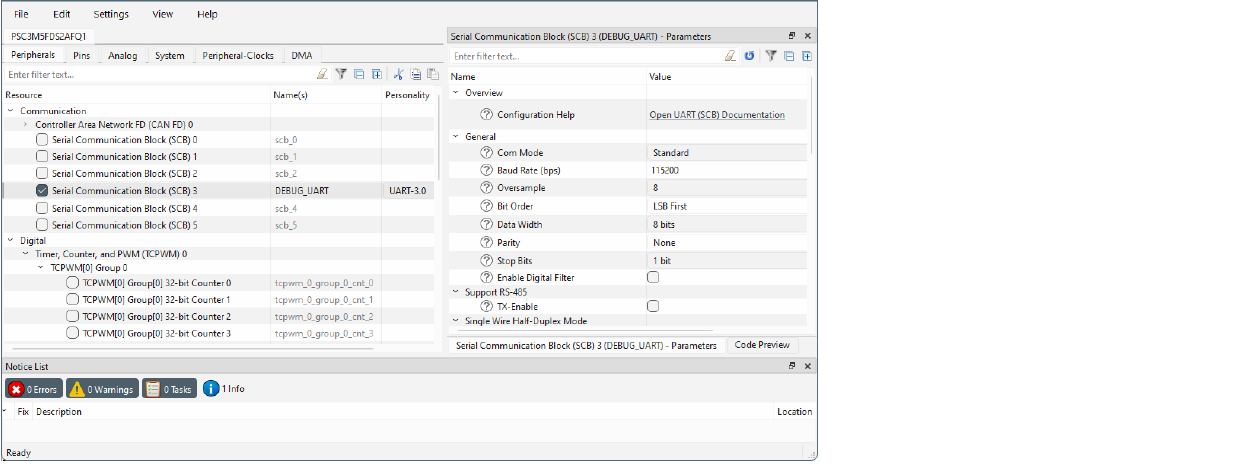
Depending on your application, you may want to update and generate some of the configuration code. While it is possible to write configuration code from scratch, the effort to do so is considerable. ModusToolbox™ software provides applications called configurators that make it easier to configure a hardware block or a middleware library. For example, instead of having to search through all the documentation to configure a serial communication block as a UART with a desired configuration, open the appropriate configurator to set the baud rate, parity, stop bits, etc.
Before configuring your device, you must decide how your application will interact with the hardware. That decision affects how you configure settings for devices, peripherals, and libraries.
The configurators can be run as GUIs to easily update various parameters and settings. Most can also be run as command line tools to regenerate code as part of a script. For more information about configurators, see the Configurators section. Also, each configurator provides a separate document, available from the configurator's Help menu, that provides information about how to use the specific configurator.
Configurator GUI tools
You can open various configurator GUIs using the appropriate make command from the application directory. For example, to open the Device Configurator, run:
make device-configurator
This opens the Device Configurator with the current application's design.modus configuration file.
As described under Utility make targets, you can use the make command with appropriate arguments to open any configurator. For example, to open the CAPSENSE™ Configurator, run:
make capsense-configurator
You can also use the Eclipse IDE, if installed, to open configurators. For example, if you select the "Device Configurator" link in the IDE Quick Panel, the tool opens with the application's design.modus file. Refer to the Eclipse IDE for ModusToolbox™ user guide for more details about the Eclipse IDE.
One other way to open BSP configurators (such as CAPSENSE™ and SegLCD Configurators) is by using a link from inside the Device Configurator. However, this does not apply to Library configurators (such as Bluetooth® and USB Configurators).
Configurator CLI tools
Most of the configurators can also be run from the command line. The primary use case is to re-generate source code based on the latest configuration settings. This would often be part of an overall build script for the entire application. The command-line configurator cannot change configuration settings. For information about command line options, run the configurator using the -h option.
Write application code
As in any embedded development application using any set of tools, you are responsible for the design and implementation of the firmware. This includes not just low-level configuration and power mode transitions, but all the unique functionality of your product. When writing application code, you must decide how the application will interact with the hardware.
ModusToolbox™ software is designed to enable your workflow. It includes support for Eclipse IDE, Visual Studio (VS) Code, IAR Embedded Workbench, and Keil µVision (see Using supported IDEs). You can also use a text editor and command line tools. Taken together, the multiple resources available to you in ModusToolbox™ software: BSPs, configurators, driver libraries, and middleware, help you focus on your specific application.
Debug the application
When you've added and changed code in your application, it is likely that something will not work as expected. At that point, you need to debug the application to determine what is wrong, or how to optimize the desired behavior. Similar to building an application and programming the board, you can use an IDE or command line options to debug the application.
Use Eclipse IDE
When using the Eclipse IDE, if installed, click the appropriate "Program" link in the Quick Panel for the selected application.
Refer to the "Program and Debug" chapter in the Eclipse IDE for ModusToolbox™ user guide for details about launch configs and various debugger settings.
Export to another IDE
If you prefer to use an IDE other than Eclipse, refer to your preferred IDE's documentation for debugging instructions. As noted under the Build and program section, you export a ModusToolbox™ application to a supported IDE following instructions in Using supported IDEs. There are also some debugging set-up instructions in that section.
Switch to J-Link
By default, most ModusToolbox™ applications are set to use the KitProg3 connection on the kit. For Eclipse and VS Code, if you want to use J-Link instead, you must set a couple of make variables as follows:
- Open your ModusToolbox™ single-core application's Makefile , or multi-core application's common.mk file, and enter the following variable:
BSP_PROGRAM_INTERFACE=JLink
- If you install J-Link software in a non-default location, or intend to use make commands, such as
make programandmake qprogram, also enter the following variable:
MTB_JLINK_DIR=<path to J-Link>
Note: If you want all projects/applications for the BSP to use the J-Link programmer/debugger, you can specify the BSP_PROGRAM_INTERFACE and MTB_JLINK_DIR variables in the bsp.mk file instead.
-
Save the Makefile .
-
In a bash terminal run the applicable
make [ide]variable for the IDE you wish to use.- For a VS code example, run:
make vscode
- For an Eclipse example click Generate Launches for ... , or run:
make eclipse
When the command completes, J-Link configurations will be shown where applicable.
For IAR Embedded Workbench and Keil μVision, you can make changes using their GUI tools.
For more specific details, refer to the specific user guide for the IDE you're using.