Installation instructions
The easiest way to install ModusToolbox™ software is to use the ModusToolbox™ Setup program. After you install it, you need to launch Setup program to view and select various ModusToolbox™ packages to install. As packages are updated to new versions over time, you can then use the Setup program to update your system, and the Setup program will even check to update itself. This section contains the following steps:
- Downloading the Setup program
- Installing the Setup program
- Launching the Setup program
- Installing the minimum required software packages
- Installing packs
The Setup program version is separate from the versions of the tools packages and various other packages. Each different program and package will likely be updated at different times instead of all at the same time.
Downloading the Setup program
The Setup program is available from the Infineon website: https://softwaretools.infineon.com/tools/com.ifx.tb.tool.modustoolboxsetup
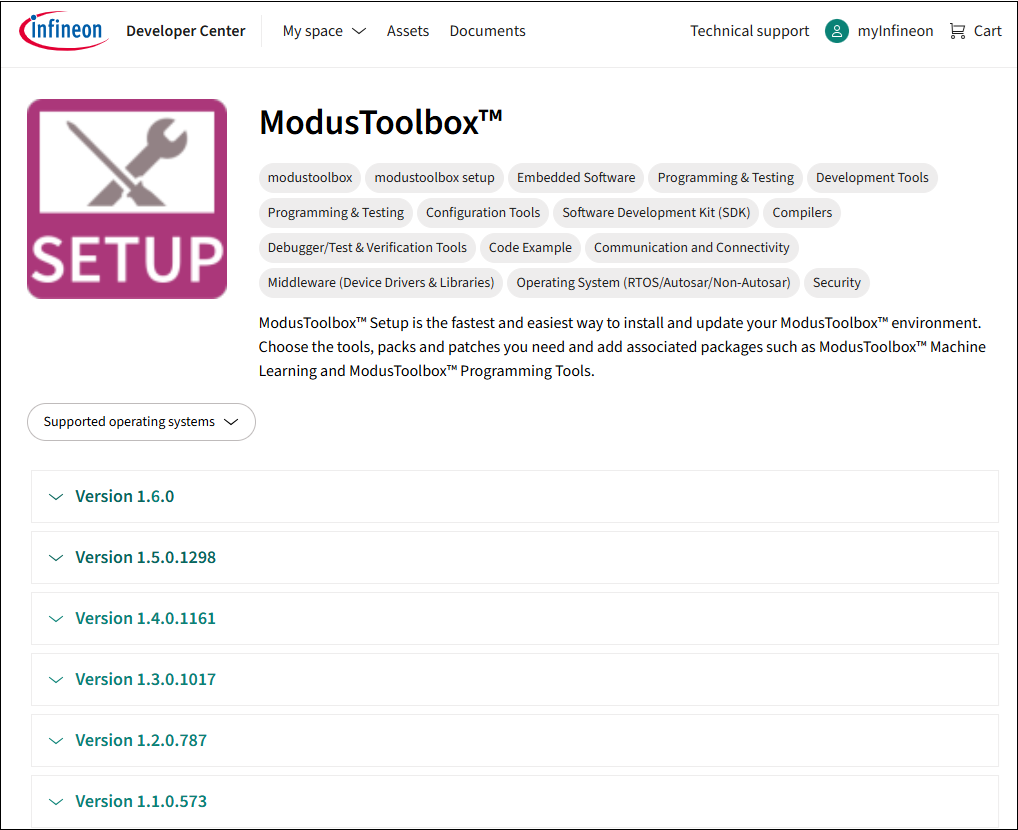
Select your operating system and click the Download button.
In some cases, you may see an Install via Launcher button. If so, ignore it and use the Download option.
Installing the Setup program
When the download completes, follow the instructions for your operating system.
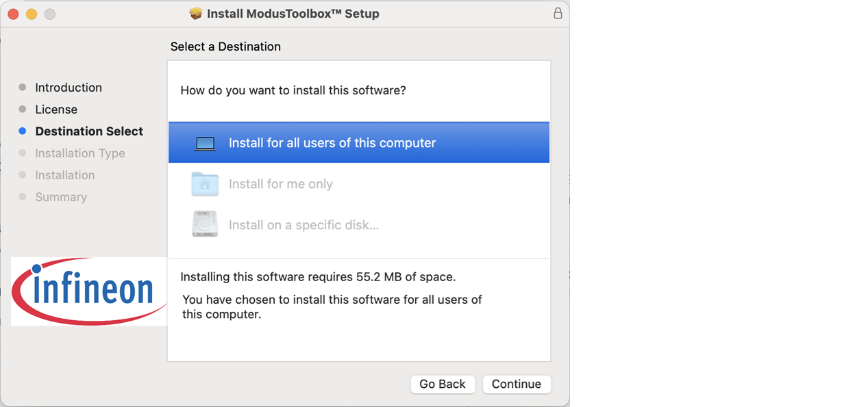
macOS
On macOS, launch the installer and follow the wizard. The default is to install for all users in Applications.
Linux
On Linux, open a terminal and run sudo apt install [package-name].deb. The Debian package doesn’t provide a user option and installs for all users in /opt/Tools.
If you see a message similar to this:"N: Download is performed unsandboxed as root as file '/home/{username}/Downloads/ModusToolboxSetupInstaller_1.X.Y.Z_linux_x64.deb' couldn't be accessed by user '_apt'. - pkgAcquire::Run (13: Permission denied)",
Simply disregard it, as this message is not an error, but a notice informing you that 'apt' tool accesses the package file under the "root" user instead of "_apt" user having restricted rights. This does not affect the installation process of the tool.
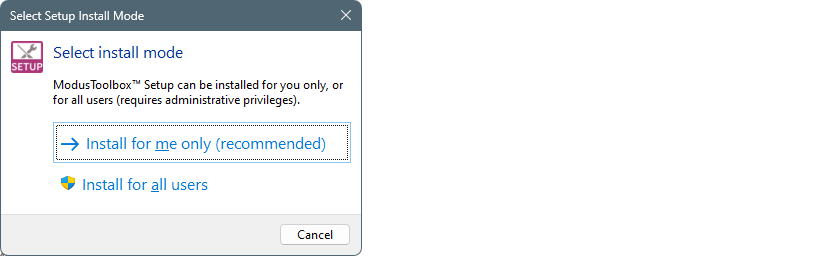
Windows
On Windows, launch the installer, and select Install for me only (recommended) in most cases.
Launching the Setup program
Initial installation
On the final screen of the installer, there will be an option to launch the Setup program and to open the release notes. If you select the options, they will open automatically when you click Finish. If you choose to launch the Setup program later, you can do so as applicable for your operating system.
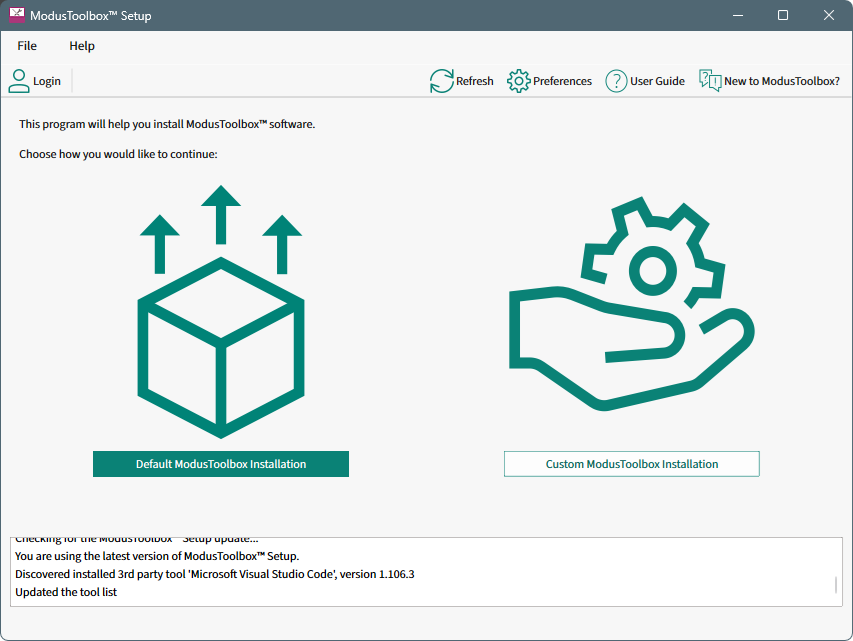
If you do not have any ModusToolbox™ tools package installed, the Setup program opens showing you two options:
-
Default - Selects all the newest minimum required packages.
-
Custom - Allows you to select the packages you want.
Subsequent uses
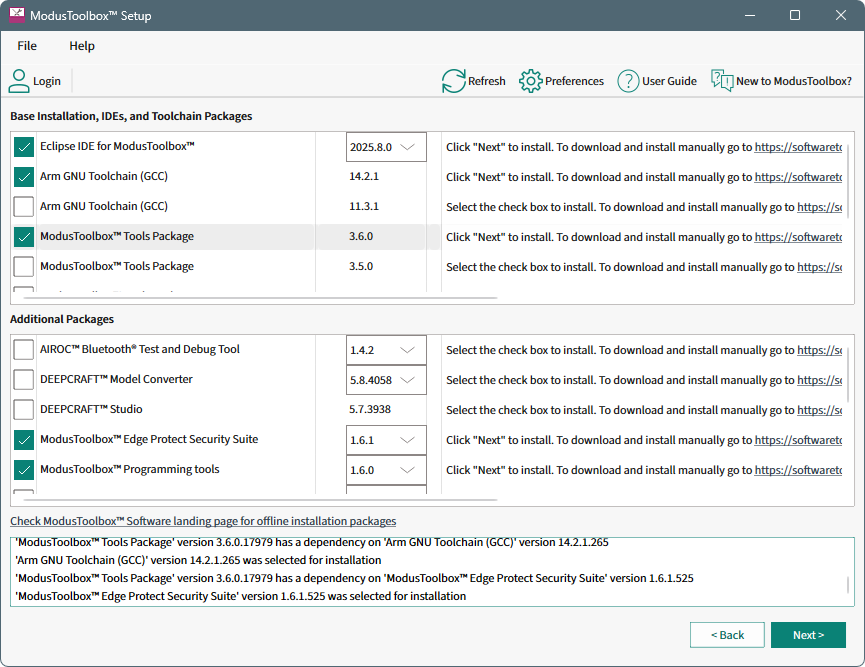
After you have installed a ModusToolbox™ tools package, the Setup program will open showing you what is installed, as well as any other packages that are available. Refer to the Setup program GUI description section for more details.
Also after installing, you can also launch the Setup program from the Dashboard, as well as from various tools such as Project Creator or Library Manager if they prompt you when your application does not have a required asset.
Installing the minimum required software packages
To install the minimum required software:
-
Click the Default option if it is available. This will select the latest versions of these packages automatically (as shown in Step 3):
-
Eclipse, unless the Setup program detects that VS Code is installed. If so, Eclipse is not selected.
-
GCC
-
Tools package
-
Edge Protect Security Suite
-
Programming tools
-
-
If the Default option is not available, or if you want to choose other the packages using the Custom option, select the tools package version you want to install. This will also select the dependencies as described in Step 1.
Note: Earlier releases of the ModusToolbox™ tools package included Eclipse and GCC. They are now separate installable packages.
-
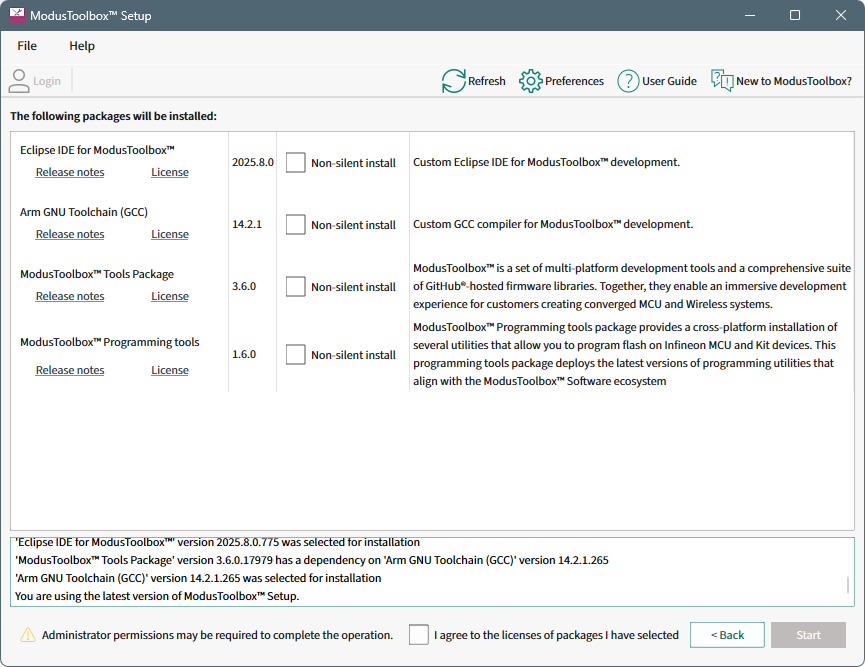
Click Next > .
This screen shows the packages that will be installed, with links to the release notes and license for each package. We recommend using the default installation option. See Installing using non-silent option if you need to install in a non-default location.
-
Select the I agree to the licenses … check box and click Start .
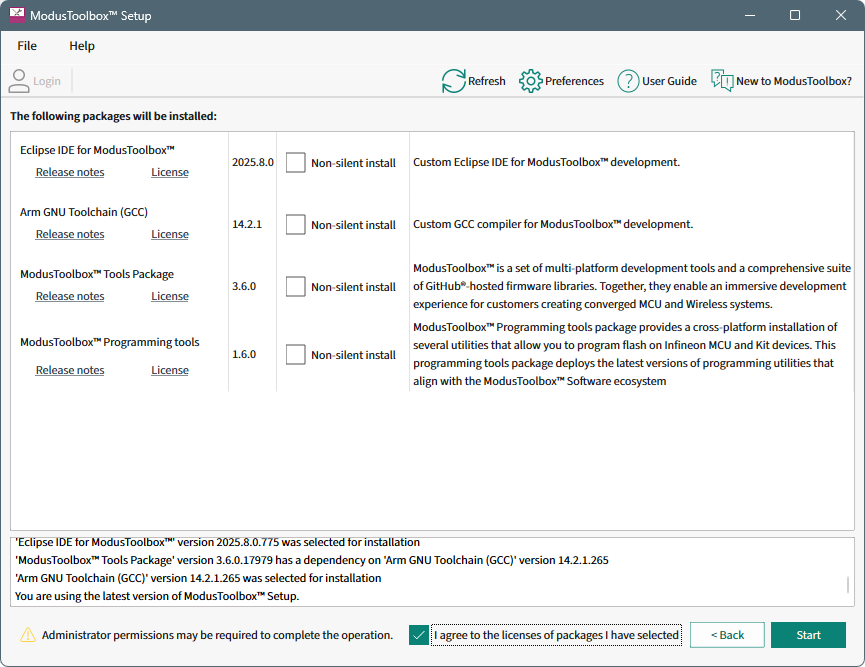
The Setup program will download and install the selected packages.
Note: Installing Programming tools and some other packages may require an Administrator user name and password to proceed.
Note: On Windows, if you need to install the tools package in a non-default location, see Installing using non-silent option.
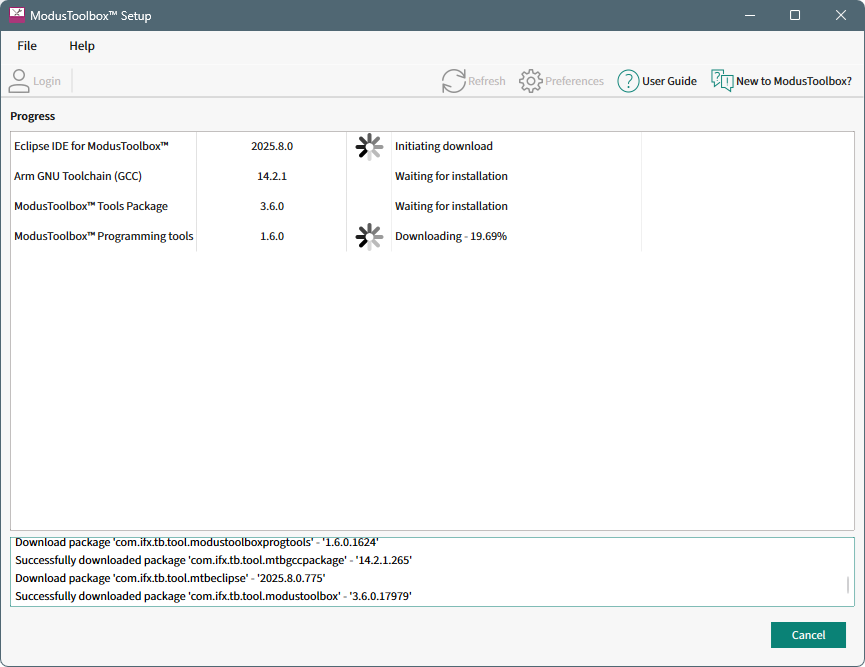
Note: Clicking the Cancel button will not affect install operations that have already started; only pending install operations will be stopped.
-
When all packages are installed, the Setup program shows options to run various tools. Click Run for the tools you wish to start.
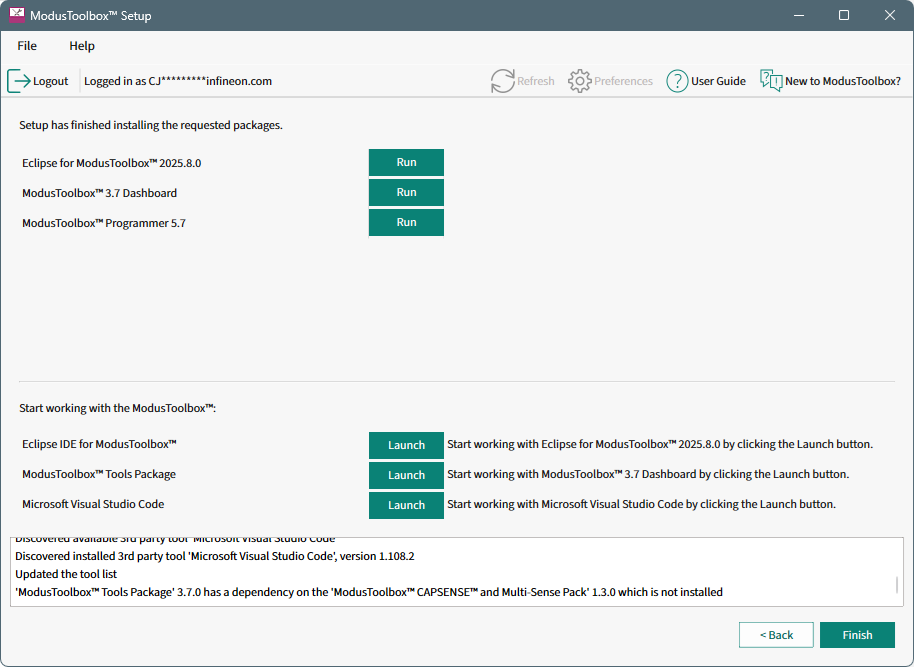
-
Click Back to return to the select packages window. Finish or click File > Exit to close the Setup program.
Installing IDEs
You can use the Setup program to install the Eclipse IDE as a separate package. Just select it from the list.
You can also use the Setup program to download Microsoft Visual Studio Code to install it separately. Click on the Download MS VS Code link. In the opened browser window, download the installation package suitable for your system and install it manually following platform-specific guides on https://code.visualstudio.com/docs/setup/setup-overview. On Ubuntu Linux, the recommended packages are "deb" or "snap". On macOS, download and extract the .zip archive content and drag "Visual Studio Code.app" to the Applications folder.
After the installation is complete, return to the ModusToolbox™ Setup window and click the Refresh button to update the UI.
Once either IDE is installed, the Setup program provides a button to launch it.
Installing packs
After installing the minimum required software packages, you are ready to begin developing your application using the ModusToolbox™ ecosystem. Our devices and software support multiple technologies. Review these webpages to learn more. You can use the Setup program to install additional packs as needed.
Refer also to the tools package user guide for a complete description of the ModusToolbox™ ecosystem, information about the build system, manifest, and BSPs, as well as instructions about how to get started creating and building an application.
There are two kinds of packs:
-
Technology packs - long term packs that provide extended technology software and tools as noted above.
-
Early access packs - short term packs to provide selected customers access to newer devices and technology that is still being developed.
Installing technology packs
To install a particular technology pack, you can just select it in the Setup program. There are no special requirements to install and use these types of packs, other than having the base tools package and dependencies already installed.
Installing early access packs
To install an early access pack, you must be given access. This may include signing a non-disclosure agreement (NDA). Once you have permission, you will be able to see available early access packs when you log in to the Setup program. Then, you can select it and download/install it the same as any pack or package.
In order to use an early access pack, you must enable it using the Settings tool. Refer to the Settings tool user guide for details about that tool.
Run the Dashboard (optional)
The ModusToolbox™ tools package includes an optional Dashboard tool. To run the Dashboard select the option on the final page of the Setup program after installation has complete. You can also run the Dashboard as follows:
-
Windows : Select the "dashboard" item from the Windows Start menu.
-
Linux : Navigate to /[install-path]/ModusToolbox/tools_[version]/dashboard and run the executable.
-
macOS : Run the "dashboard" app.
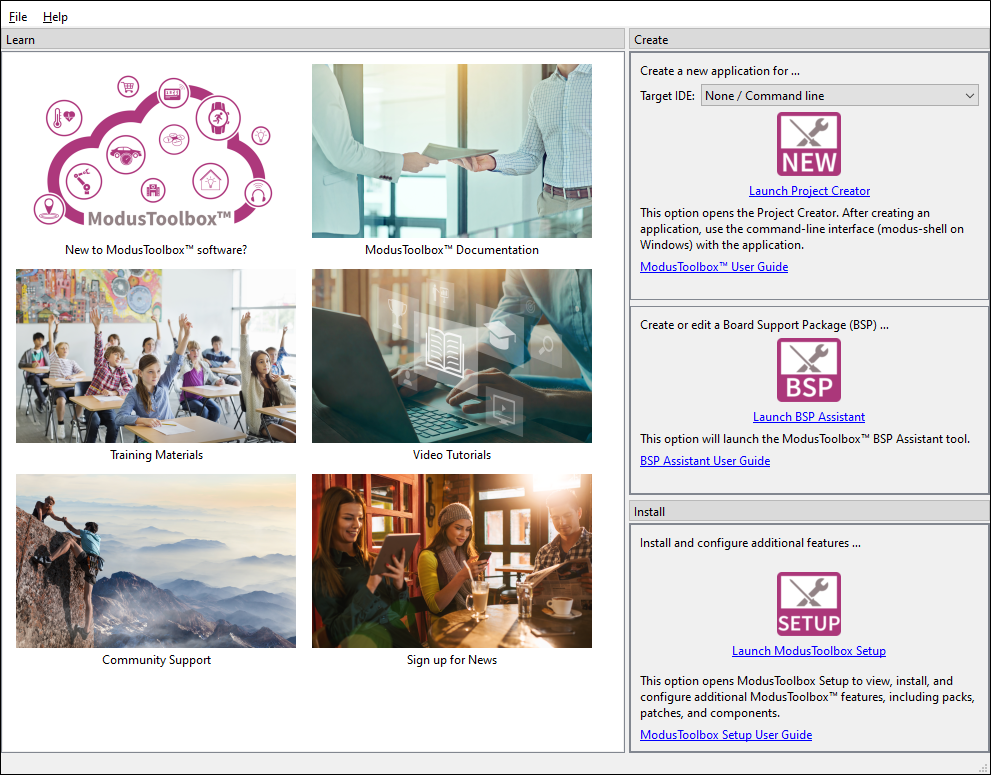
The Dashboard provides links to various sources of documentation and training materials. It also contains starting points: create a new application, create/edit a BSP, install or launch the ModusToolbox™ Setup program. For more details, refer to the Dashboard user guide.