Working with BSPs
This section covers the common tasks involved when working with BSPs for your application, including:
The Library Manager displays the BSP(s) included with the application at the top of the list above the libraries, by default.
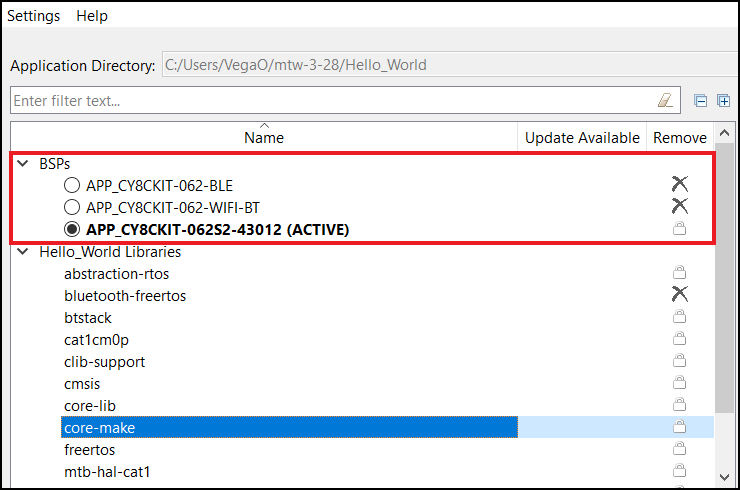
Select Active BSP
The active BSP for the application displays in bold text with "(ACTIVE)" next to it. An application can only have one active BSP. If your application has more than one BSP included, select one of the other BSPs to be active by clicking the radio option next to it. You can also choose to right-click on it and select Set as
Active BSP
. Then, click the Update button.

When you click the
Update
button, the system displays progress in the message console and updates your application's
Makefile
TARGET=
variable to specify the new BSP as active.
Add BSPs
When you add a BSP to an application, you have several options, including adding a BSP from a template, browsing to one on disk, and creating a new BSP from a device part number. To begin the process, click the
Add BSP
button located below the list of BSPs and libraries.
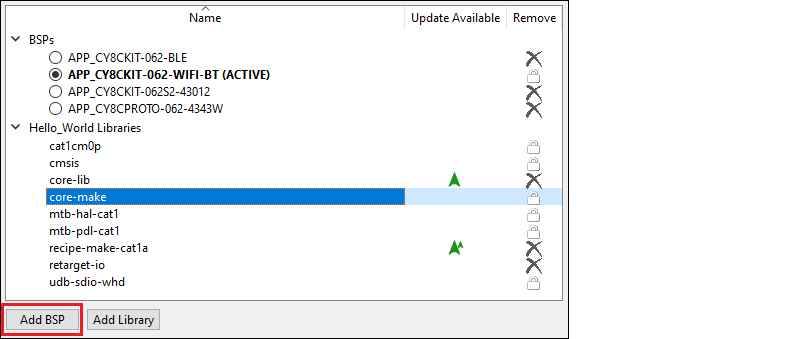
This opens the Add BSP dialog. There are different steps to add, select, or create a BSP.
Add BSP from template
On the Add BSP dialog, select the desired BSP from the list, change the
New BSP name
, if desired, and click
OK
.
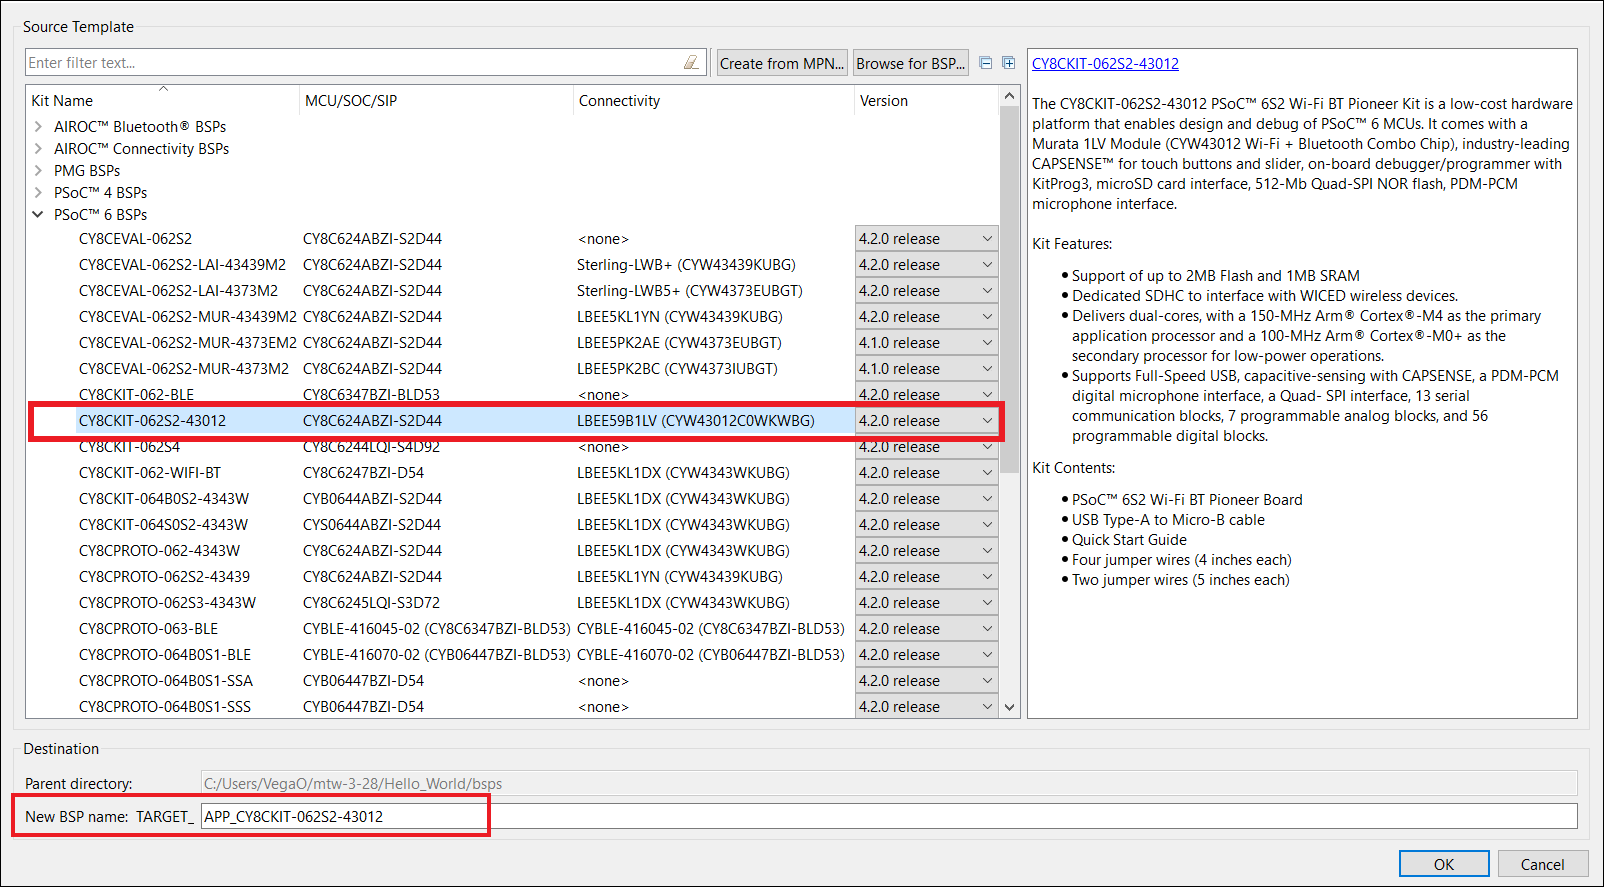
The added BSP will appear on the list of BSPs on the main Library Manager window.
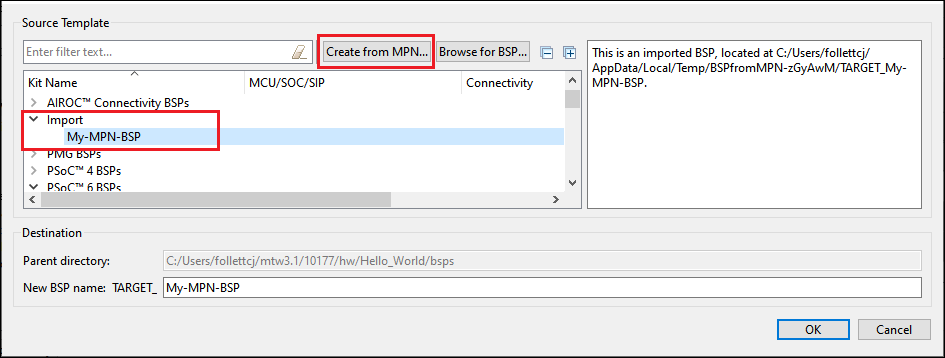
Create BSP from MPN
On the Add BSP dialog, click the
Create from MPN
button. This command opens the BSP Assistant tool to create a BSP based on device part numbers. Refer to the
BSP Assistant user guide
for more details about how to create a BSP from MPN. When you close the BSP Assistant, the new BSP will show up in the
Add BSP
dialog under Import.
Change the
New BSP name
, if desired, and click
OK
. The new BSP will appear on the list of BSPs on the main Library Manager window.
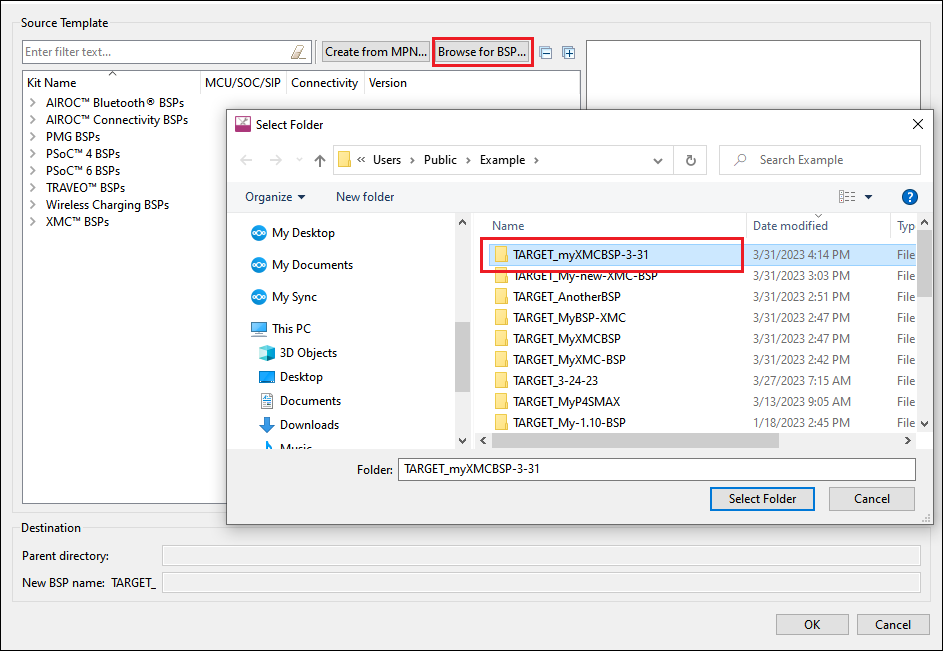
Browse for existing BSP
On the Add BSP dialog, click the
Browse for BSP
button. Then on the Select Folder dialog, navigate to and select the desired BSP and click
Select Folder
.
The added BSP will show up in the Add BSP dialog under
Import
.
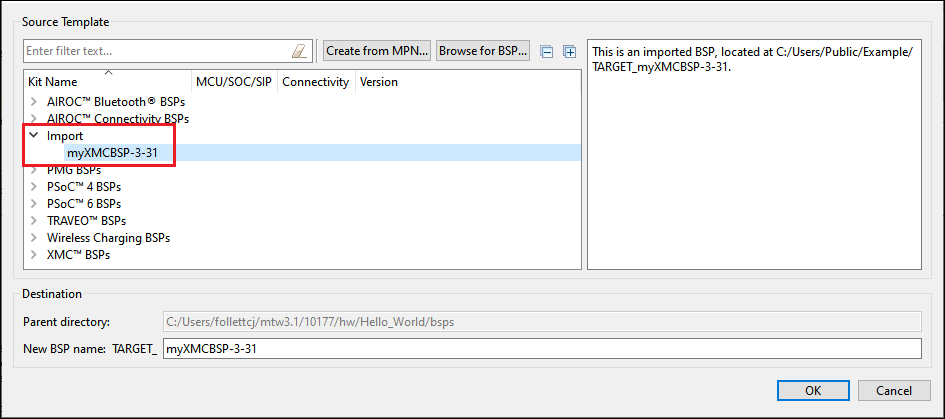
Change the
New BSP name
, if desired, and click
OK
. The added BSP will appear on the list of BSPs on the main Library Manager window.
Finalize Add BSP process
After adding a BSP you can choose to
Select Active BSP
. You can also choose to
Remove BSP
the non-active BSP and/or
Rename BSP
either BSP.
Regardless of whether you added an existing or new BSP, and whether you made other changes, the final step is to click the
Update
button on the main Library Manager window to commit the changes. This copies the BSP to the application and then it becomes owned by the application. This also updates the application's
Makefile
.
Rename BSP
There are a few ways to rename a BSP, as follows:
Existing BSP
For a BSP already shown in the main Library Manager list, right-click and select
Rename BSP
or double-click on the BSP. Then in the
Properties
tab Value field for the
Name
, type the new name for the BSP.
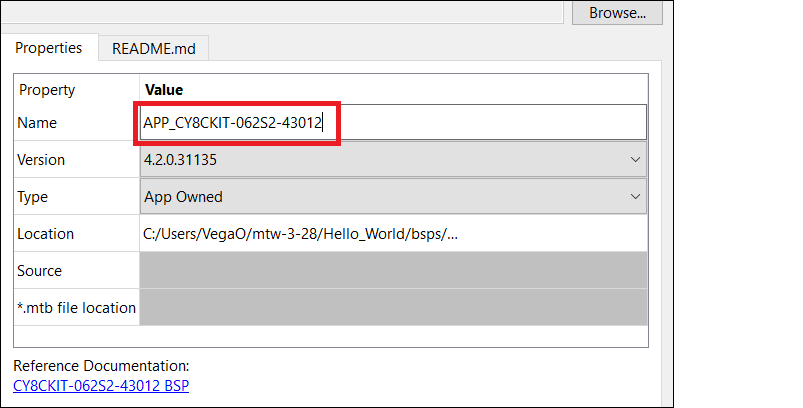
You can also double-click the BSP name shown in the
Value
field to rename it.
To commit the change, click
Update
.
Added BSP
You can also rename a BSP when adding one. On the Add BSP dialog, the added BSP appears under
Import
. When you select the added BSP, you can type a new name for it in the
New BSP name
field.

Remove BSP
To remove a BSP, click the
Delete
symbol under
Remove
for the appropriate BSP.

Note:
The Lock symbol for the active BSP means you cannot remove the active BSP from the application.
A dialog displays a message asking you to confirm the removal.

Click
Delete
to remove the BSP from the list of BSPs for the application. Then, click the
Update
button in the main window to commit the change.