Create new application
No matter which IDE you intend to use, you start by creating a ModusToolbox™ application with the Project Creator tool. Creating an application includes several steps, as follows:
Step 1: Open Project Creator
You can open Project Creator using the Dashboard as shown in the previous section. However, you can also open the Project Creator using the tool's executable as applicable for your operating system.
To launch the Project Creator tool with Eclipse, click the New Application link in the Quick Panel.
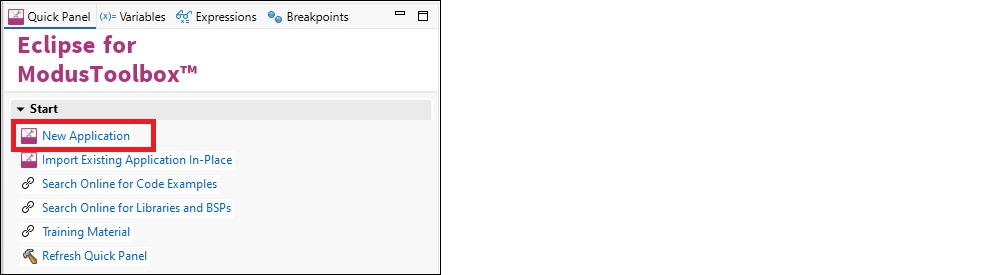
You can also launch it by selecting File > New > ModusToolbox™ Application.

Project Creator provides several applications for use with different development kits, as shown in the example image below.
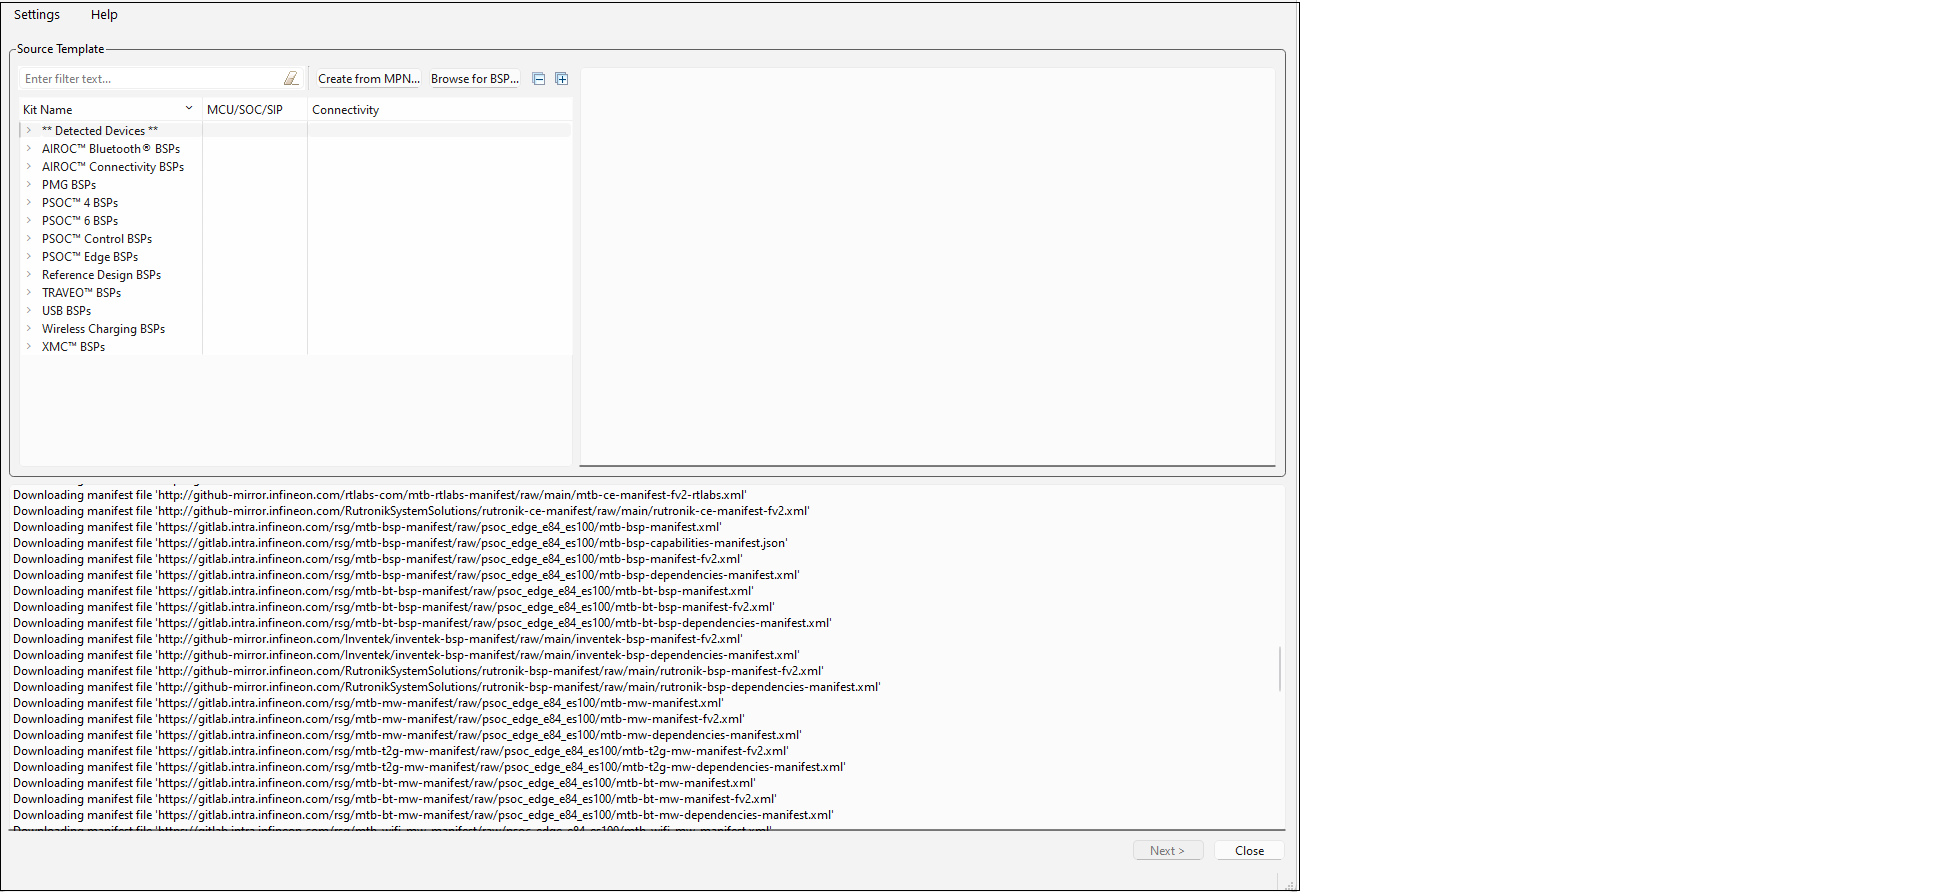
Refer to the Project Creator user guide for more information.
Step 2: Choose Board Support Package (BSP)
When the Project Creator tool opens, expand one of the BSP categories under Kit Name and select an appropriate kit; see the description for it on the right. For this example, select the PSC3M5_EVK kit. The following image is an example; the precise list of boards available in this version will reflect the platforms available for development.
You can create your own BSP using the Create from MPN feature, or add a BSP using the Browse for BSP feature.
Step 3: Select application
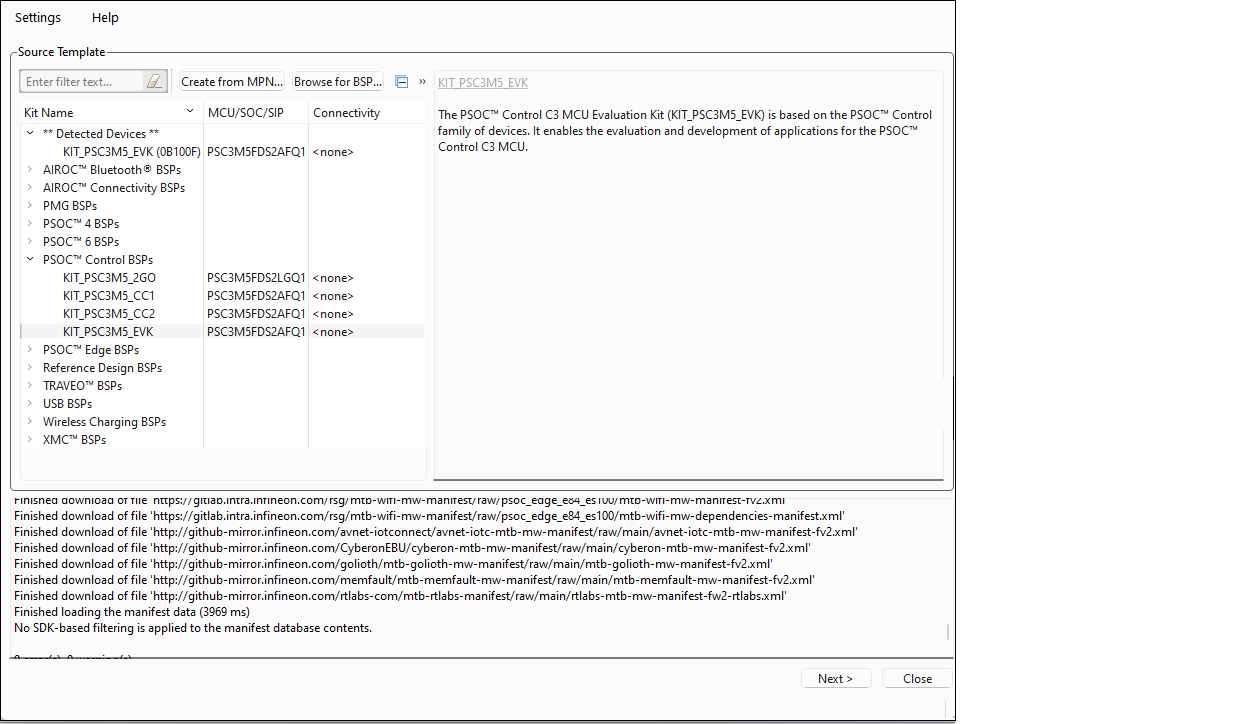
Click Next > to display the "Select Application" page. This page displays the Template Applications available for the selected BSP, organized by categories.

Use the Application Root Path field to select the location for your application.
Use the Target IDE drop-down to select your chosen IDE from the drop-down menu, in this case the example IDE selected is Eclipse.
If you used the Dashboard to open the Project Creator tool, Target IDE will already be selected.
For this example, expand Getting Started and select Hello World from the list. This example uses the PSOC™ Control MCU to blink an LED.
The actual application names available might vary.
Type a name for your application and/or BSP or leave the default names. Do not use spaces. Also, do not use common illegal characters, such as:
* . " ‘ / \ [ ] : ; | = ,
Step 4: Create application
Click Create to start the process of creating a ModusToolbox™ application, and the GUI will display various messages showing the progress.
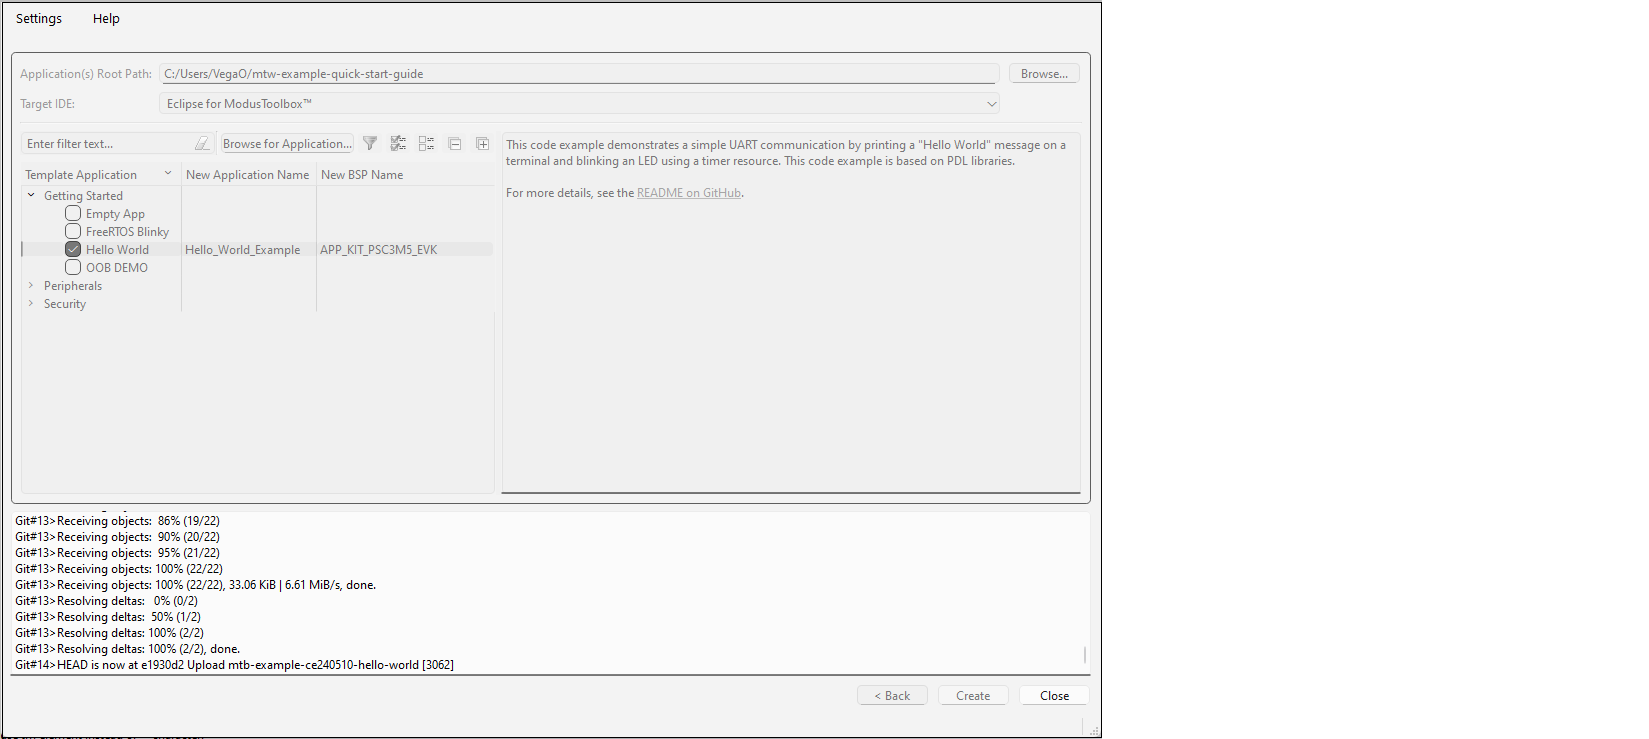
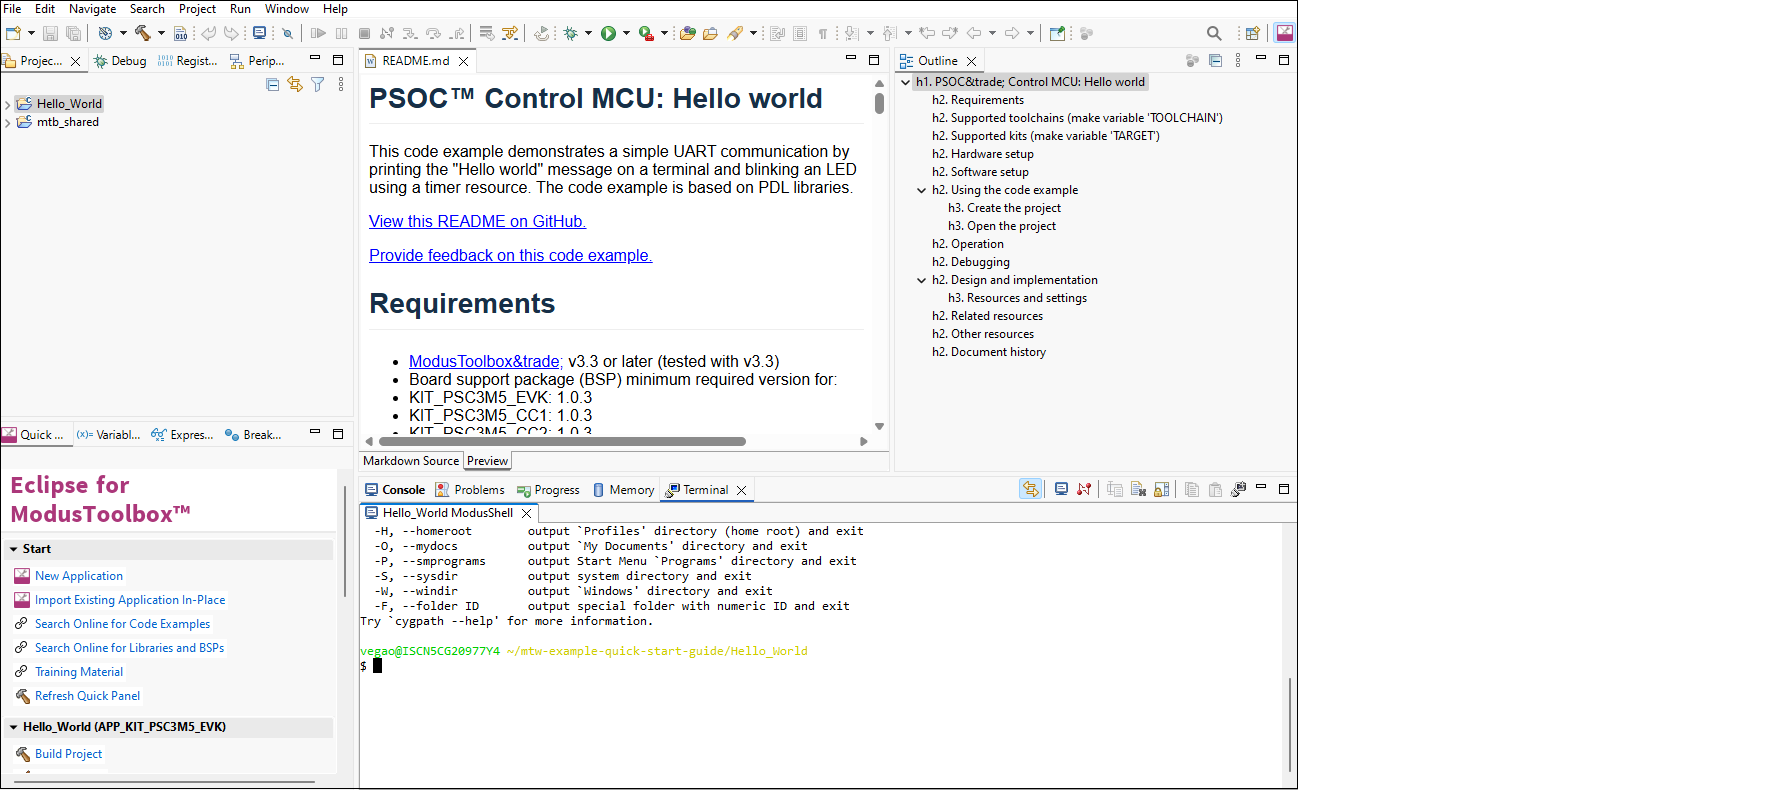
When complete, the Project Creator tool closes automatically if there are no errors or warnings. If there are warnings only, click Close and the application will open in Eclipse. After several moments, the application opens with the Hello_World in the Project Explorer, and the README.md file opens in the file viewer:
If there are errors, project creation will fail.
If you choose to use an IDE other than Eclipse, the tool will display a message stating that the application was created. To close the tool, click the Close button or the X button at the top-right of the GUI and confirm.
