PSOC™ DRIVECORE Smart End Point [Infineon, Elektrobit, IAR]
Getting Started Guide
About this document
Scope and purpose
DRIVECORE is a scalable software bundle portfolio that streamlines and accelerates software development. It simplifies processes, reduces migration efforts, and minimizes commercial complexities. Drive Core offers a seamless user experience throughout the R&D journey for Infineon’s automotive microcontrollers: AURIX™, TRAVEO™, and PSOC™.
This document is created in a collaboration between Infineon and the partners of the specific bundle, to support you in the installation and set-up phase of the software, show code examples, and provide answers to common issues in this phase.
Intended audience
Engineers who integrate with the iSOFT toolchain and the TC4D7 development board.
Introduction
DRIVECORE
DRIVECORE is a scalable software bundle portfolio for AURIX™, TRAVEO™ and PSOC™ that facilitates a rapid start into Automotive software development.
PSOC™ DRIVECORE Smart End Point [Infineon, Elektrobit, IAR]
The PSOC™ DRIVECORE Smart End Point [Infineon, Elektrobit, IAR] is a software Bundle suite designed to simplify and accelerate the development of edge controllers and small peripheral ECUs in automotive subsystems. With a focus on cost efficiency, re-usability, and extensibility, it empowers developers to bring reliable, scalable solutions to market faster. Tailored for applications such as smart sensors, interior lighting, and motor controls, it is ideal for small, safety-relevant ECUs where performance and resource optimization are critical.
The bundle combines proven software and tools from Infineon, Elektrobit, and IAR, enabling rapid development on Elektrobit’s EB tresos AutoCore Light—a lightweight, high-performance, ASIL-B ready, and CSMS-certified platform. It supports LIN signal-based communication, a UDS service handler (ISO 14229-1), and offers a streamlined integration and configuration work flow. Paired with Infineon’s PSOC™ 4 HV microcontroller, the bundle minimizes memory and processing overhead and ensures resource-optimized, deterministic, reliable operation in safety-relevant automotive subsystems.
Software & Tool components
Software components
Packages | Version | Description |
|---|---|---|
EB tresos 9 AutoCore OS | 6.1.400 | Stand-alone AUTOSAR compliant real-time, single-core Operating System. The OS is hardware and compiler dependent |
EB tresos 9 - AutoCore Light Base Package | 9.4.0 | This product features hardware-independent communication stacks for LIN protocols, supports signal-based communication, and includes basic diagnostic interfaces for identification and coding. It also provides interfaces for MCAL driver integration and includes a robust watchdog stack for system reliability |
EB tresos 9 - AutoCore OEM Extension Startup Package Application for Essentials | 9.4.0 | EB creates a generic EB tresos Studio project configuration that runs on the selected μC with customer defined compiler and compiler settings, integrating one set of project specific ECU and Diagnostic extracts |
EB tresos 9 - Board Support Package MCAL | 9.4.0 | Integration of 3rd party MCAL modules into EB tresos Studio, for the requested μC, with pre-defined compiler and compiler settings |
EB tresos 9 - Board Support Package Platform | 9.4.0 | Porting of the basic set of hardware-dependent packages (e.g. compiler abstraction, memory abstraction, μC initialization, ..) |
Micro HAL | 0.1.0 Code drop | PSOC™ 4 HV family Micro Hardware Abstraction Layer (HAL) that abstracts the hardware-specific details of the microcontroller. |
Auto PDL | 1.10.1 | PSOC™ 4 HV family Auto Peripheral Driver Library (PDL) is a collection of low-level drivers and APIs that enable developers to interact with the hardware peripherals of the PSoC™ 4 HV family microcontrollers. |
Tools Components
Tool chain | Version | Description |
|---|---|---|
EB tresos Studio version | 33.0.0 | Tool for configuration and generation of basic software components in accordance with AUTOSAR |
IAR Embedded Workbench for Arm, Functional Safety | 8.50.10 | IAR Embedded Workbench is a complete development toolchain with an optimized compiler, debugger, and analysis tools, streamlining embedded software development. |
Prerequisites
KIT_PSoC4-HVMS-128K_LITE
MCU: CY8C4147LWE-HVS135X
Windows 10 64-bit host computer
Workflow
Introduction
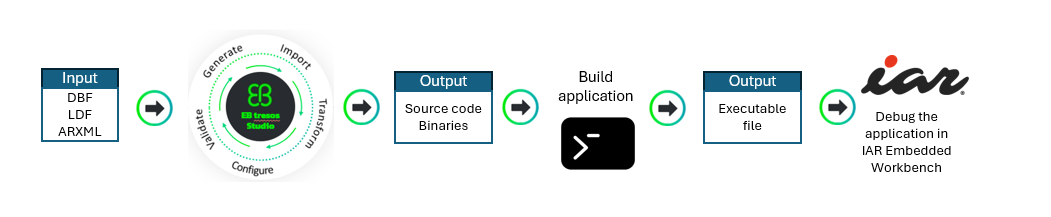
This configuration workflow introduces the end-to-end workflow for generating ECU software using EB tresos Studio.
Provide Your Input Files
EB tresos Studio supports several standard file formats relevant for managing ECU configuration projects
EB tresos Studio supports AUTOSAR XML files containing:
System Description
LDF (Lin Description Format)
DBC
Import and Configure
Once inputs are loaded, EB tresos Studio guides you through:
Importing definitions into the configuration environment
Transforming them into AUTOSAR-compliant components
Configuring software modules using graphical editors
Validating configurations to ensure completeness and correctness
Generate Output Artifacts
After validation, EB tresos Studio produces all required build assets:
Code Generation for the configured AUTOSAR stack
Figure 1. Configuration Workflow
Files in bundles
File name | Short description |
|---|---|
Document List ├──ACL-9.4.0_CY8C4147LWE_42036-B1109400_EvalKit.zip │ ├──ACL-9.4.0_CY8C4147LWE_42036-B1109400_EvalKit │ │ ├── 1.1_EB_tresos_installation_guide.pdf │ │ ├── Documentation_Doc.uip │ │ ├── Documentation_EBtresosStudio.uip │ │ ├── EBtresosStudio_EBtresosStudio.uip │ │ ├── EBtresosStudio_Wibui.uip │ │ ├── setup.exe | Installation file “setup.exe” to start installing the EB tresos and user documentations |
Installation
Installation of EB tresos Studio
For introductory guidance on EB tresos Studio workflows, refer to the following resources:
Tutorials available under the Tutorials tab on the
Working with EB tresos Studio – Elektrobit
webpage
The Getting Started materials on the same webpage
The
Workflows view
chapter in the EB tresos Studio User Guide, available at: $TRESOS_BASE/doc/2.-0_EB_tresos_Studio/2.1_Studio_documentation_users_guide.pdf
Install EB tresos Studio license
Install the workspace: the AutoCore OEM Extension Startup Package Application workspace is delivered as an uip package and is installed with the EB tresos Studio installer
The license key for the tool is given in your Infineon Developer Center (IDC) portal
(Ensure to log in to IDC using registered credentials)
Installation of IAR Embedded Workbench
Download the IAR Embedded Workbench installer from
IAR Embedded Workbench for Arm Functional Safety, version 8.50.10
Install IAR Embedded Workbench for Arm Functional Safety version 8.50.10. Installation instructions and license activation instructions are provided in
Installation and Licensing Quick Reference
/
Note:
Make sure to specify an installation directory without any spaces, for example C:\iar\EWARMFS850
The license key for the tool is given in your Infineon Developer Center (IDC) portal
(Ensure to login to IDC using registered credentials)
Copy the device support patch
IAR_EWARM_Patch_PSoC4HV.zip
from the PSOC™ DRIVECORE Smart End Point [Infineon, Elektrobit, IAR] V1.0 software delivery and unzip it on top of the IAR Embedded Workbench installation (for example C:\iar\EWARMFS850)
Configure the compiler path by opening/EB/tresos/templates/Application_Lin_ACL/util/launch_cfg.bat, and change the value of TOOLPATH_COMPILER to the installation location of your compiler (for example C:\iar\EWARMFS850)
HW setup
Board description
Overview
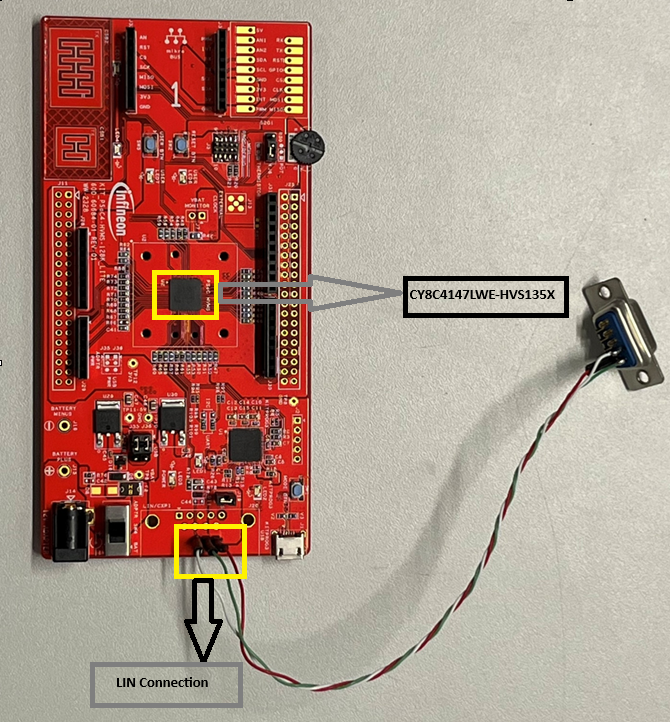
For this release the CY8C4147LWE development board was used.
CY8C4147LWE-HVS135X
You can order the Evaluation kit here:
https://www.infineon.com/evaluation-board/KIT-PSOC4-HVMS-128K-LITE
Board Image
Figure 2. Evaluation Board with LIN connection
Complete Setup
Figure 3. Test bench setup
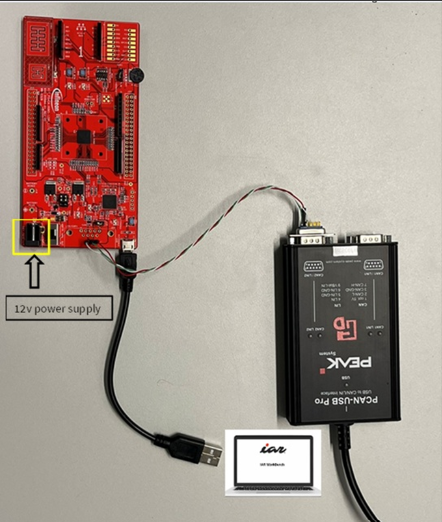
Note:
Note: A 12V supply (VBAT) is typically required for a PSOC-based
LIN slave node to perform a remote wake-up.
LIN Connections to the board
Lin Channel and Lin Ports Pins Configuration as given below:
Lin channel | |
|---|---|
LIN0-CH1 | |
Port Pin | Pin function |
P2.0 | LIN0 Receive Input |
P2.1 | LIN0 Transmit Output |
P2.2 | LIN0 Channel Enable |
Demo
Introduction
The AutoCore OEM Extension Startup Package Application LIN provides a ready-to-use foundation for integrating EB tresos AutoCore Light 9 on a dedicated target platform.
It simplifies initial setup by preconfiguring essential LIN communication components, project structure, and platform-specific settings.
This demo accelerates development and reduces integration effort, enabling teams to focus on application functionality and customization.
LIN Slave Configuration
AutoCore Light OEM Extension Startup Package Application LIN supports LIN communication for Application messages for Transmission and Reception and Diagnostics Services using Uds and BlPduR.
ID | PID | Type | Length | Direction | Description | Application |
|---|---|---|---|---|---|---|
0x00 | 0x80 | LIN | 1 Byte | Rx | Pdu_CounterIn_0R_128R contains byte 0 for CounterIn_ 0R_128R signal | Application_Lin_ACL |
0x01 | 0xC1 | LIN | 1 Byte | Tx | Pdu_CounterOut_1T_193T contains byte 0 for CounterOut_1T_193T signal | Application_Lin_ACL |
0x3C | -- | LIN | 8 Bytes | Rx | UDS physical request | Application_Lin_ACL |
0x3D | -- | LIN | 8 Bytes | Tx | UDS physical response | Application_Lin_ACL |
Baudrate is 19200 bits per second for LIN communication
Building and running the demo Application
Importing the project
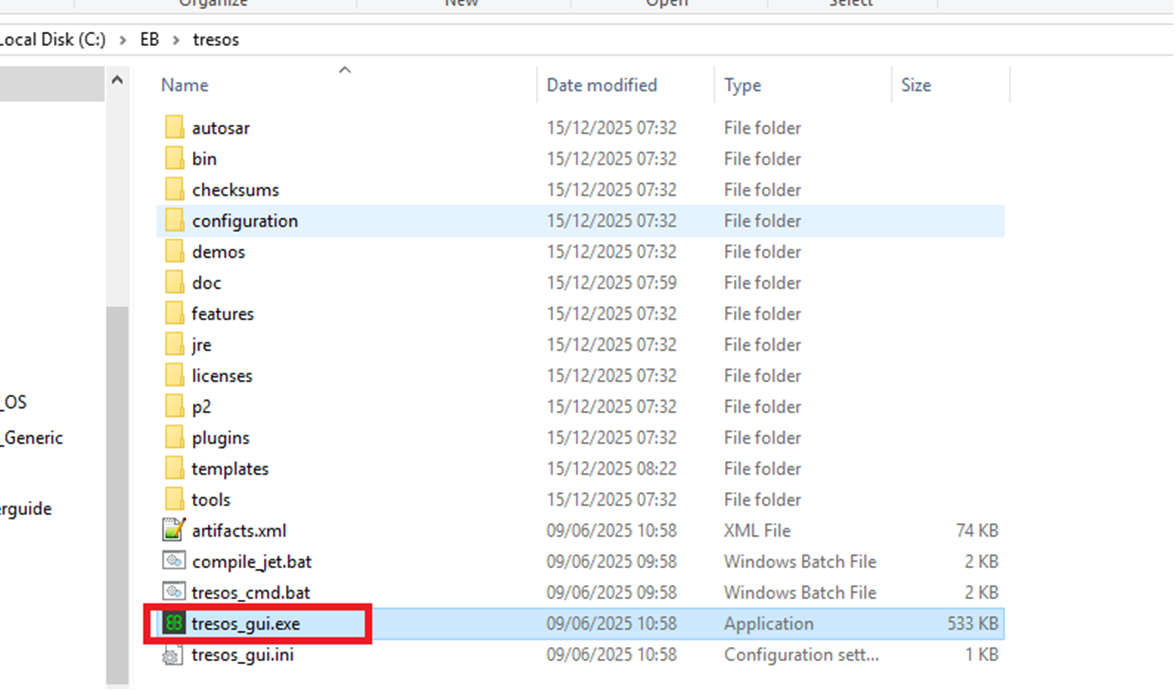
You must import the project into your EB tresos Studio workspace (for example C:/EB/tresos).
Step 1 : Navigate to the
tresos
installation and run
tresos_gui.exe
Figure 4. Step 1
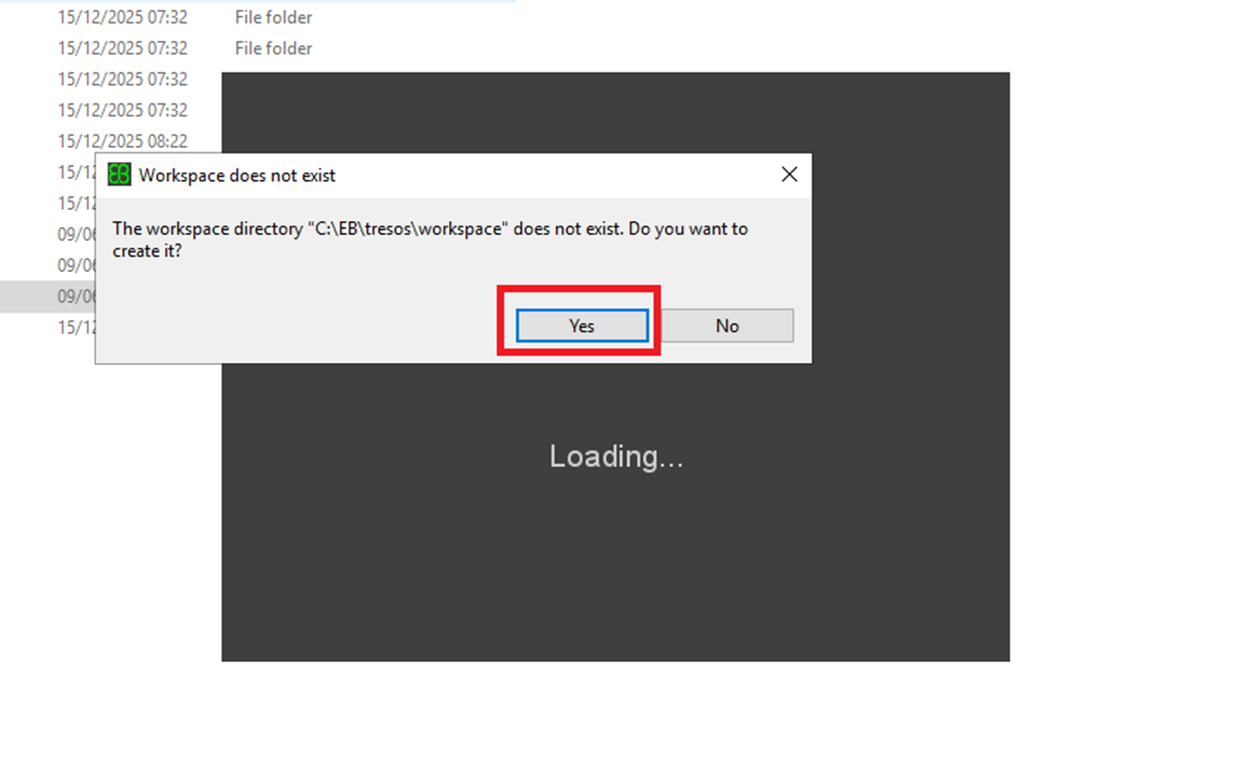
Step 2: A pop-up asking to create the workspace directory, click
Yes
. A new workspace folder will then be automatically created inside the Tresos directory.
Figure 5. Step 2
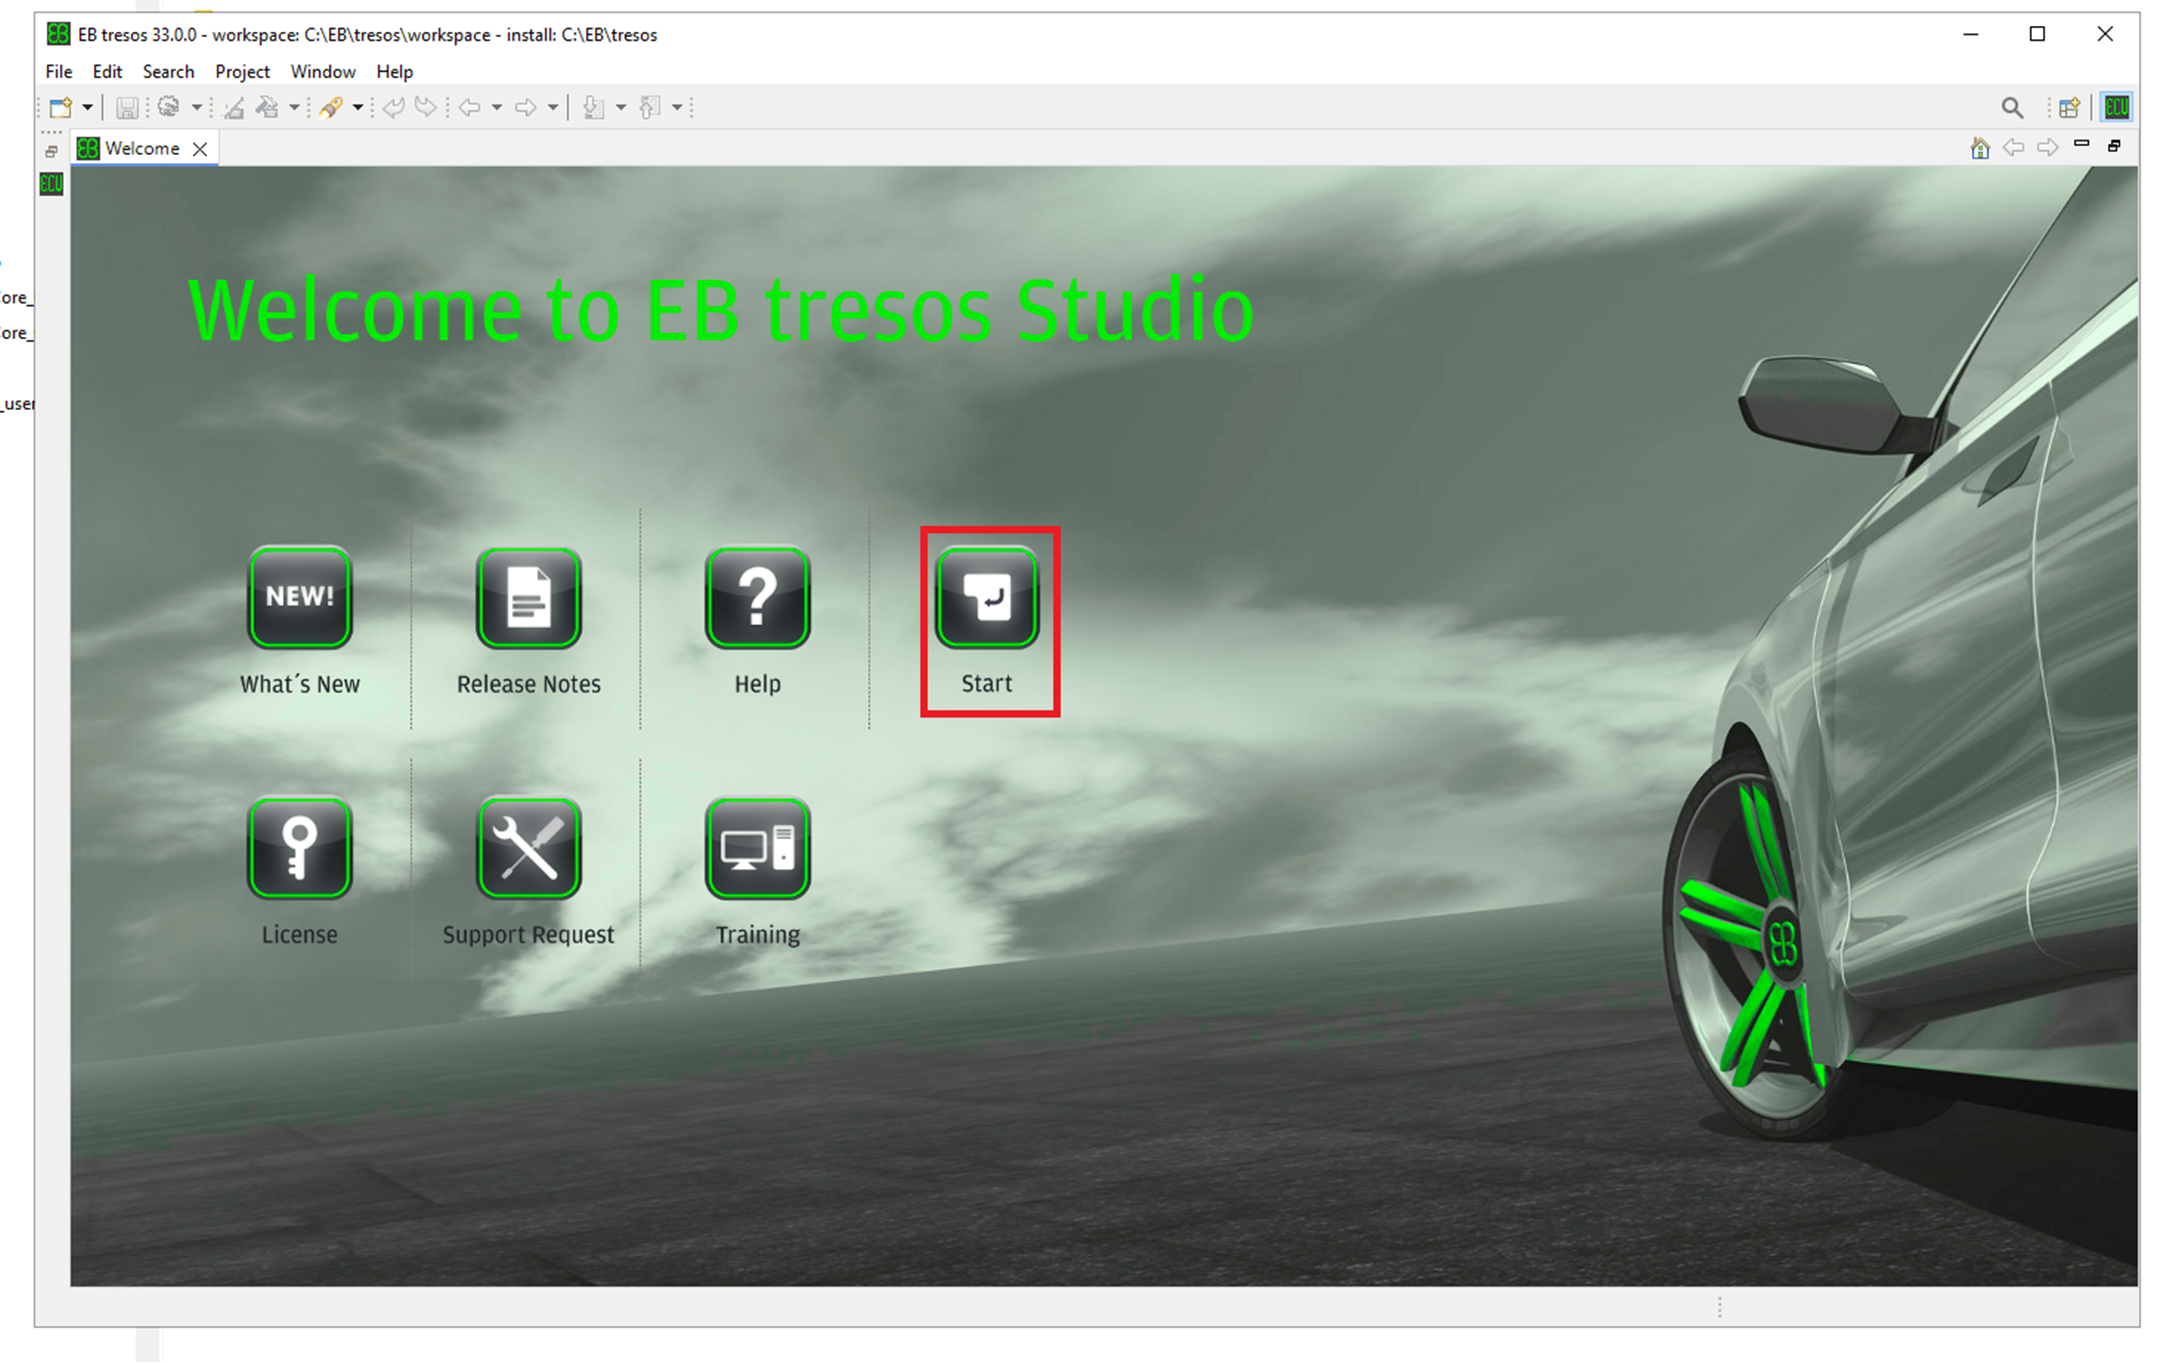
Step 3: Tresos will open click on
Start
.
Figure 6. Step 3
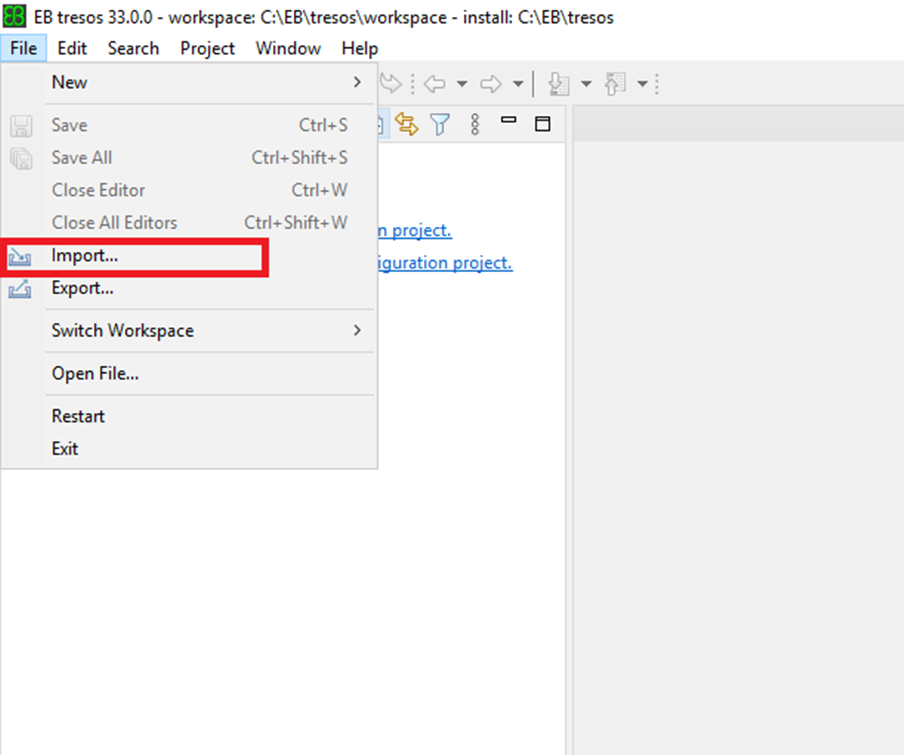
Step 4: In the
File
menu, click
Import
.
Figure 7. Step 4
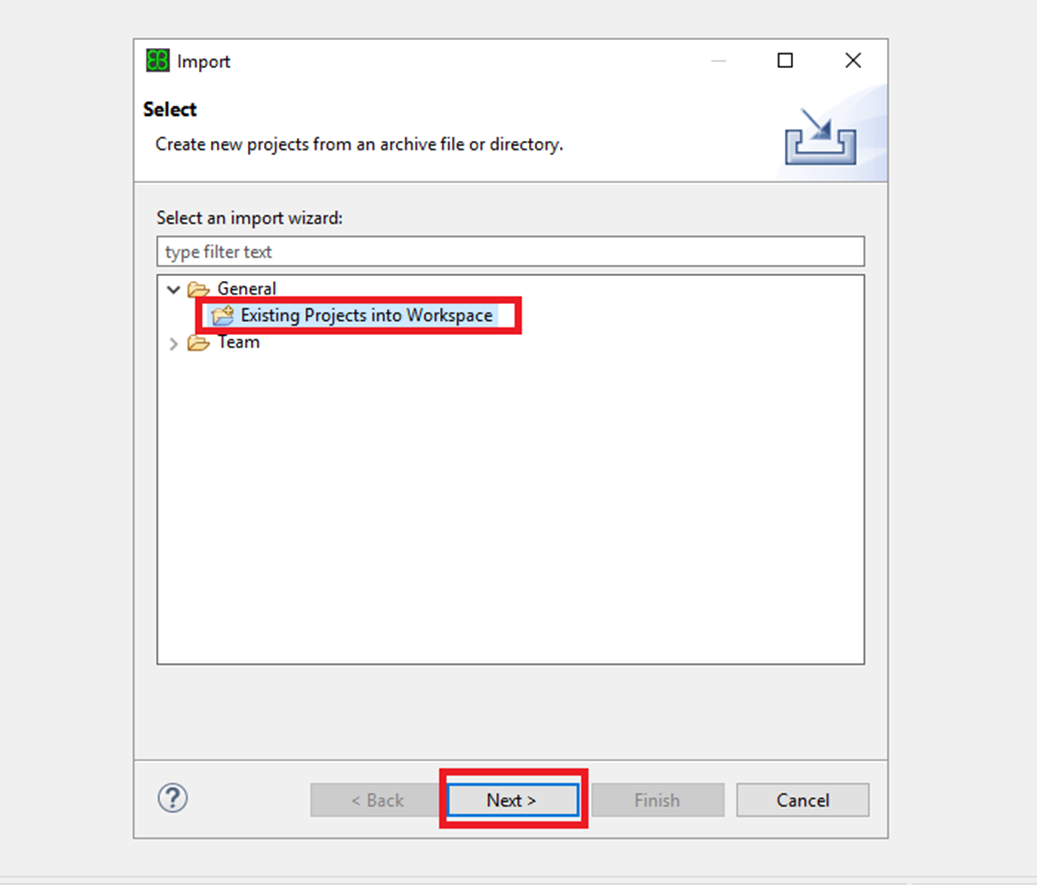
Step 5: In the
Import
window, click
Existing Projects into Workspace
, and then click
Next
.
Figure 8. Step 5
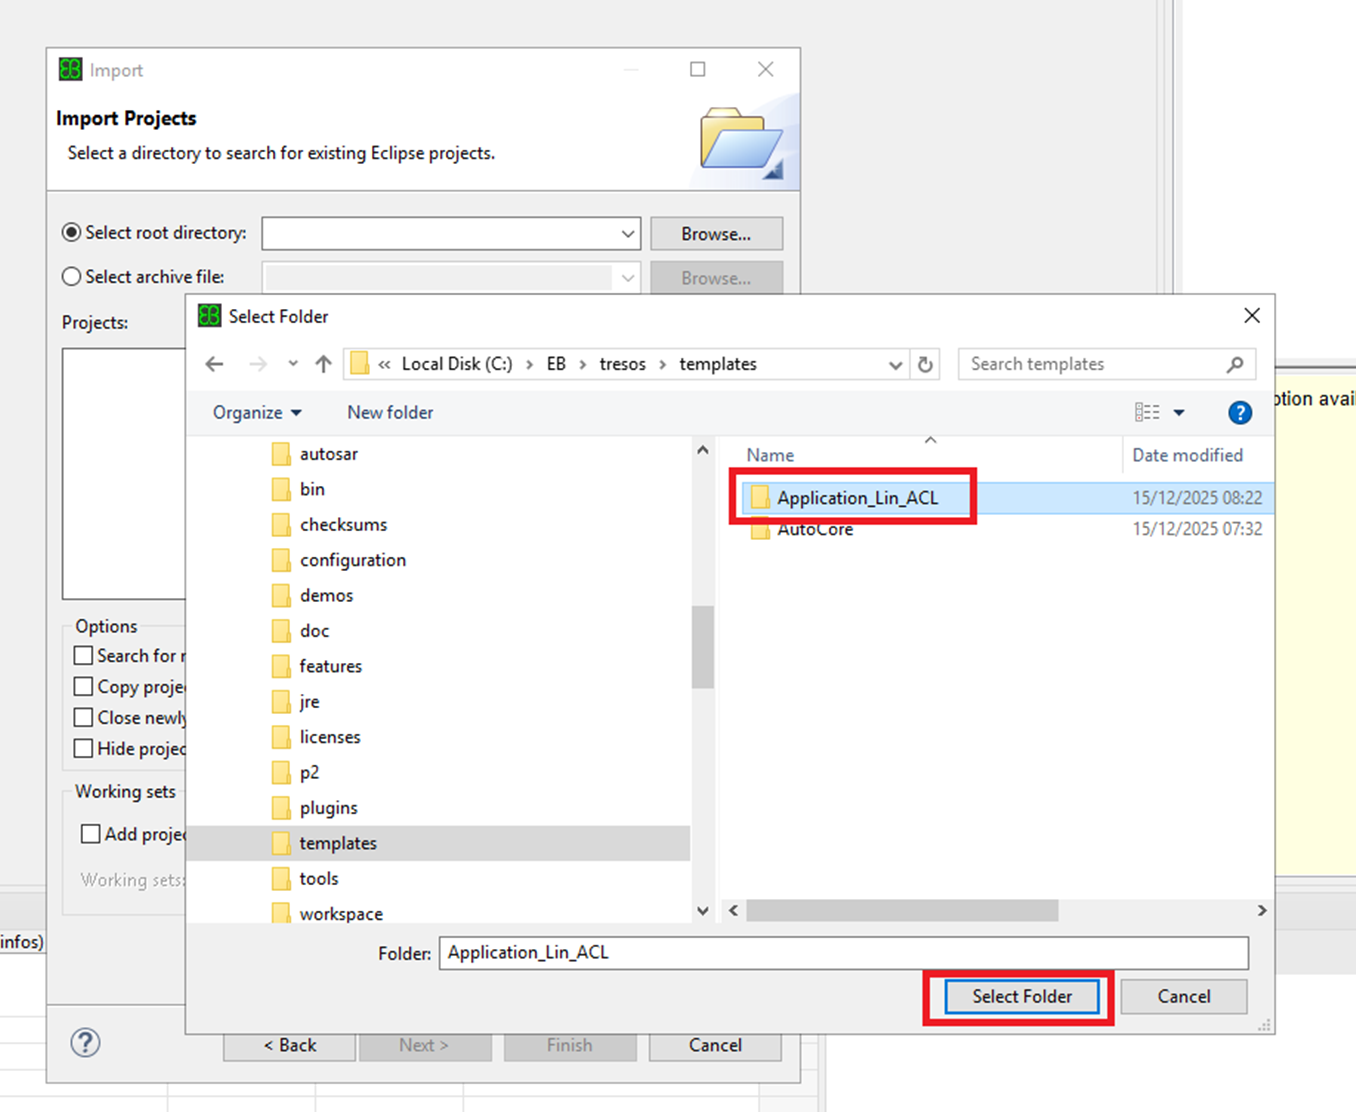
Step 6: Click
Select root directory
and browse to templates/<Application_Lin_ACL> and then click
Select Folder
.
Figure 9. Step 6
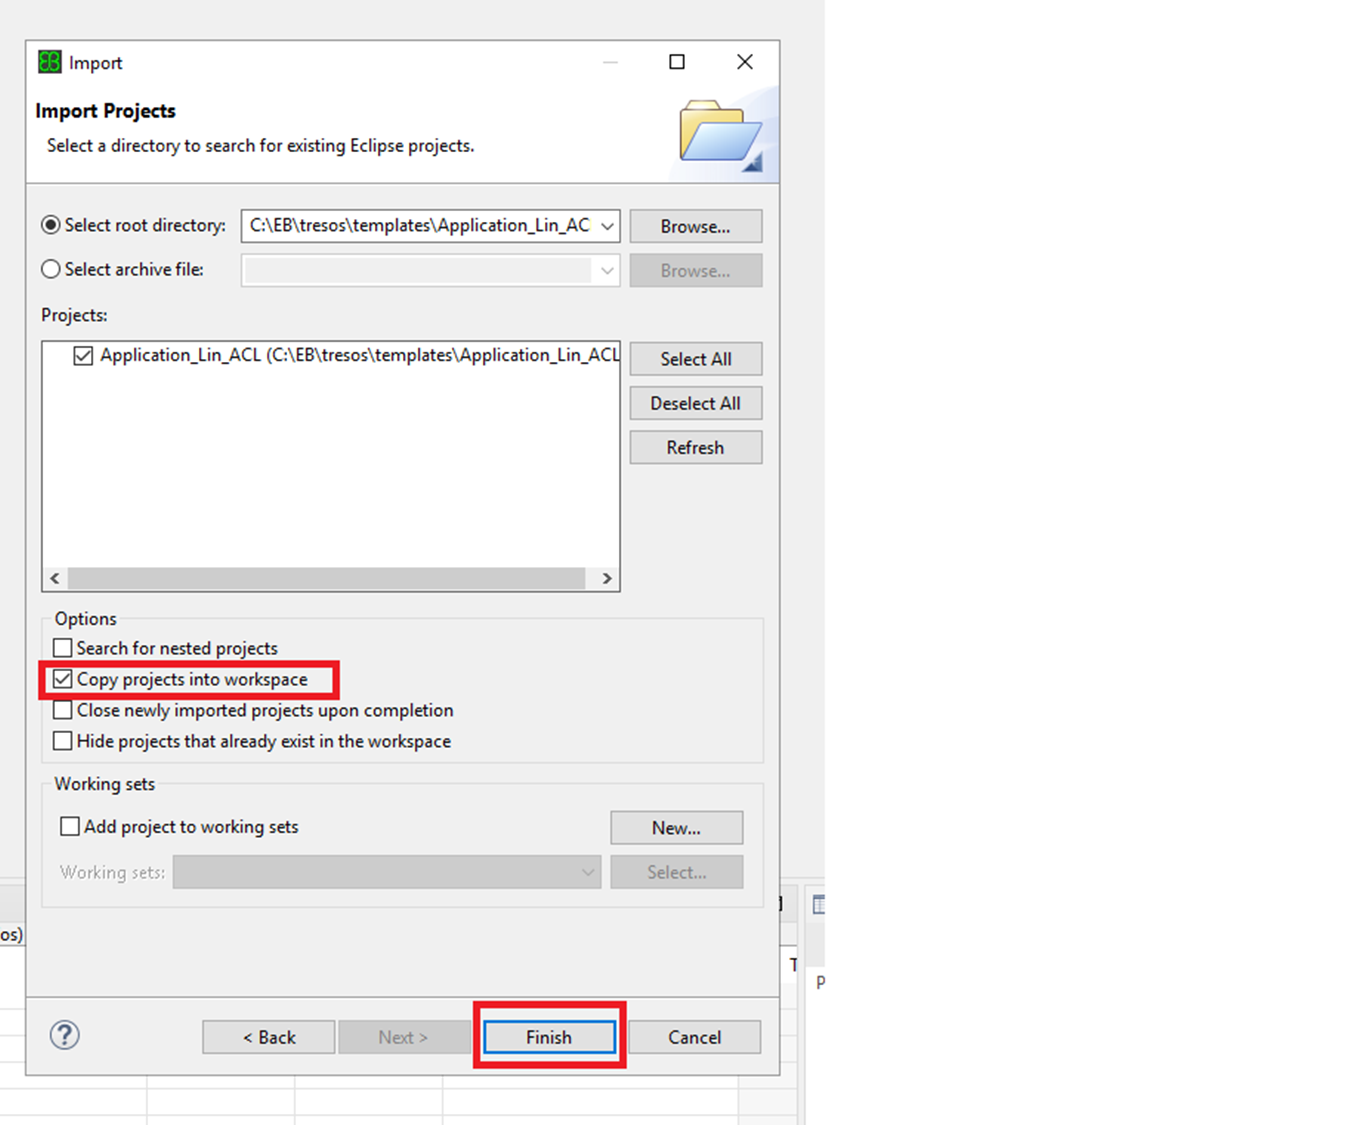
Step 7: In the
Import Projects
window, click
Copy projects into workspace
to copy the project into the default workspace and then Click
Finish
.
Figure 10. Step 7
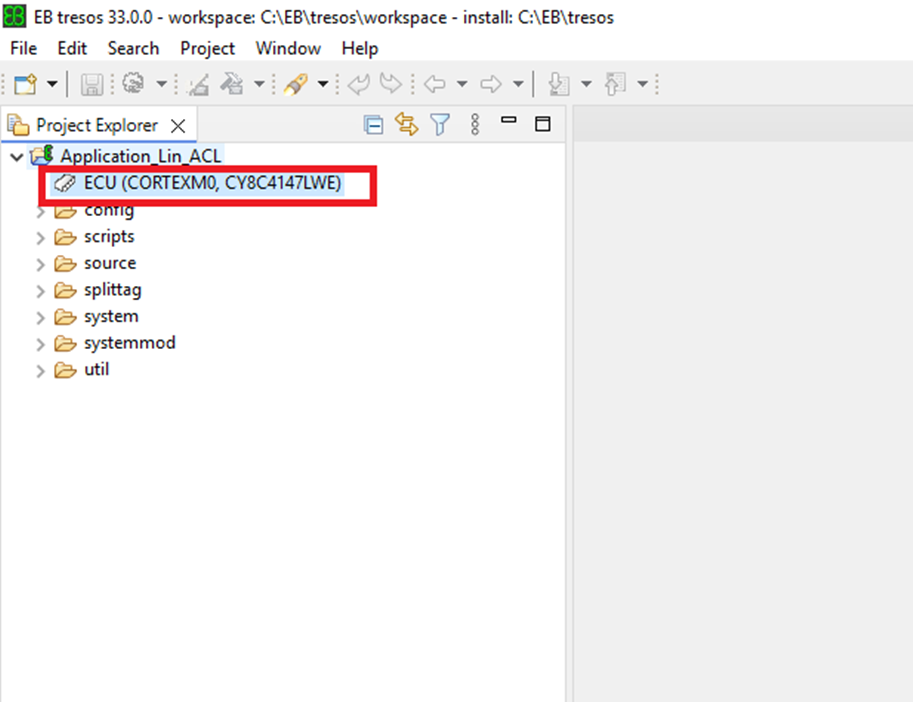
In the
Project Explorer
view, you can:
► Open the project by double-clicking on the project name.\
Figure 11. Step 7a
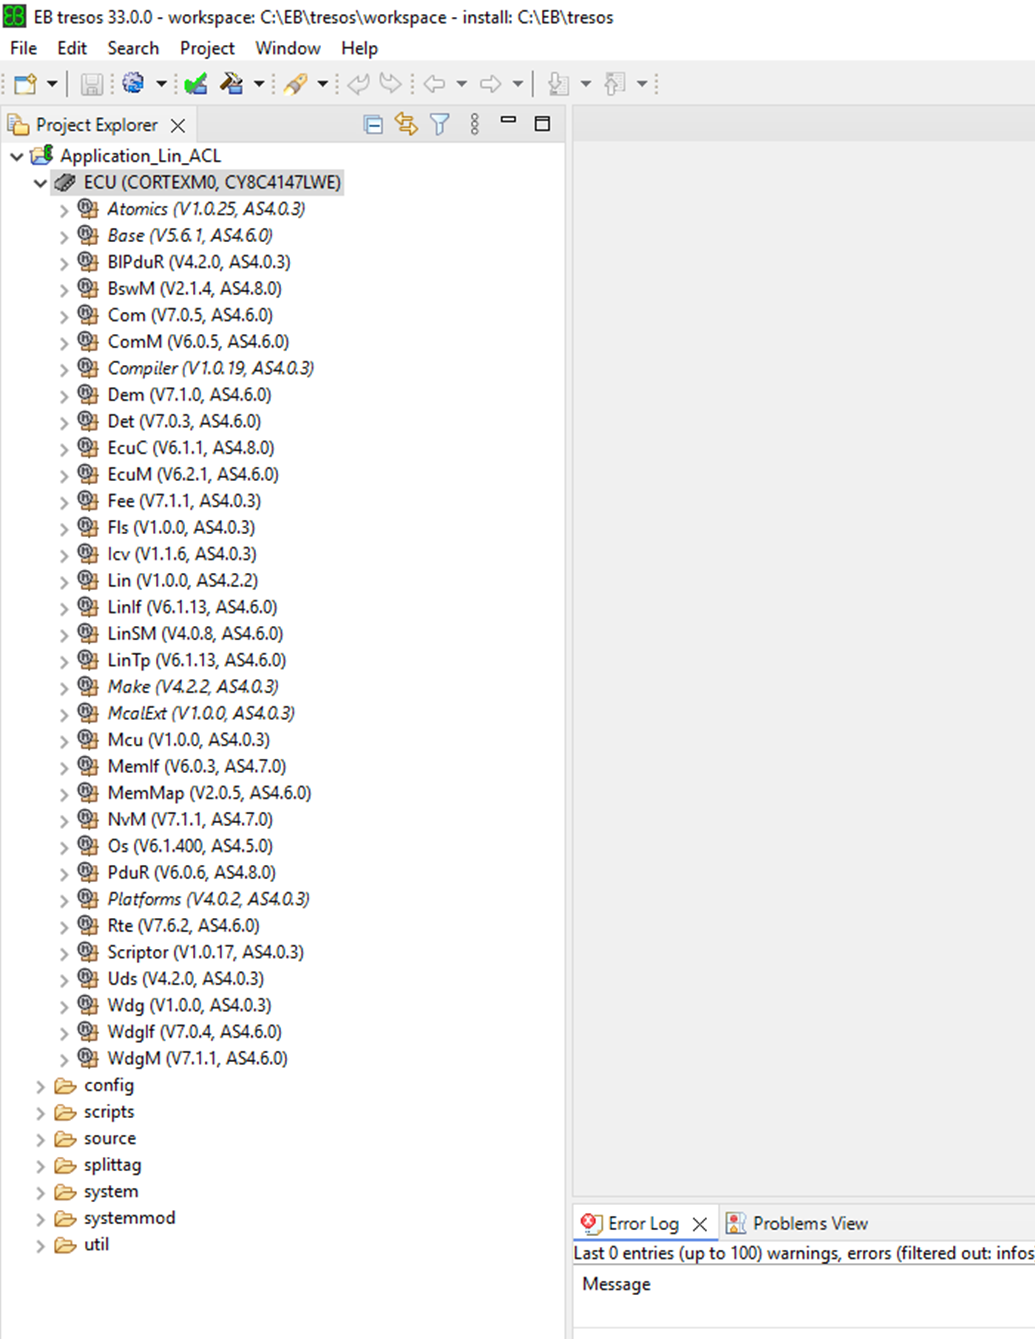
► Open the configuration by clicking.
Figure 12. Step 7b
Building the project
Step 1: Ensure EB tresos Studio is not running.
Step 2: Navigate to your workspace directory
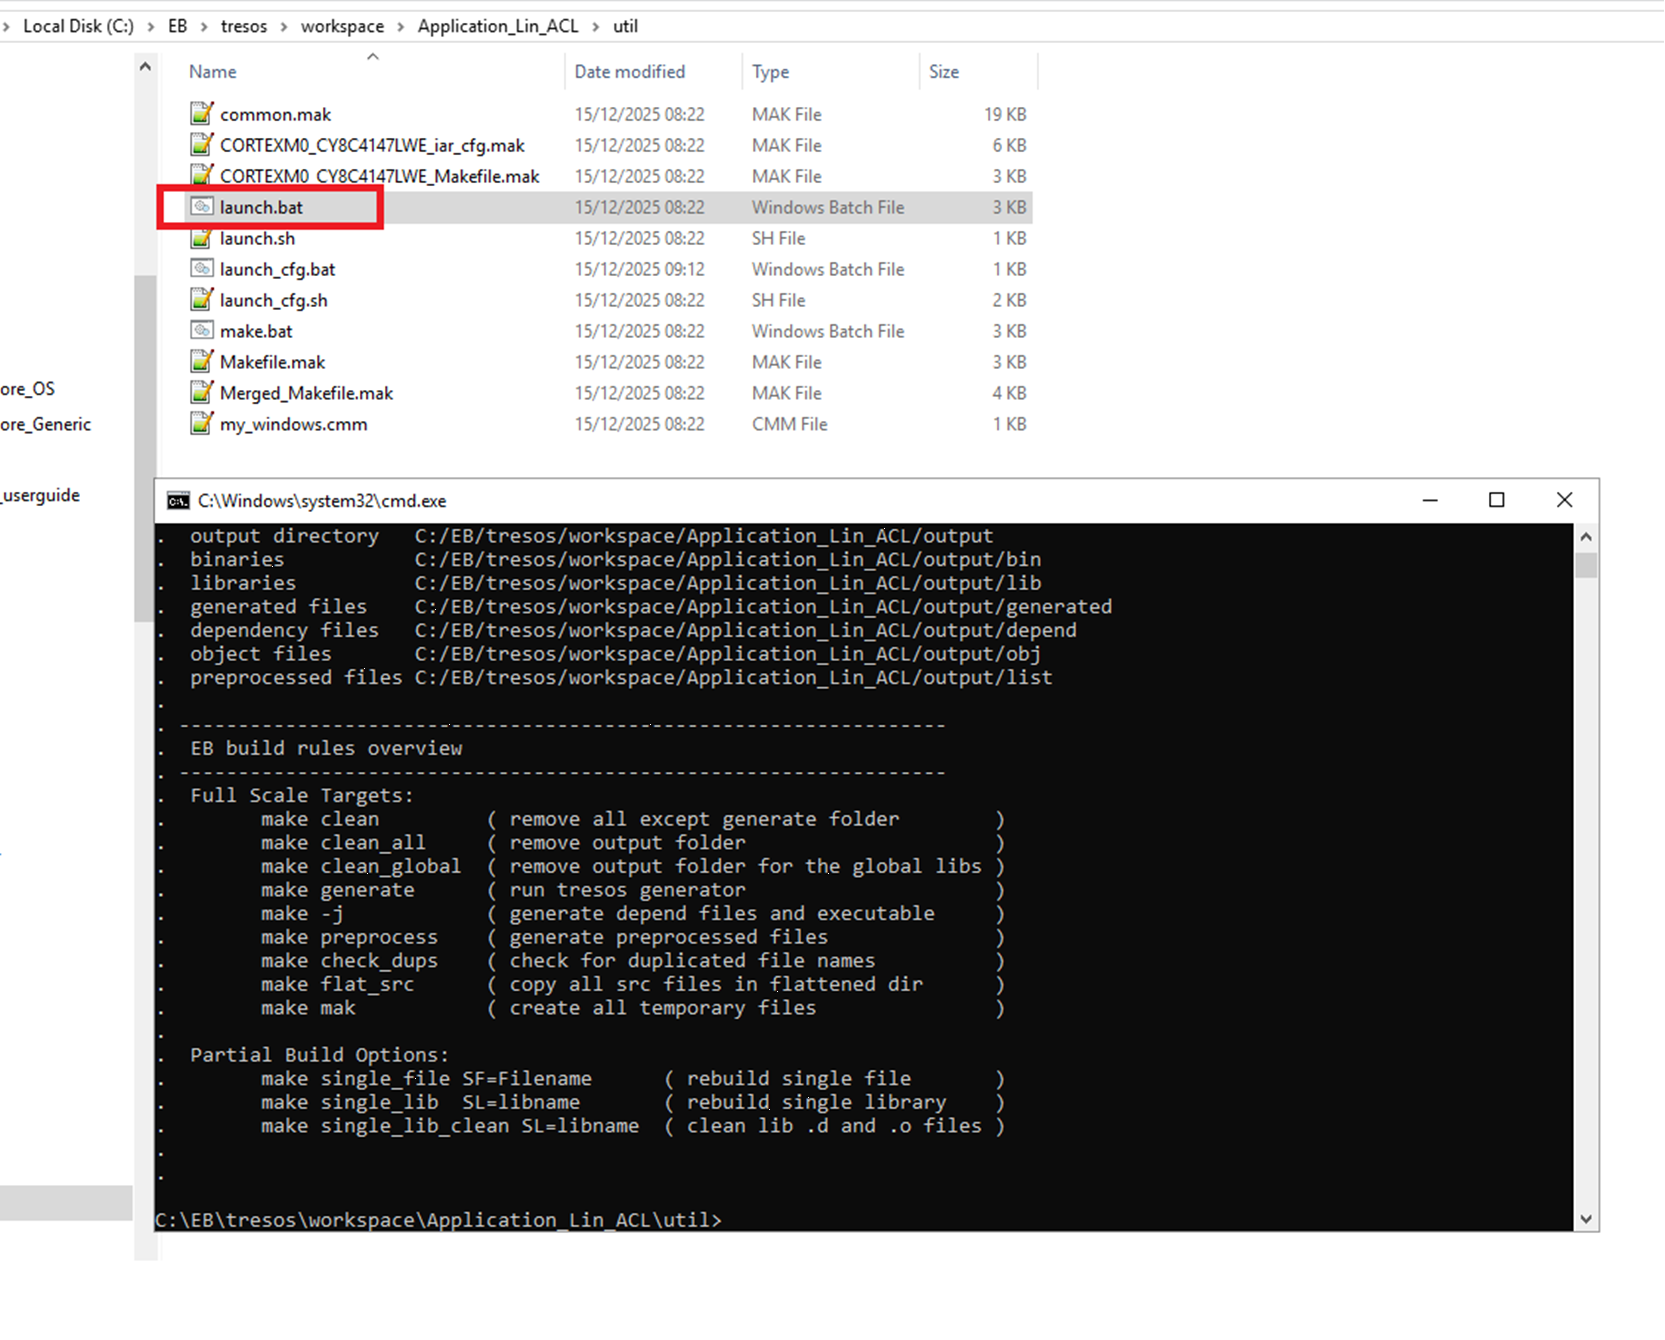
Step 3: In the Application_Lin_ACL/util directory, double-click launch.bat. The first startup of launch.bat takes some time.
Figure 13. Step 3
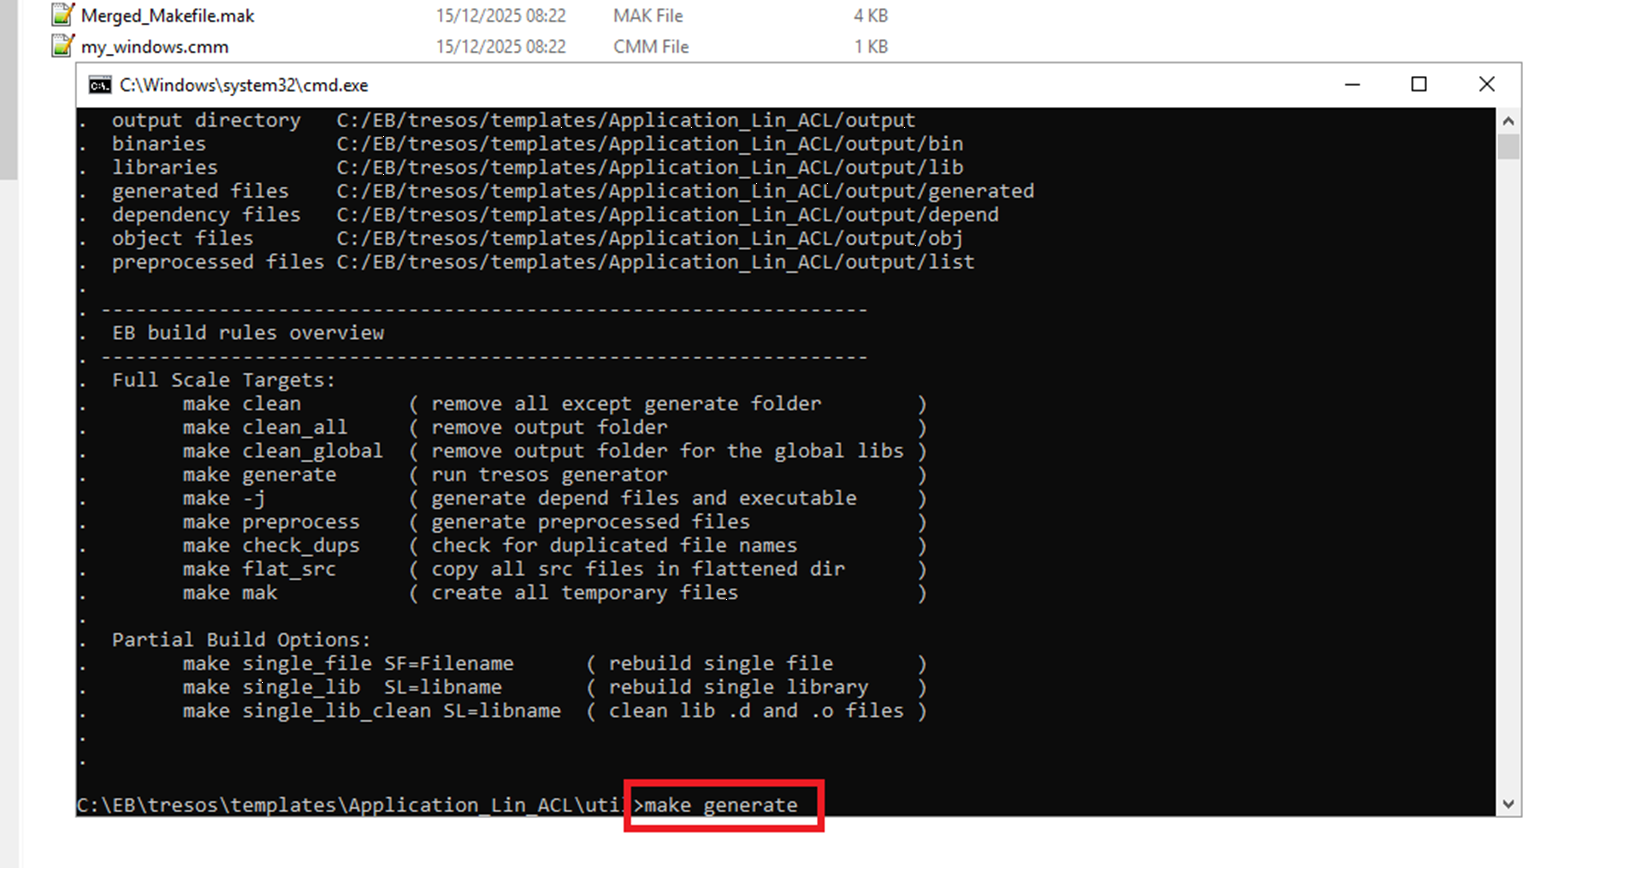
Step 4: In the command line window, execute this command: make generate
Figure 14. Step 4
Step 5: Execute this command: make or for compiling in parallel: make -j -O.
Figure 15. Step 5
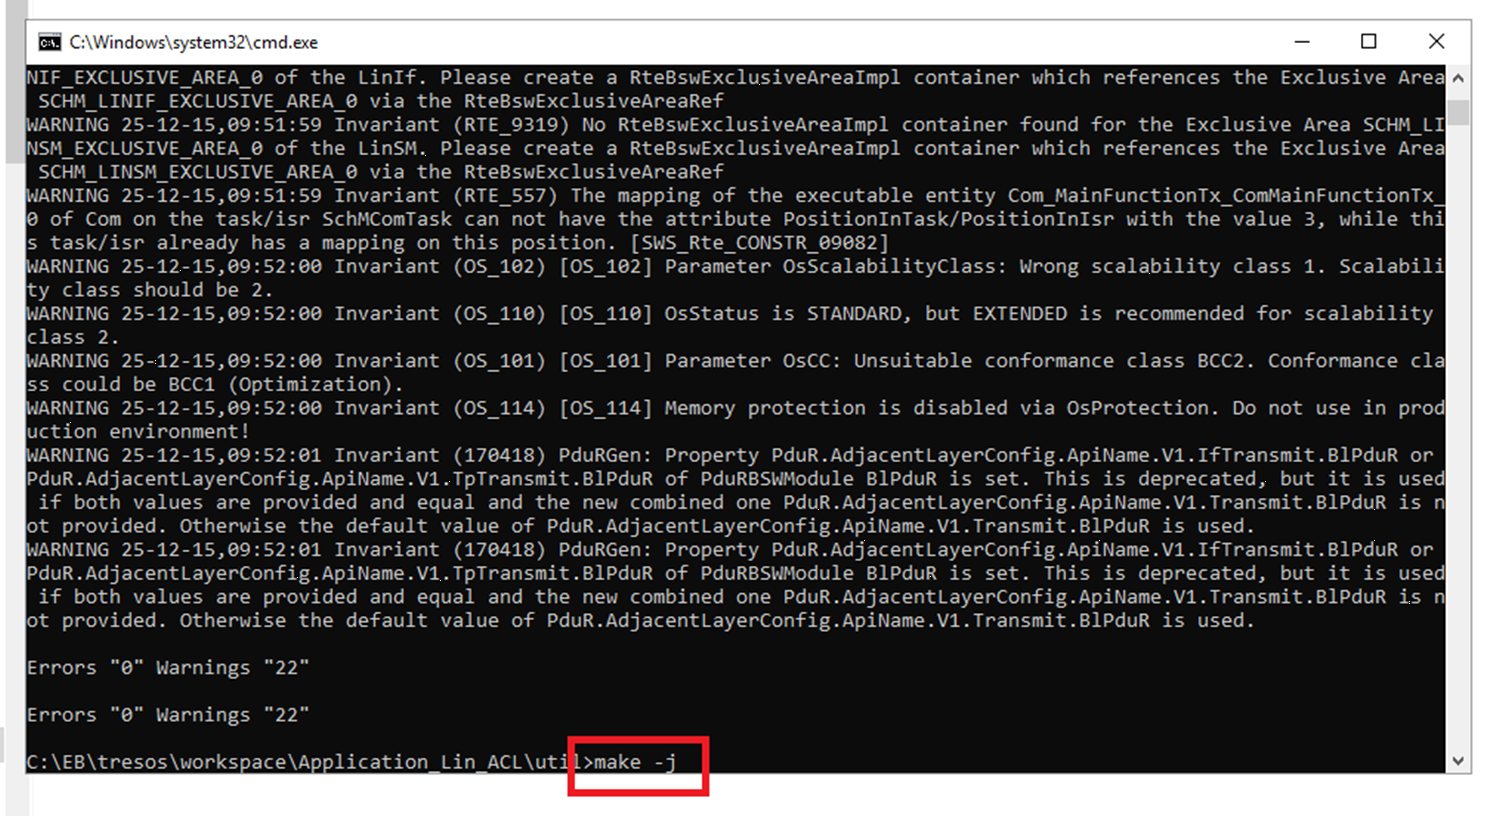
The resulting binary file is in the Application_Lin_ACL/output/bin directory.
Executing batch files for the project
Batch files are available to execute automatically some project steps. The files are in the templates folder.
Figure 16. Batch files
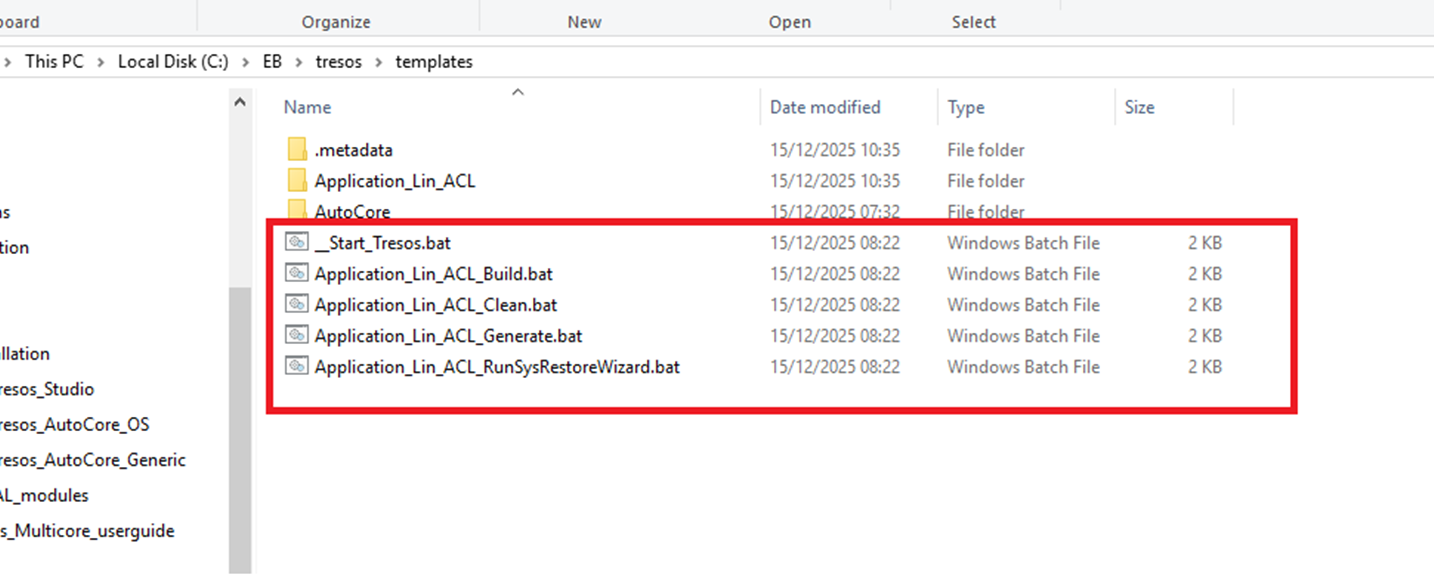
Please follow the same sequence when running the batch files
__Start_Tresos.bat:
Starts EB tresos Studio and automatically imports the projects if not previously imported than close the tresos
Application_Lin_ACL_RunSysRestoreWizard.bat:
Performs a complete system update based on the supplementary files, it uses Execute multiple tasks Unattended Wizards
Application_Lin_ACL_Generate.bat:
Generates tresos application
Application_Lin_ACL_Build.bat:
Compiles the project using the build environment
Application_Lin_ACL_Clean.bat:
Cleans the project using the build environment
Debugging the project
Rename the executable file in C:\EB\tresos\workspace\Application_Lin_ACL\output\bin named CORTEXM0_CY8C4147LWE_Application_Lin_ACL.elf to CORTEXM0_CY8C4147LWE_Application_Lin_ACL.out
Start IAR Embedded Workbench version 8.50.10
Select
Project>Create New Project
and choose
Externally built Executable:
Figure 17.
Create new project

Select the name and location for your IAR Embedded Workbench project
Add the executable file CORTEXM0_CY8C4147HV_basicTemplate.out to the project using
Project>Add Files
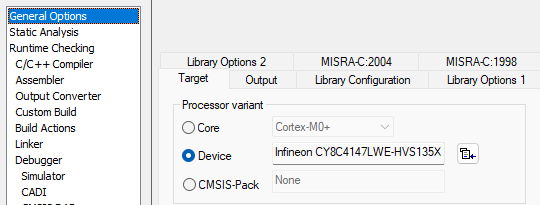
Open the Project Options and select the correct device:
Figure 18.
Select the device
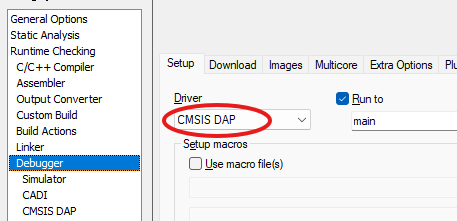
In the debugger options select CMSIS-DAP as the Debugger driver
Figure 19.
Selecting the Debugger driver
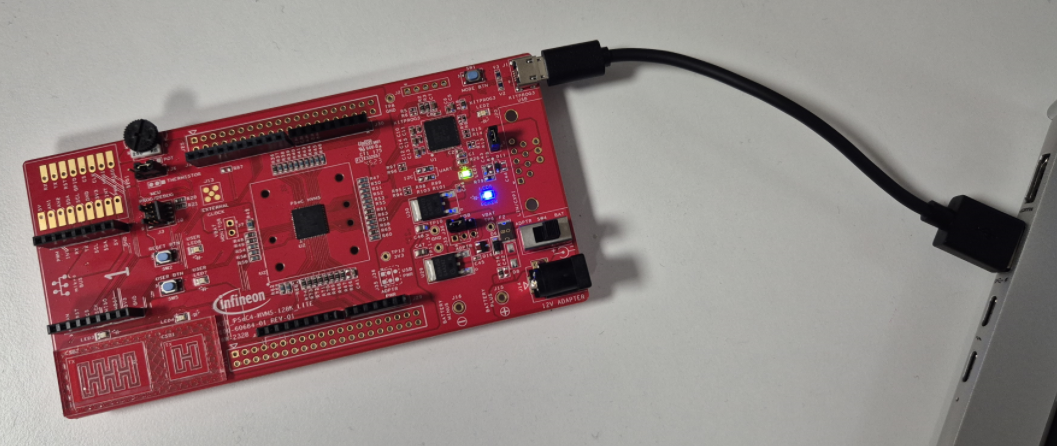
Connect the board to your PC using the USB-cable provided:
Figure 20.
Connecting the board
To start the debugger, select the project in the workspace window and click the
Download and Debug
button in the toolbar:

The project can be reused whenever you rebuild your executable file. The debugger will notice if the executable file has been rebuilt and ask you if you want to reload it.
Start LIN Simulator tool (PLIN View Pro/CANalyzer) to verify the LIN communication on the target. Configure PLIN View Pro as Master and send frame with ID 0x00 to wake up the target. Once the wakeup frame is received, target will start sending the frame with ID 0x01 with 1 second interval incrementing the data. Please note that the wake-up frame should be sent continuously within 4 second interval else the target will go in sleep state.
Development resources
The SW-C composition consists of the following components:
► SWC_CyclicCounter
Only runnable from above Software components are utilized for C API implementation. Rte is integrated with BSW_SCHEDULER_ONLY mode for scheduling the BSW module main functions.
Support
Contact support
MyCases
In the event of any problems, issues, or questions, please do not hesitate to reach out to your designated Infineon contact or Field Application Engineer (FAE) for assistance. Alternatively, you can also submit a request through our ticketing system
. For more information on how to use the myCases portal, please refer to this
document
.
Partners
By contacting support, you agree that your request and contact details are shared between
iSOFT
,
TASKING
, and Infineon.