Mode Switching
KitProg3 v1.20 and later supports CMSIS-DAP Bulk by default, and it may support Arm DAPLink mode. Each supported kit has a
Mode Select
switch (mode switch). Push the switch to cycle through the two modes: CMSIS-DAP Bulk and DAPLink. KitProg3 also supports CMSIS-DAP HID mode, but only through the Firmware Loader tool. See
fw-loader tool documentation
.
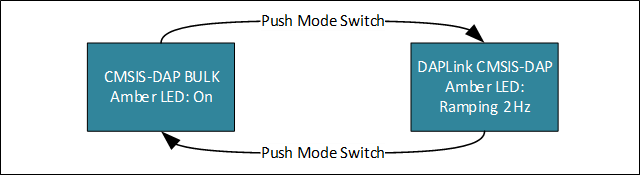
Figure 1. Mode switching in KitProg3
Note: If a kit does not support DAPLink mode, mode switch will have no effect. See DAPLink Mode for supported kits.
DAPLink Mode
for supported kits.
The precise designation for the mode switch varies based on the kit. For example, on some CYPRESS™ Pioneer kits and the MiniProg4 debug probe, it is labeled
Mode Select
. Use your kit documentation if you can't find the switch. Starting from KitProg3 v1.11, the
Custom App
switch is deprecated and does not perform any action.
Switch to HID mode only if needed for your design or hardware. Otherwise, stay in Bulk mode for better performance during programming and debugging operations. Use DAPLink mode when required by your development workflow.
When in Bulk mode, the amber LED is ON and steady. In DAPLink mode the LED ramps at 2 Hz frequency. When in HID mode, the amber LED ramps up and down at 1 Hz frequency. In Bulk and HID modes, bridging (USB-I2C, USB-SPI, or USB-UART) is available while debugging with one exception: starting from KitProg3 v2.10, USB-I2C and USB-SPI bridging and debugging are mutually exclusive for Windows OS in CMSIS-DAP Bulk mode – see
Troubleshooting
for details. See
KitProg3 LEDs
for information on how KitProg uses the LEDs.